Posted on

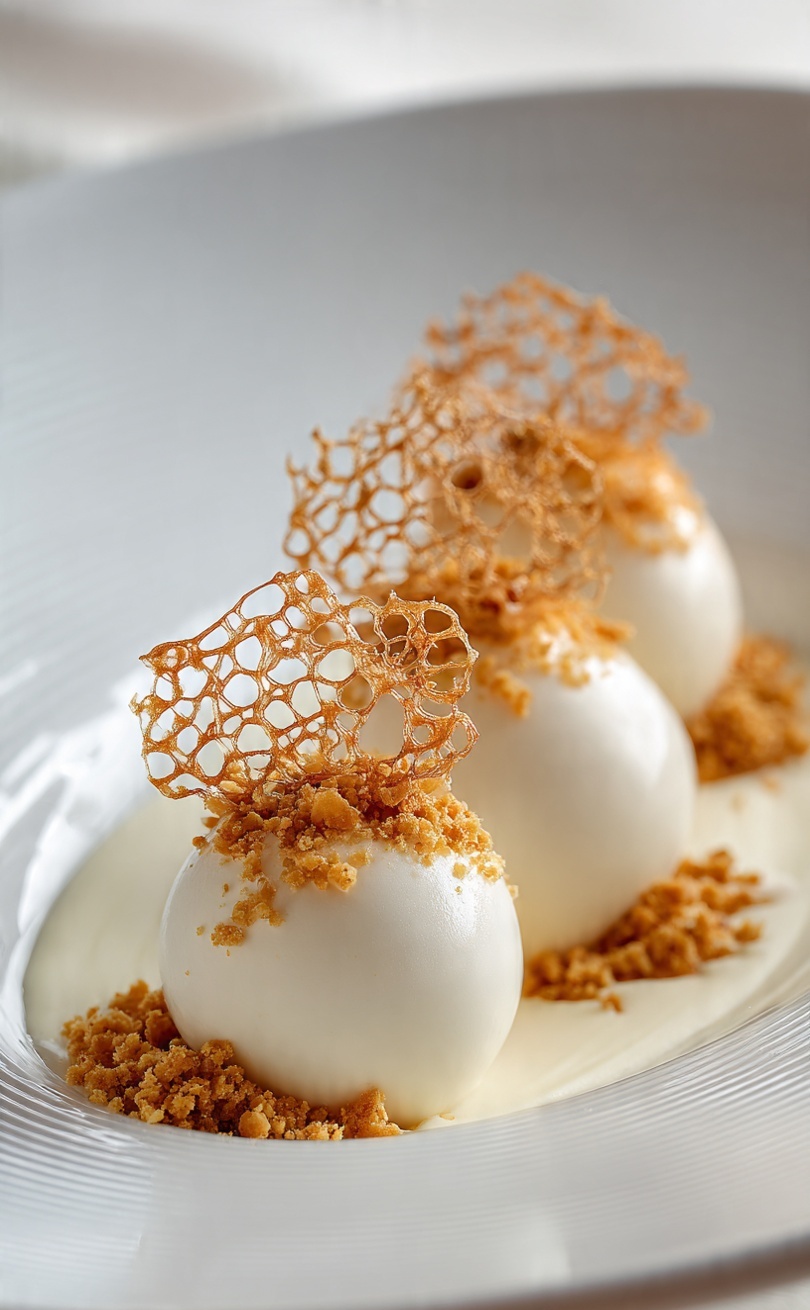
From Scratch to Elite: How to Build a Michelin-Level Restaurant

A Michelin star is never awarded to a menu. It’s awarded to a system — a restaurant where every detail, from the sourcing of a single herb to the timing of a server’s approach, operates at a level of consistency most operations never attempt. Building toward that level from nothing is a multi-year undertaking that spans concept, capital, kitchen discipline, and hospitality culture. Here’s how it’s done.

1. The Concept: Before Anything Else

Every elite restaurant starts with a singular point of view, not a broad menu. Michelin inspectors and top diners alike are evaluating whether a restaurant has a clear culinary identity — a chef’s voice, a defined technique, a story that explains why this restaurant exists and not another one like it.

Requirements at this stage:

  • A defined cuisine philosophy (regional, technique-driven, ingredient-led, or narrative-based)
  • A signature style that can be articulated in one sentence
  • A target guest profile — who this is for, and who it is deliberately not for
  • A location strategy that matches the concept’s price point and expected covers per night

Skipping this stage is the single most common reason ambitious restaurants stall at “very good” instead of reaching “exceptional.”

2. Capital and Business Structure

Fine dining economics are brutal before they are glamorous. Elite restaurants typically run on thin margins (often 3–9% net) sustained by high average checks, disciplined food cost control, and strong covers management.

What’s required:

  • Capital for buildout, which in fine dining runs significantly higher per square foot than casual dining due to kitchen equipment, design, and front-of-house finishes
  • 6–12 months of operating reserve, since reputation-building and star consideration take time
  • A realistic P&L built around food cost (typically 28–35%), labor cost (often 35–40% at this tier due to brigade depth), and rent
  • Legal structure, licensing, and — depending on jurisdiction — liquor licensing, which can itself take months

3. Location and Design

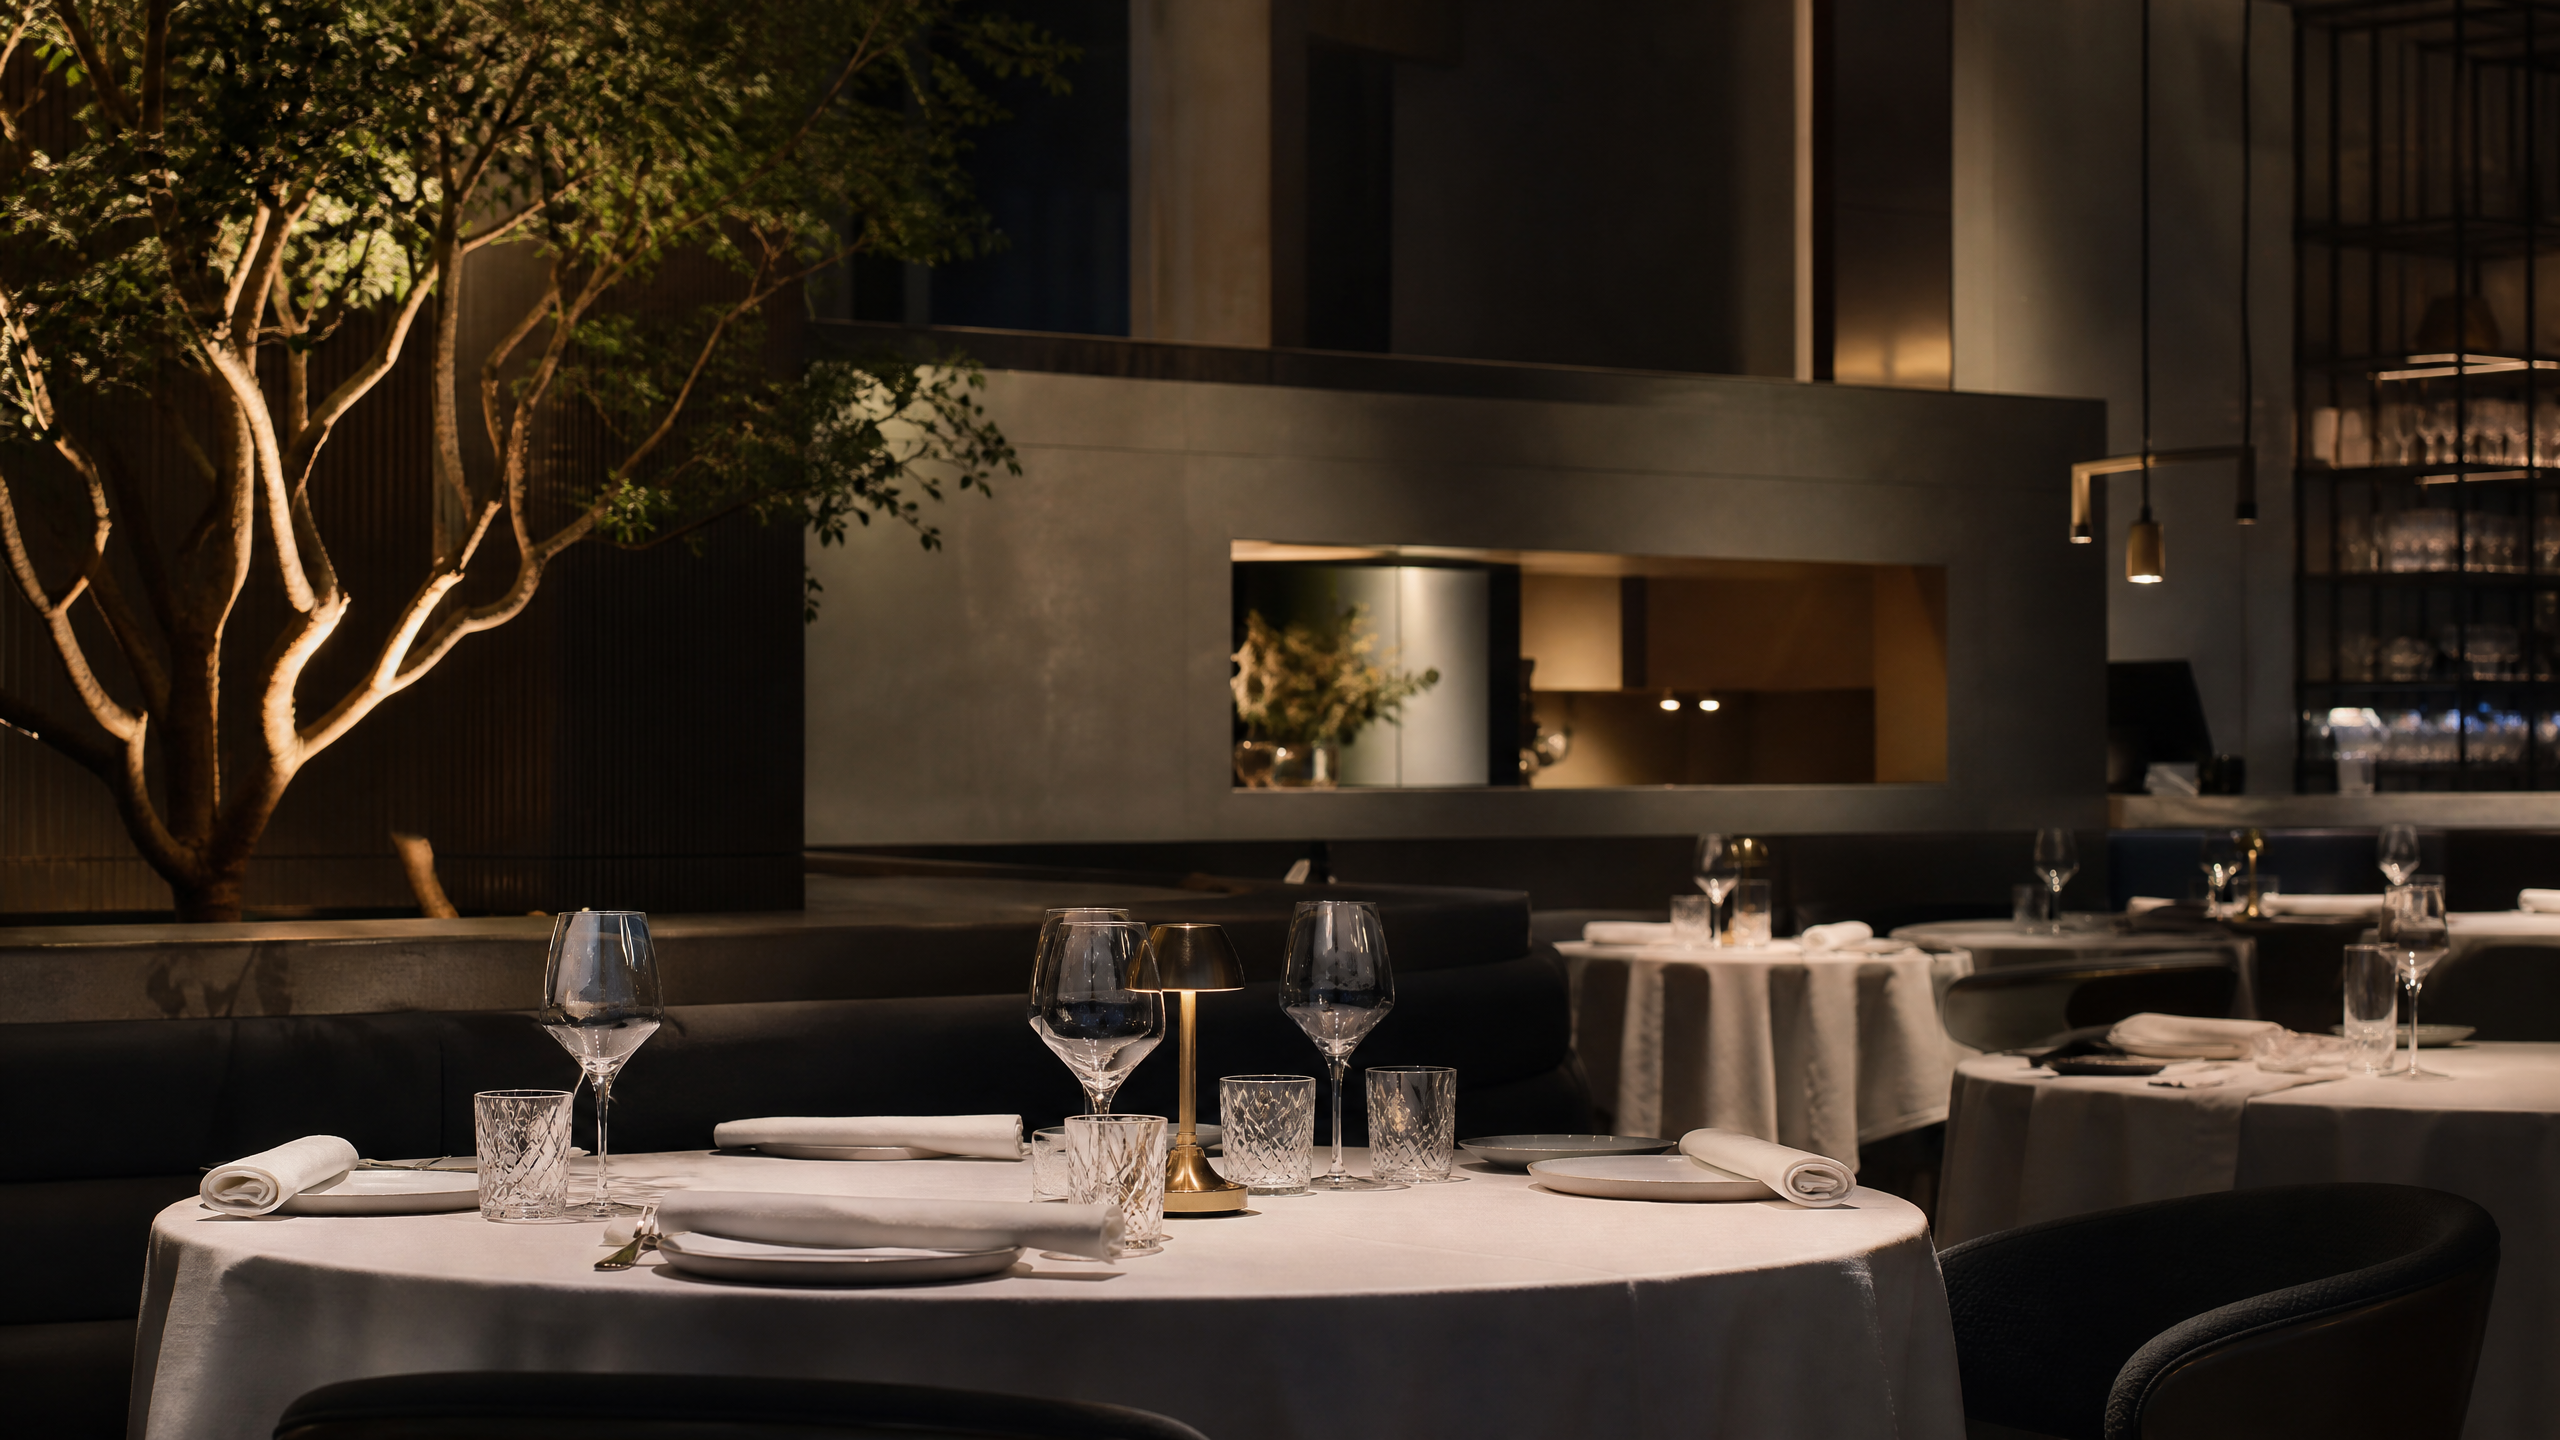
Location must match ambition. Elite dining rooms are usually 30–60 covers — small enough to maintain obsessive quality control, large enough to be financially viable. Design should communicate the concept nonverbally: lighting, spacing between tables, acoustics, and materials all signal fine dining before a single dish arrives.

4. Building the Kitchen Brigade

This is where most Michelin-track restaurants live or die. The classic brigade structure exists because elite service requires specialized, uncompromising execution at every station, night after night.

Core roles to build toward:

  • Executive Chef / Head Chef — sets vision, standards, and menu direction
  • Sous Chef — runs the pass, enforces consistency
  • Chef de Partie (by station: saucier, poissonnier, pâtissier, etc.)
  • Demi-Chef and Commis roles — the pipeline that trains future chefs de partie
  • Stagiaires (interns) — common at ambitious restaurants building a reputation

Non-negotiables:

  • Documented recipes (mise en place standards down to the gram)
  • A culture of tasting and correction before every service
  • Strict hygiene, HACCP, or equivalent food safety certification
  • Cross-training so no single absence breaks a station

5. Sourcing and Supply Chain

Michelin-level cooking depends on ingredient integrity as much as technique. This means:

  • Direct relationships with specialist farmers, foragers, fishmongers, and purveyors — not just wholesale ordering
  • Seasonal menu structures that can flex with ingredient availability
  • Traceability for every core ingredient, since top restaurants are increasingly expected to speak to provenance
  • Backup suppliers for critical items, since running out of a hero ingredient mid-service is reputationally costly

6. Front of House and Service Standards

Michelin inspectors evaluate hospitality as rigorously as food. Service must be technically flawless — correct cutlery timing, wine service, plating explanation — and warm without being scripted; guests should feel genuine care, not choreography. Consistency matters most, since inspectors visit anonymously and expect the same standard regardless of who is dining.

Requirements:

  • A trained sommelier or wine director for pairing-driven menus
  • A reservations and guest-history system (tracking allergies, preferences, and past visits)
  • Staff trained specifically in luxury hospitality, not just service basics

7. Financial and Operational Management

Running the elite tier requires tighter management than any other restaurant category:

  • Daily food cost tracking, not monthly
  • Waste logs tied directly back to menu engineering
  • POS and inventory systems built for high-SKU, high-turnover ingredients
  • A staffing model that can absorb the labor cost of a deep brigade without collapsing margins

8. The Long Runway to Recognition

Michelin stars are not applied for — they’re the result of sustained, inspected excellence, often over 2–5 years of consistent operation. During that runway, the priority is building relationships with respected food critics and industry press, maintaining unwavering consistency even during slow periods, and reinvesting in training, sourcing, and refinement rather than expanding covers or opening a second location too early.

The Real Requirement

Above every checklist, what separates restaurants that reach elite status from those that plateau is obsessive, sustained attention to detail — sourced ingredients, technique, hospitality, and consistency — repeated at the same standard on a random Tuesday as on opening night. That discipline, more than capital or concept, is what Michelin recognition actually measures.

Posted on

How Sugar Actually Works: The Michelin Pastry Chef’s Guide to Sugar Stages

Every pastry student learns about sugar. Sweetness, caramelisation, syrup stages — these are foundational. What is rarely taught is that in professional kitchens, sugar is not used primarily for sweetness. It is used for texture, for colour, for moisture control, and for structural architecture. Sweetness is almost secondary.

Understanding how sugar behaves at different stages of cooking, and why Michelin pastry chefs use it the way they do, will change how you approach every dessert you make. Not because you will necessarily change your recipes, but because you will understand what you are doing rather than simply following instructions.

The Sugar Stages and What Each One Actually Does

Sugar dissolved in water and heated passes through identifiable physical stages, each with specific applications in pastry. The temperature references below assume you are working at sea level. Dubai and other high-altitude cities require small adjustments (subtract approximately 1°C per 300m of elevation).

Thread Stage: 106–113°C

At this temperature, sugar syrup dropped into cold water forms thin threads. In professional kitchens this stage is used for moistening baba, dipping fruits, and making spun sugar. It is also the stage used for Italian meringue preparation — the syrup is poured into whipping egg whites at exactly 121°C to pasteurise the eggs and create a stable, shiny meringue that holds structure without collapsing or weeping. Temperature precision at this stage is critical. Under 118°C and the meringue will weep. Over 124°C and the syrup will seize on contact with the whites.

Soft Ball: 113–118°C

Used for fudge, fondant and buttercream. The sugar retains moisture and produces a pliable, yielding texture when set. Fondant — the smooth, white confection used to glaze éclairs and mille-feuille — is made by cooking syrup to 116°C, cooling it to around 40°C, then agitating it vigorously until it crystallises into an opaque, smooth paste. The agitation is essential: it produces millions of microscopic crystals that give fondant its smooth melt on the palate. Large crystals produce a grainy texture — the sign of poor fondant technique.

Firm Ball: 118–121°C

The range for Italian meringue and most French buttercreams. At this temperature, the sugar solution is concentrated enough to pasteurise egg whites on contact, but fluid enough to incorporate smoothly without seizing. This is the stage professional pastry chefs return to most frequently.

Hard Crack: 149–154°C

Used for pulled sugar, blown sugar, nougatine and praline. At this temperature most of the water has evaporated and the sugar is almost entirely sucrose. It sets rigid and glassy on cooling. Nougatine — the caramelised almond brittle that forms the base of many plated desserts — is made at hard crack, combined with toasted nuts, then rolled thin and cut before it sets. The window between workable and brittle is roughly 90 seconds, which is why professional kitchens keep it under heat lamps during shaping.

Caramel: 160–180°C

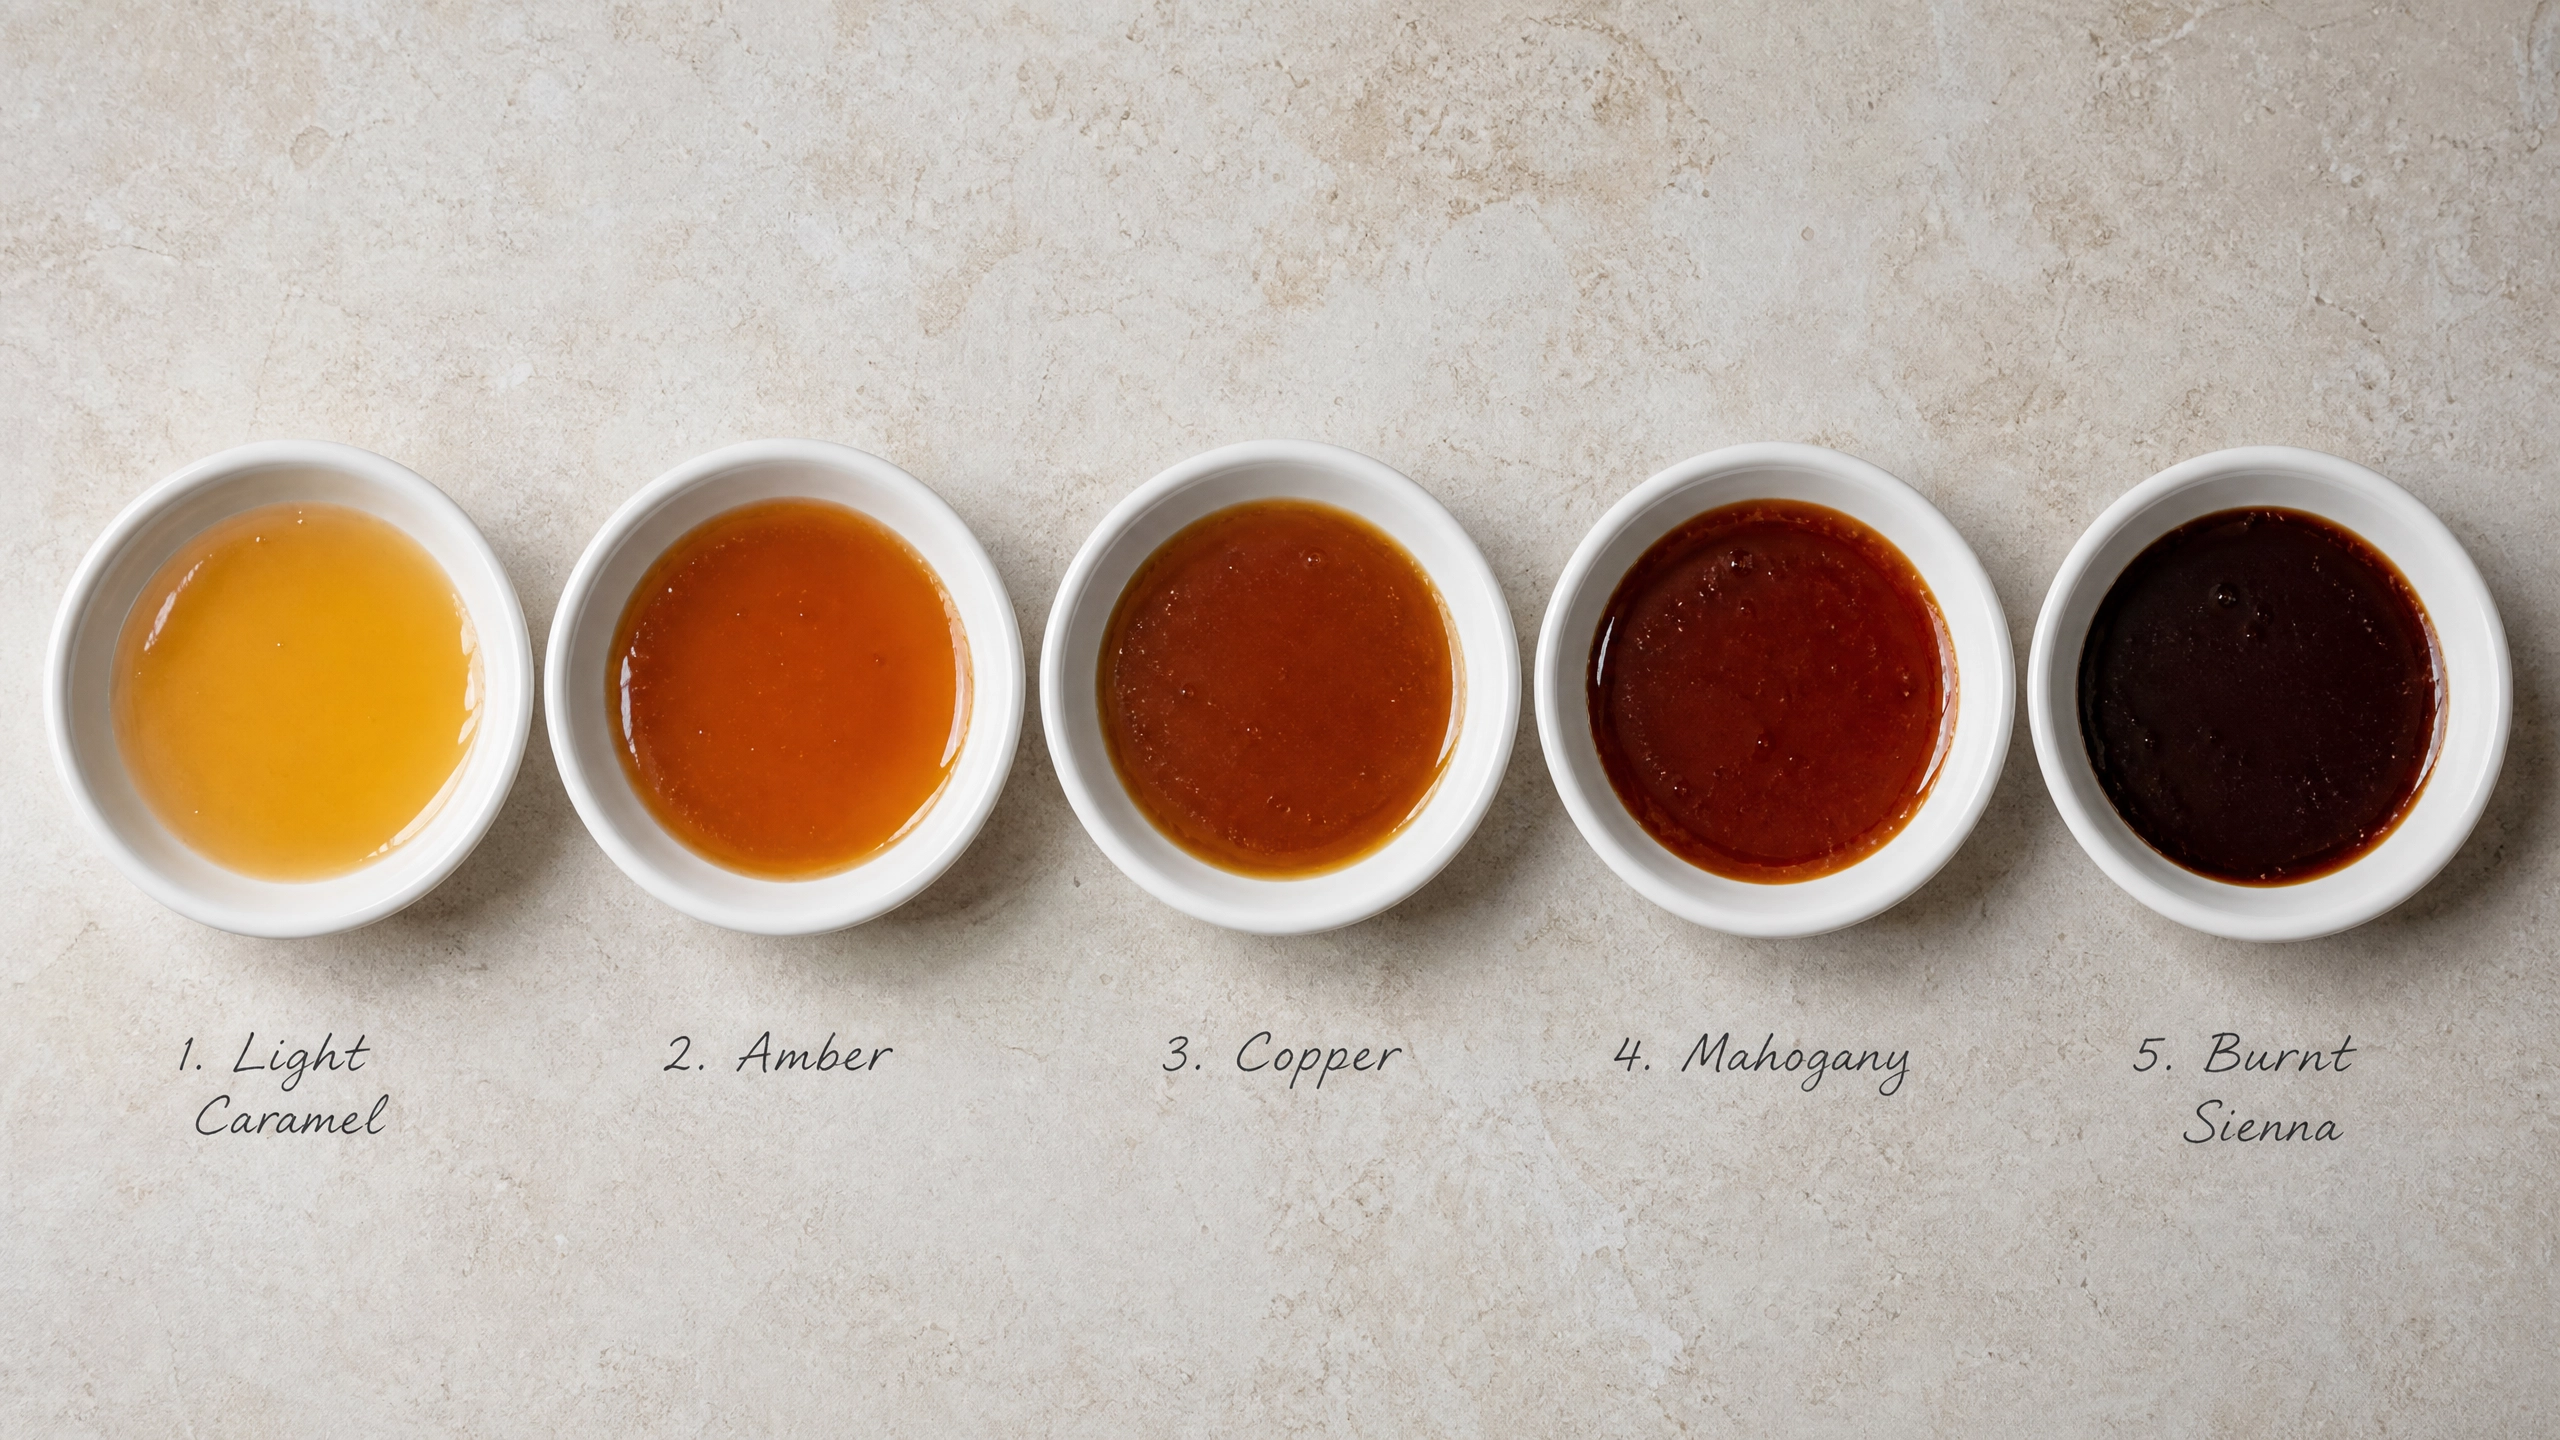
This is where sucrose breaks down entirely and the Maillard reaction and pyrolysis produce hundreds of new flavour compounds. The colour shifts from amber to deep copper to mahogany. The flavour shifts from butterscotch to bitter toffee to burnt. Professional pastry chefs typically use caramel at 170–175°C for sauces and glazes — complex, slightly bitter, with depth. Lighter caramel (160°C) is sweet and one-dimensional. Dark caramel (above 180°C) is acrid and irreversible. The difference between them is often less than 10 seconds on the heat.

How Professional Pastry Chefs Actually Use These Stages

Sugar as Moisture Control

Sugar is hygroscopic — it attracts and retains moisture from its environment. This is why a cake or biscuit with higher sugar content stays moist longer than a lower-sugar one. Inverted sugar (glucose + fructose, made by hydrolysing sucrose) is even more hygroscopic than caster sugar, which is why professional ganaches and ice cream bases use trimoline or glucose syrup — it keeps textures soft and prevents crystallisation in frozen products.

Sugar as Structure

In a baked cake, sugar delays gluten network formation and protein coagulation by competing with them for water. This is why high-sugar cakes are tenderer than low-sugar ones — less gluten develops during mixing. The same principle explains why adding sugar to a meringue stabilises it: sugar raises the temperature at which the egg white proteins coagulate, giving you more time to build the foam before it sets. Remove sugar from a meringue and it collapses almost immediately when heated.

Sugar as Colour

Reducing sugars (glucose, fructose, lactose) participate in the Maillard reaction when heated with amino acids from proteins. This is what produces the golden colour on a baked croissant, the dark crust on a briôche, the caramelised surface of a crème brûlée. Professional egg washes include milk (lactose) precisely because the additional reducing sugar accelerates browning. A pure egg wash browns more slowly and less deeply than one extended with milk or cream.

The Professional Discipline: Temperature, Not Guesswork

In a professional kitchen, sugar work is never done by eye alone. A probe thermometer is essential equipment, not optional. Home baking guides often suggest the “cold water test” as a substitute for a thermometer — dropping syrup into cold water and feeling the texture. It works in principle but introduces variables: the temperature of the water, the speed of your hands, the air temperature. A thermometer removes all of those variables.

If you bake seriously, a digital probe thermometer is the single piece of equipment that will improve your results more than any other purchase. Not a stand mixer. Not a silicone mat. A probe. Temperature is information. Without it, you are guessing.


Part of the Michelin Star Series on allcookings.com — the science and technique behind professional pastry, broken down for the serious home baker.

Posted on

Kouign-Amann: The Laminated Breton Pastry That Croissants Wish They Were

Kouign-Amann was invented in 1860 in Douarnenez, Brittany, by a baker named Yves-René Scordia who, by most accounts, simply ran out of brioche dough and improvised with bread dough, butter, and sugar. The result was an accident that became arguably the greatest laminated pastry France ever produced.

It is rarely made outside of Brittany, rarely taught, and consistently underestimated by pastry students who assume croissant dough is the pinnacle of lamination. It is not. Kouign-Amann is harder, more unforgiving, and produces a more extraordinary result when done correctly: a caramelised, lacquered crust surrounding a layered interior of buttery, chewy, salted pastry. Nothing else in the French canon tastes quite like it.

What Makes Kouign-Amann Different from Croissant

In croissant and pain au chocolat, the lamination is dry — you fold cold butter into cold dough, creating distinct, separate layers that puff and separate during baking. The result is airy, flaky, and crisp.

In Kouign-Amann, you laminate with sugar as well as butter. The sugar is folded into the final turns, which means it dissolves slightly into the fat during resting and then caramelises during baking. The layers do not separate cleanly — they fuse at the edges while remaining distinct in the centre, creating a hybrid of flaky lamination and caramelised toffee. The crust becomes a hard, brittle caramel shell. The interior is chewy and layered. The salt — always fleur de sel in Breton baking — cuts through the sweetness precisely.

This is not a delicate pastry. It is aggressive, loud, and completely addictive.

The Two Technical Challenges

1. The Dough Is Not Enriched

Croissant dough contains eggs, milk, and sugar that make the gluten easier to work with. Kouign-Amann uses a lean bread dough — flour, water, yeast, salt. That means higher gluten tension and a dough that tears more easily under the rolling pin. You must rest it aggressively between turns, minimum 20 minutes in the refrigerator. Do not rush the rests. Torn layers mean butter leaking out of the dough rather than staying within it, and the caramelisation will be uneven.

2. The Sugar Burns Before the Pastry Cooks

Sugar caramelises at around 160–180°C. A laminated pastry needs 200–210°C to bake properly. The solution is to bake in a cake tin with high sides, which contains the caramel and prevents it from burning on the base before the interior is cooked. The tin should be buttered generously and dusted with sugar — this creates the lacquered bottom crust that is the defining feature of the pastry. Bake on a low shelf so the base caramelises without the top burning. Expect smoke. It is normal.

Full Recipe: Classic Breton Kouign-Amann

Ingredients

For the dough:

  • 300g strong white bread flour
  • 7g instant yeast
  • 6g fine salt
  • 180ml cold water

For lamination:

  • 200g cold unsalted butter (84% fat or higher — use Breton butter if available)
  • 150g caster sugar
  • 4g fleur de sel (plus extra to finish)

Method

Day 1 — Make the dough: Combine flour, yeast and salt. Add cold water and mix to a rough dough. Knead 8 minutes until smooth. The dough will be tight and slightly stiff — this is correct. Do not add water. Wrap and refrigerate overnight.

Day 2 — Prepare the butter block: Place cold butter between two sheets of parchment. Beat with a rolling pin into a 15 x 15cm square of even thickness. Refrigerate until firm but pliable (around 12°C — it should flex without cracking).

Laminate: Roll the dough into a 30 x 30cm square. Place the butter block in the centre at 45 degrees. Fold the four dough corners over the butter like an envelope, sealing the edges tightly. Roll out to 45 x 20cm. Fold into thirds (letter fold). Wrap and rest 20 minutes in the refrigerator. Repeat the roll and letter fold twice more, resting 20 minutes between each turn. After three letter folds, rest 30 minutes.

Add the sugar: Roll the dough to 40 x 30cm. Scatter the caster sugar and fleur de sel evenly over the surface. Fold into thirds, pressing lightly to embed the sugar. Roll gently to a round shape roughly the size of your tin. Rest 15 minutes refrigerated.

Tin and proof: Butter a 24cm round cake tin generously. Dust with caster sugar. Place the dough in the tin, pressing to the edges. Cover loosely and proof at room temperature for 45 minutes to 1 hour until slightly puffed and the dough fills the tin.

Bake: Preheat oven to 200°C. Scatter additional fleur de sel over the surface. Bake on the lowest shelf for 30–35 minutes until deep golden brown and caramel is actively bubbling around the edges. The top should be lacquered and hard. Remove from oven and turn out onto a wire rack immediately — if you wait, the caramel will set and fuse to the tin permanently.

Serve warm. Do not refrigerate — the caramel will soften and the texture will be lost.

How to Read a Correctly Made Kouign-Amann

The base should be almost black in patches — that is correct caramelisation, not burning. The interior should tear into visible layers, chewy and slightly sticky from the integrated caramel. The fleur de sel should be audible in the first bite before it dissolves against the sweetness. If your Kouign-Amann is pale, sweet without bitterness, or soft throughout, it was underbaked. Take it further next time. This pastry is not afraid of heat.


Part of the Laminated Luxury Series on allcookings.com — a deep-dive into the most technical and rewarding laminated pastries in the French and European tradition.

Posted on

How Michelin Star Chefs Make Crème Caramel (And What You’re Probably Getting Wrong)

Crème caramel is one of those desserts that exposes you. No chocolate to hide behind. No decoration to distract from a flawed texture. Just egg, cream, sugar and heat — and the results will tell you exactly where your technique stands.

At Fouquet’s and in Michelin-starred kitchens across the world, pastry chefs have refined this dessert to a science. The gaps between a good crème caramel and a flawless one are not secrets — they are simply precision, ratio, and temperature control applied consistently.

The Three Mistakes That Ruin Most Crème Caramels

1. Wrong Egg Ratio

Most home recipes lean too heavily on whole eggs. Whole eggs are high in protein and set firm — which gives you a rubbery, bouncy custard instead of a trembling, silky one. Professional recipes use a blend of whole eggs and yolks only. The yolks add richness and emulsification without over-setting the structure. A reliable ratio for restaurant-quality crème caramel is 2 whole eggs + 4 yolks per 500ml of liquid. Adjust from there based on your mould depth and desired texture.

2. Boiling the Custard Base

When you heat your cream or milk to infuse it with vanilla, it should reach 80°C — never a rolling boil. Boiling destroys the protein structure of the cream and introduces air, both of which produce surface bubbles and uneven setting. Bring the liquid to just below simmering, infuse your vanilla for 10 minutes off heat, then temper slowly into the eggs. The word is temper, not pour — ladle the hot liquid in gradually while whisking constantly so the eggs never scramble.

3. Baking Too Hot or Without a Proper Bain-Marie

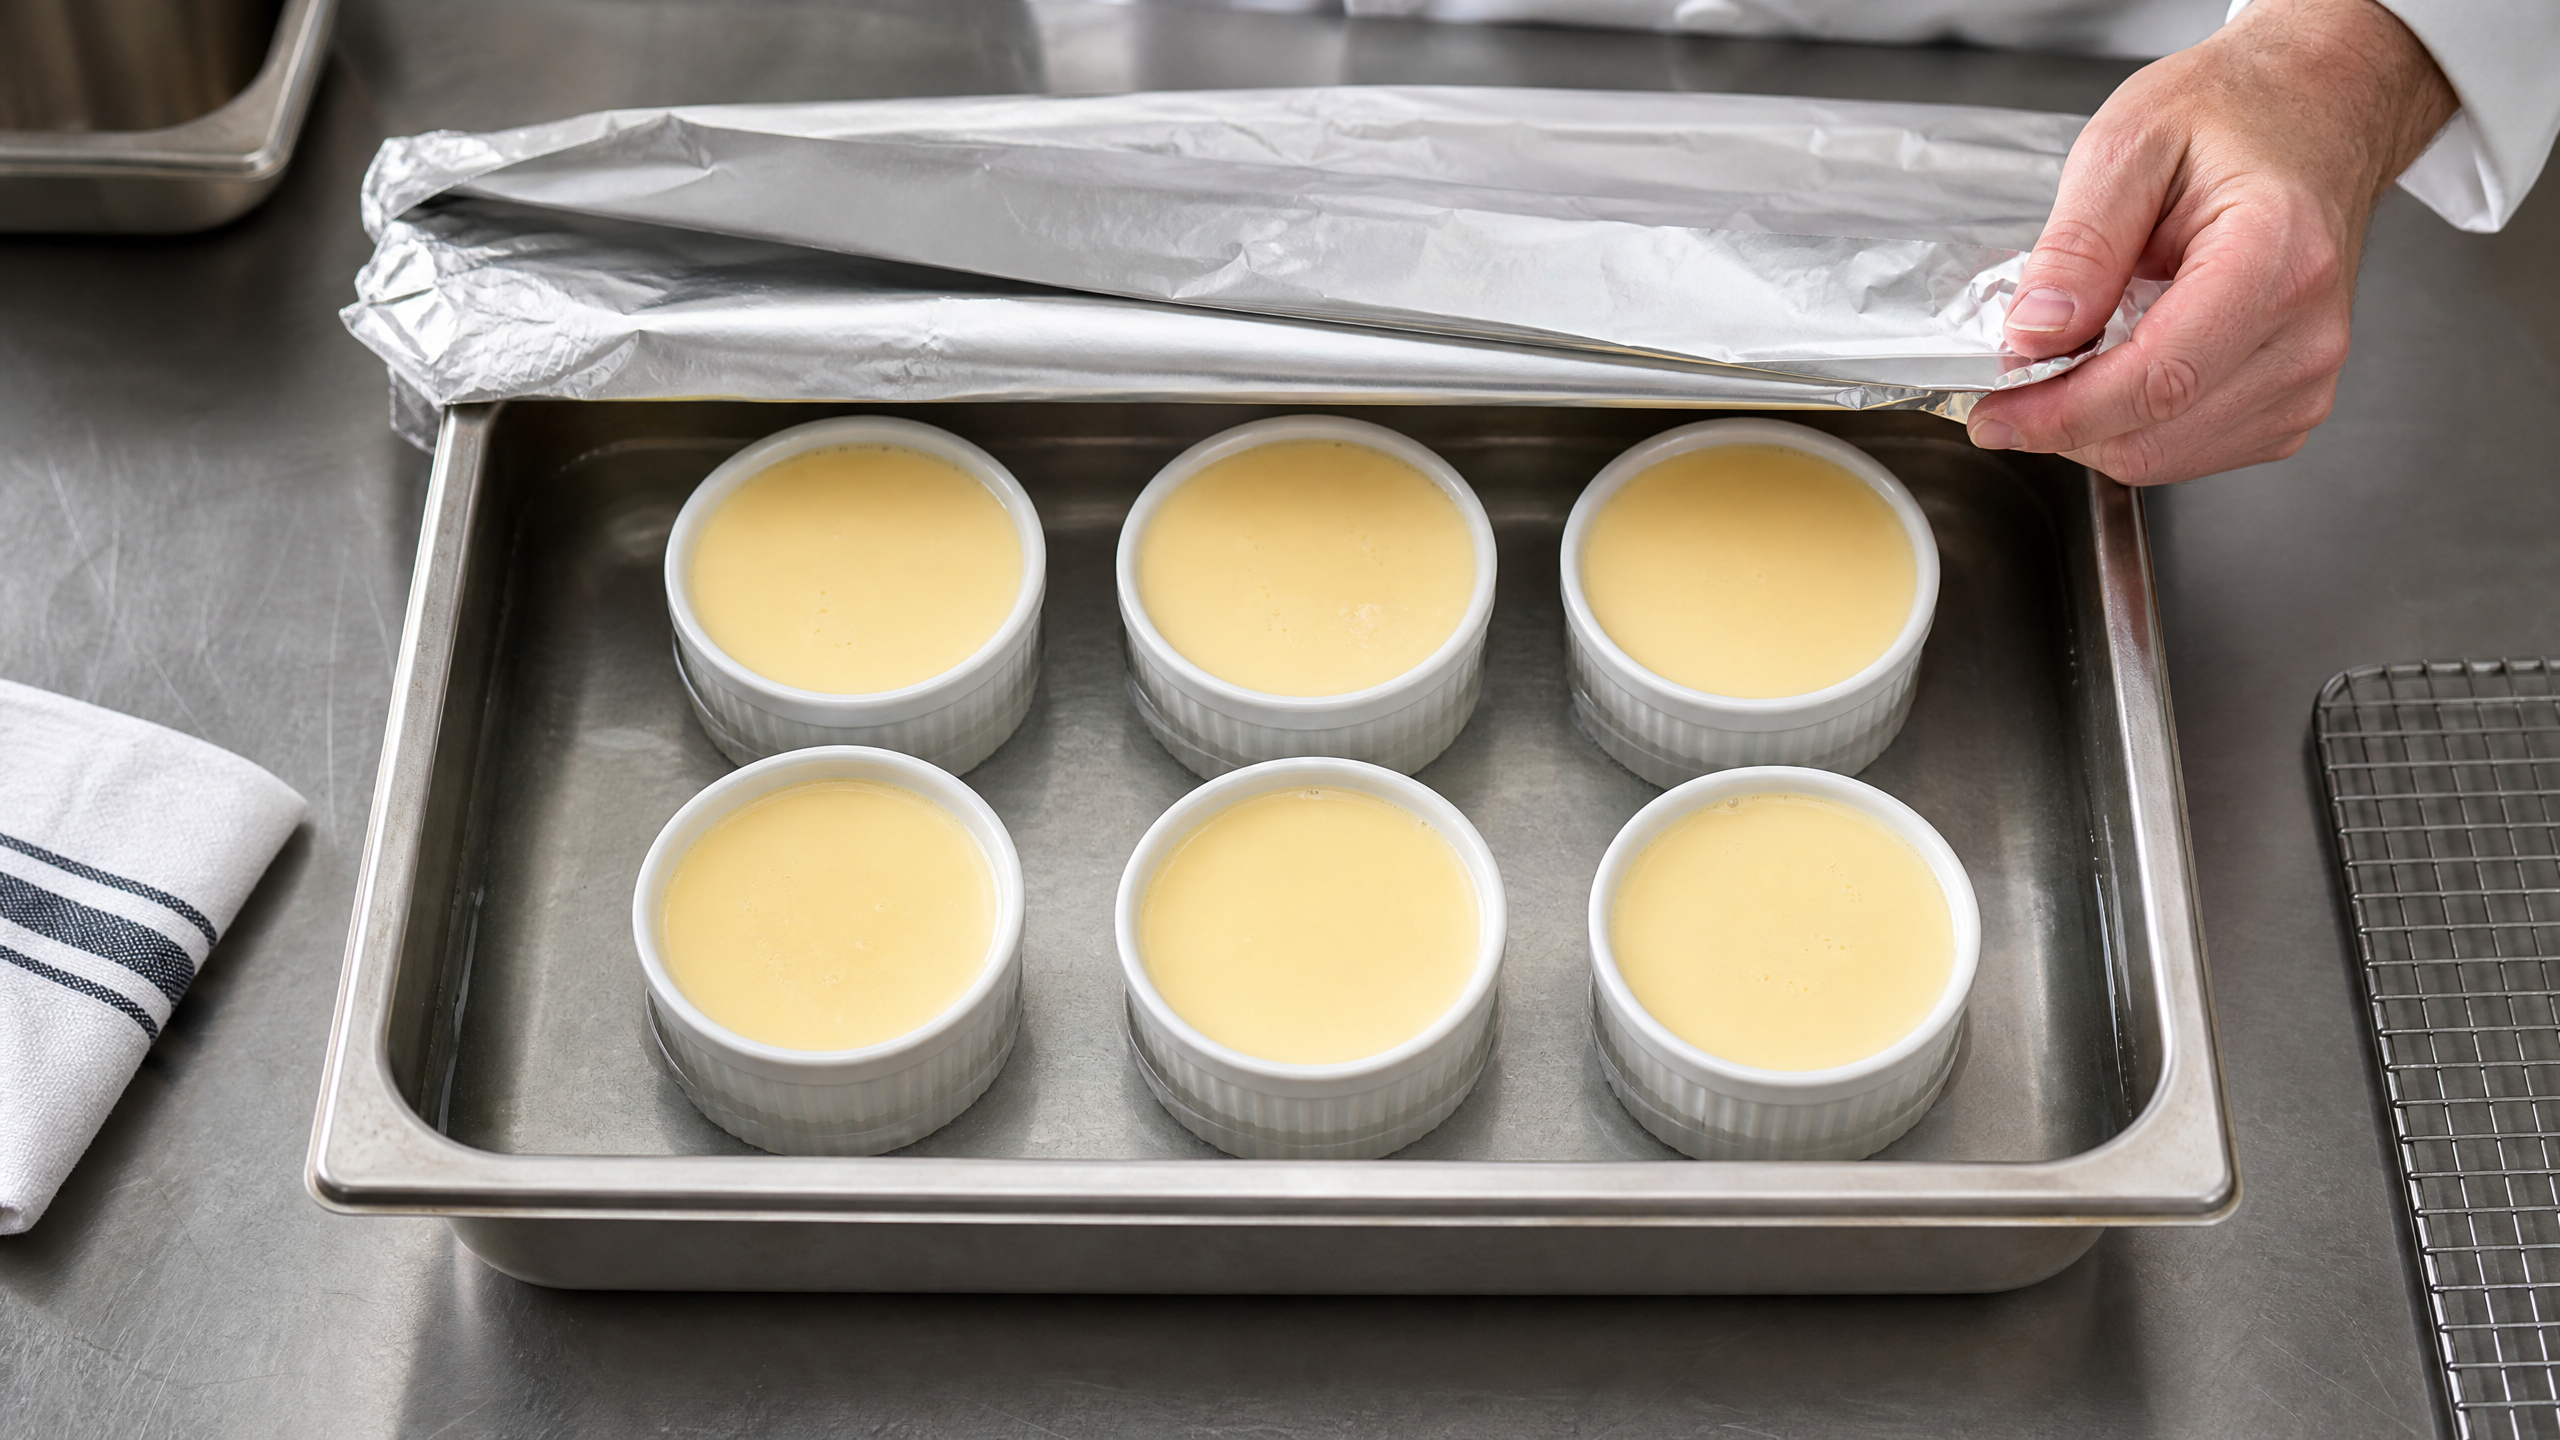
Custard should never exceed 85°C internally during baking. Above that temperature the proteins over-coagulate, releasing water — which is the source of that weeping, watery pool underneath your unmoulded custard. Professional kitchens bake crème caramel at 150°C in a deep bain-marie with water that comes at least two-thirds up the side of the moulds. The water moderates heat transfer and prevents hot spots. Cover the tray loosely with foil to stop a skin forming on the surface.

The Caramel: Where Most People Rush and Always Regret It

The caramel base defines the flavour profile of the entire dessert. Cook it too light and you get bland sweetness. Cook it too dark and bitterness takes over. The professional target is a deep amber, around 175–180°C — at this temperature the sugar has caramelised fully, developing the bitter, complex top notes that balance the richness of the custard. Do not stir once the sugar begins colouring. Swirl the pan gently to even out hot spots, then remove from heat the moment it hits that deep copper colour. It will continue cooking for several seconds after leaving the heat.

Pour the caramel into your moulds immediately and tilt to coat the base evenly. Work fast — caramel sets in seconds. If it seizes before you coat the mould, do not attempt to reheat in the mould. Start the caramel again.

The Michelin Kitchen Method: Full Walkthrough

Ingredients (serves 6)

  • 500ml whole milk
  • 200ml double cream
  • 2 whole eggs
  • 4 egg yolks
  • 130g caster sugar (for custard)
  • 1 vanilla pod, split and scraped
  • For the caramel: 150g caster sugar + 40ml water

Method

Caramel: Combine sugar and water in a heavy pan. Cook on medium-high without stirring until the caramel reaches deep amber (175–180°C). Pour immediately into 6 lightly greased ramekins. Leave to set.

Custard: Combine milk, cream and vanilla pod in a saucepan. Heat to 80°C. Remove from heat and infuse 10 minutes. Meanwhile, whisk eggs, yolks and sugar until pale — do not over-aerate. Slowly ladle the warm cream mixture into the egg mixture, whisking continuously. Strain through a fine sieve. Skim any surface bubbles with a spoon or blowtorch pass.

Bake: Preheat oven to 150°C. Pour custard into prepared ramekins. Place in a deep baking tray. Fill with hot water to two-thirds the height of the ramekins. Cover loosely with foil. Bake 35–45 minutes — the custard should be set at the edges with a gentle wobble in the centre. Remove from the bain-marie and cool to room temperature. Refrigerate a minimum of 4 hours, preferably overnight.

To unmould: Run a thin knife around the inside edge of the ramekin. Place a plate over the top, invert sharply and hold for 3 seconds before lifting the ramekin. The caramel will cascade over the custard.

What the Texture Should Tell You

A correctly made crème caramel trembles like set jelly when you shake the plate. It should slice cleanly, hold its shape for a few seconds, then slowly yield. The surface should be smooth and mirror-like with no bubbles or pitting. Bubbles mean the custard was baked too hot or the base was over-aerated. Pitting means the bain-marie water was boiling actively — it should never exceed 90°C.

This is the gap between home baking and professional patisserie: not the recipe, but the discipline around temperature at every stage. Master the temperature, and crème caramel becomes one of the most reliable, impressive desserts in your repertoire.


This is part of the Michelin Star Series on allcookings.com — restaurant-quality pastry techniques broken down for the serious home baker. Explore more recipes in the series.

Posted on

Temperature as an Ingredient — The Michelin Approach to Hot and Cold on a Single Plate

Part of the Michelin Star Series.

Temperature is usually discussed as a serving concern. At the Michelin level this is the wrong frame entirely. Temperature at the highest level of pastry is an ingredient: added to a dish with the same deliberateness as salt or acid, managed with the same precision.

Why Temperature Tastes

Cold suppresses sweetness. Heat amplifies volatile aromatic compounds. Fat texture is entirely temperature-dependent. These are not incidental variations — they are flavour decisions.

The Architecture of Contrast

The most sophisticated use of temperature in fine-dining pastry is the managed contrast — two elements on the same plate at temperatures far enough apart that the gap between them becomes part of the dish. The canonical example is the warm fondant against the cold sorbet: the heat partially melts the cold element on contact, creating a third temperature that exists only briefly in time. That is what great temperature contrasts are engineering.

Cold as Structure

Cold is also a structural element. A chocolate marquise at four degrees holds its edge; at twelve it begins to weep. A panna cotta unmoulded at three degrees stands; at fifteen it collapses. This is why serious pastry kitchens chill plates before service. The plate is not a neutral surface — it is part of the thermal system.

Heat as Drama

If cold is structure, heat is drama. Heat generates aroma, and aroma reaches the diner before the fork does. The sequence in which a complex dessert reveals itself — first through smell, then sight, then the first mouthful — is designed. Temperature is one of the primary tools through which that sequence is controlled.

Precision and Margin

The practical challenge of temperature as ingredient is that it has the narrowest margin of any element in pastry. At the restaurants where this is done best, the temperature of every component is measured before plating as standard procedure. Temperature, understood correctly, demands the same rigour as salt or acid. It is not a variable to be managed. It is a decision to be made.


This post is part of the Michelin Star Series. Read the companion pieces — The Evolution of Modern Dessert Plating and The Grammar of Negative Space — for the broader context.

FREE GUIDE ✦ INSTANT DOWNLOAD

Want to plate like a Michelin-star chef?

Get the free PDF guide — 5 plating secrets from a professional pastry kitchen, sent directly to your inbox.

Posted on

The Five Sauces That Redefined Dessert Plating

Part of the Michelin Star Series.

The sauce on a dessert plate is not an afterthought. At the highest level of pastry it is a compositional decision with its own grammar, its own history, and its own argument. Five plating sauces have fundamentally changed how desserts are presented. Each belongs to a moment, a chef, a philosophy.

I. The Arc

The first sauce to reshape the dessert plate was the coulis arc — a curved sweep of fruit puree applied with a spoon and pulled in a single controlled motion across the porcelain. It appeared in the early nouvelle cuisine kitchens of the 1970s and 1980s, and its arrival was a rupture. Before it, sauces pooled beneath or around a component, obedient and subordinate. The arc changed the relationship: the sauce was now moving, directional, dynamic. It implied that something had passed through the plate — that the composition had momentum.

The technique requires a warm spoon, a cold plate, and a sauce at precisely the right viscosity. Too thin and it bleeds; too thick and it tears. The arc at its best is clean, tapered at both ends, with a slight variation in width that reveals the hand behind it. It is the first plating technique that made the chef’s gesture visible on the plate.

II. The Smear

The smear arrived with the avant-garde generation and it was, in its moment, a provocation. Where the arc was elegant and controlled, the smear was raw and deliberate — a spoonful of puree applied to the plate and dragged with the flat of a spoon in a single aggressive stroke. It looked unfinished. That was the point. At its best, the smear is extraordinarily precise in its imprecision. Components placed above a smear appear to have landed.

III. The Pool

A sauce poured into the base of a shallow bowl or at the centre of a plate, into which a component is then placed. The pool makes the plate three-dimensional. In current fine-dining the pool is precise and minimal: the component rests at the edge of it, in contact but not submerged, the line where sauce meets porcelain itself becoming a compositional element.

IV. The Dot

The dot is the most misused element in modern pastry plating. Applied with a piping bag or squeeze bottle, its misuse is well-known: dots distributed around a plate in a roughly even pattern, serving no compositional purpose. Its correct use is one single dot, placed at a specific distance from the main component. The space between the dot and the component becomes charged. If the dot matches the colour of the main element the relationship reads as echo. If it contrasts, it reads as argument.

V. The Absence

The fifth sauce that redefined dessert plating is not a sauce at all. It is the decision to serve the plate without one. What the absence of sauce demands is that every element carry its own moisture, its own contrast, its own counterpoint. The plate must be complete without it. The sauce, by its absence, reveals everything.


This post is part of the Michelin Star Series. Read The Grammar of Negative Space for a deeper study of how these sauce techniques interact with the empty porcelain around them.

FREE GUIDE ✦ INSTANT DOWNLOAD

Want to plate like a Michelin-star chef?

Get the free PDF guide — 5 plating secrets from a professional pastry kitchen, sent directly to your inbox.

Posted on

The Grammar of Negative Space — Why What’s Missing from the Plate Matters More

Part of the Michelin Star Series — a study of the techniques, philosophies, and visual language of fine-dining pastry.

There is a moment, studying a great dessert plate, when you stop looking at the food and start looking at the porcelain around it. The empty space. The deliberate nothing. And you realise that the chef has thought as carefully about what is absent as about what is present. This is the grammar of negative space — one of the most sophisticated and least discussed tools in fine-dining pastry.

What Negative Space Actually Is

In visual composition, negative space is the area surrounding the subject — the background, the void, the unoccupied field. On a dessert plate it is managed through porcelain, and its dimensions are fixed: you cannot make the plate larger to create more space, so every decision about placement is also a decision about how much emptiness remains and where it falls. Negative space is not passive. It is not the absence of a decision — it is a decision in itself.

Weight Without Mass

Empty areas carry visual weight. A large field of dark slate porcelain on the lower half of a plate pulls the eye downward with considerable force. A single component placed at the upper third sits against that weight, held there by the tension between its position and the gravitational pull of the void beneath it. The result is a plate that feels dynamic, almost precarious. This is why the choice of plate matters enormously at the Michelin level. White negative space recedes. Dark negative space advances. Neither is correct. They are different sentences making different arguments.

The Direction of Emptiness

Advanced plating uses negative space not just as backdrop but as vector — a force that implies movement or draws the eye through the composition in a deliberate sequence. A quenelle placed at a slight diagonal angle does not simply sit on the plate; it points. The eye follows the long axis of the form and arrives somewhere. The chef is choreographing where the diner looks and in what order. This borrows directly from the conventions of Japanese calligraphy and ikebana, both of which treat empty space as the medium through which the eye travels between points of interest.

The Discipline of Subtraction

Perhaps the hardest skill in modern plating is knowing what to remove. The instinct, particularly early in a pastry career, is additive: another element will complete the plate, another garnish will finish it. This instinct is almost always wrong. Every additional element placed on a plate consumes negative space and reduces the visual weight of every other element already there. The discipline of subtraction is the practice of removing elements until what remains feels inevitable — until you cannot imagine the plate without any single component, and cannot imagine adding one more. The space is what makes each element matter.

Practical Application: Three Ratios

Negative space operates most usefully as a ratio — the proportion of occupied to unoccupied plate surface. A plate where 60–70% of the surface is occupied reads as abundant and classical. A plate at 40–50% occupied sits in the nouvelle cuisine tradition: balanced, purposeful. A plate below 30% occupied — where 70%+ is void — enters the territory of the quiet plate: severe, editorial, demanding. This last ratio is the hardest to execute because every element must carry enormous individual weight. There is no visual noise to absorb weak components.


This post is part of the Michelin Star Series. Read the companion essay — The Evolution of Modern Dessert Plating — for the historical context behind the quiet plate aesthetic this piece explores.

FREE GUIDE ✦ INSTANT DOWNLOAD

Want to plate like a Michelin-star chef?

Get the free PDF guide — 5 plating secrets from a professional pastry kitchen, sent directly to your inbox.

Posted on

The Evolution of Modern Dessert Plating: From Careme to the Quiet Plate

Part of the Michelin Star Series — a study of how the dessert plate became a canvas, then a sculpture, then a whisper.

The modern dessert plate is one of the most heavily edited surfaces in fine dining. Every quenelle, every dust of cocoa, every off-centre tear of glaze is the product of two centuries of argument between excess and restraint. To understand a contemporary tasting-menu dessert — three components, eight grams each, set against negative space — you have to read it as the latest sentence in a long conversation. This is that conversation, told through four movements.

Movement I — The Architectural Era

Modern plating begins, properly, with Antonin Careme in early-nineteenth-century Paris. Careme did not plate desserts so much as build them. His pieces montees were sugar-spun temples, nougat colonnades, marzipan ruins — pastry as edible architecture, displayed at table the way silver was displayed at court. The plate, as we now think of it, did not exist. The dining room itself was the plate.

Auguste Escoffier inherited that grandeur and disciplined it. By the late 1800s the kitchen brigade had codified service a la russe — one course at a time, plated individually — and dessert moved from spectacle to portion. Yet the visual grammar remained ornamental. Symmetry. Generous garnish. A glazed surface, a piped rosette, a candied violet placed dead-centre. The plate was a frame for abundance, and abundance was the point. Restraint, in this era, would have read as failure.

What Careme and Escoffier left us was the foundational assumption that a dessert is a composed object — that what arrives at the guest is not just flavour but a deliberate visual statement. Every plate that came after has been an argument with that premise.

Movement II — Nouvelle Cuisine and the Birth of the Plate

The break came in the 1970s. Paul Bocuse, the Troisgros brothers, Michel Guerard, Alain Chapel — a generation of French chefs declared that classical cuisine had grown heavy with its own rituals. Their manifesto was lighter sauces, shorter cooking times, and a radical idea about presentation: the plate is the canvas, not the platter. Food would be plated in the kitchen, by the chef, on a single oversized white porcelain disc. The diner would receive a finished composition.

For pastry, the consequences were enormous. The assiette de dessert became its own genre. A trio of components replaced the single grand gateau: an entremet, a sorbet, a sauce, arranged with the same painterly logic the savoury cooks were applying to fish and game. Sauces were poured in arcs, fruits fanned, coulis dotted around the rim. White space, for the first time, became compositional. The empty porcelain was no longer waste — it was breath.

This is the moment dessert plating becomes recognisable to the modern eye. If you trace any plate served at a Michelin-starred restaurant today back through its lineage, the spine of that lineage is nouvelle cuisine — even when the chef is reacting against it.

Movement III — The Avant-Garde and the Fragmented Plate

By the late 1990s and through the 2000s, a new vocabulary arrived. Ferran Adria at El Bulli, Heston Blumenthal at The Fat Duck, Grant Achatz at Alinea — the avant-garde generation took technique itself as a subject. Spherification, gels, dehydrations, frozen powders, edible paper, smoke captured under cloches. The plate broke open. Components multiplied. A single dessert might carry twelve elements, each prepared by a different method, each occupying its own coordinate.

Visually, the avant-garde plate was a deliberate provocation. The neat triangulation of nouvelle cuisine was replaced by what looked like controlled chaos: a smear of fruit puree pulled across the porcelain with the back of a spoon, a constellation of crumbs, a quenelle at angle, a single leaf of micro-herb placed with tweezers. The asymmetry was the message. So was the abundance of techniques — the plate was a portfolio, demonstrating what the kitchen could do.

Achatz at Alinea pushed it furthest by abolishing the plate altogether on certain courses — dessert painted directly onto the silicone-covered table in front of the guest, six pastry cooks working in silence, the diner’s own surface becoming the canvas. It was, in spirit, a return to Careme’s idea that the dining room itself is the plate. Only this time it arrived through technology and theatre rather than through gilded sugar.

Movement IV — The Quiet Plate

Every excess produces its correction. The current movement in fine-dining pastry — visible from Copenhagen to Kyoto to the new wave of London and Dubai openings — is one of profound restraint. The vocabulary has narrowed. Three components. Sometimes two. Occasionally one.

What replaced the avant-garde’s fragmentation is an austerity that demands more, not less, from the kitchen. When a dessert arrives as a single sphere of poached pear in a clear consomme, with one drop of aged oil floating on the surface, every element has to carry its weight publicly. There is nowhere to hide a weak component behind a tuile. The cooking has to be perfect because nothing is decorating the cooking.

This is also the era of ingredient honesty. The plate names what it is. A plum dessert looks like a plum. A chocolate dessert acknowledges chocolate as a material rather than disguising it inside a sphere of mango gel. Coloured smears and decorative dots are gone. Tweezered micro-herbs are gone. The piping bag is used for structure, not garnish. The aesthetic owes as much to Japanese kaiseki — where the season speaks for itself and the bowl is half the composition — as to any Western tradition.

Visually, the quiet plate reads as near-monochrome. A dessert may be five shades of a single colour. The porcelain is often dark — slate, charcoal, smoked glass — and the lighting low. Negative space has returned, but it is doing different work than it did in the 1970s. Then it was breath. Now it is gravity.

What the Evolution Tells Us

Looked at across two centuries, the evolution of dessert plating is not a straight line. It is a pendulum. Careme’s architecture begets Escoffier’s discipline; Escoffier’s ornament begets nouvelle cuisine’s restraint; restraint begets the avant-garde’s maximalism; maximalism begets the quiet plate. Each correction borrows from the era before last and rejects the era immediately preceding. Today’s monochrome austerity has more in common with nouvelle cuisine’s white-space logic than with the molecular plates of fifteen years ago.

What every era shares — and what makes the lineage continuous — is the conviction that the plate carries an argument. The chef is saying something with where the quenelle is placed, with what is missing from the rim, with whether the sauce arrives in a pool or a smear or not at all. To plate a dessert at this level is to take a position in the conversation Careme started. Even silence on the plate is a sentence.

For the pastry chef working today, the practical lesson is that technique alone is no longer the point. The avant-garde decade exhausted the novelty of method. What distinguishes a great contemporary plate is editorial judgment — what to leave off, what to refuse to do, what restraint to hold. The hardest plate in the modern kitchen is the one with three components and no garnish. There is nothing easier to design and nothing harder to execute.


This essay is part of the Michelin Star Series — a continuing study of the techniques, philosophies, and visual language of fine-dining pastry. Each post in the series is a working example of the principles traced here: the egg yolk fondant, the popcorn cinema homage, the dulcey and hazelnut architecture, the earl grey and yuzu texture study. Read them alongside this piece as case studies in the quiet plate.

Next in the series: The Vocabulary of the Quiet Plate — a working glossary of restraint.

FREE GUIDE ✦ INSTANT DOWNLOAD

Want to plate like a Michelin-star chef?

Get the free PDF guide — 5 plating secrets from a professional pastry kitchen, sent directly to your inbox.

Posted on

Jasmine & Lychee Délice — Michelin Star Spring Plated Dessert

Michelin Star Series — Spring Edition

Jasmine and lychee is one of the great perfumed pairings in fine dining — floral meeting floral, each amplifying the other without competition. This délice builds that pairing across five components: a jasmine tea ganache at the centre, surrounded by a lychee gel that sets clean and bright, lifted by a coconut dacquoise base, finished with a jasmine cream quenelle and crystallised edible jasmine flowers. It is the kind of plate that stops a dining room.

The Concept

A délice is a French term for a set ganache dessert — typically moulded, smooth-sided, and designed to be sliced or unmoulded at the table. The jasmine version works because jasmine tea, when steeped in hot cream, transfers its floral, slightly smoky character directly into the ganache without requiring any extract or flavouring. It is a completely clean technique that produces an extraordinarily refined result. The lychee gel — made from fresh lychee purée set with agar — cuts through the richness of the ganache with a precise, crystalline brightness that white chocolate alone could not achieve.

Why This Works at Michelin Level

Every element on this plate earns its place through flavour logic. The coconut dacquoise base is not merely textural — its tropical sweetness bridges the floral jasmine and the fruit-forward lychee, preventing either from feeling isolated. The jasmine cream adds a second floral layer at a different temperature and texture to the ganache, creating depth without repetition. The crystallised flowers are the visual punctuation: they signal to the diner what they are about to taste before the first bite arrives.

Ingredient Notes

Jasmine tea: Use a high-quality loose-leaf jasmine pearl or jasmine green tea. Cheaper tea bags produce a thin, slightly bitter infusion. The cream steep time is 8 minutes — longer and the tannins become dominant.

White chocolate: Valrhona Opalys 33% is the correct choice here — its low sugar content and clean dairy notes let the jasmine infusion lead. Standard supermarket white chocolate will overwhelm the floral notes with sweetness.

Lychee: Fresh lychees produce a cleaner, more vibrant purée than canned. If using canned, drain thoroughly and blend with a small squeeze of fresh lime juice to restore brightness.

Agar agar: Used instead of gelatin for the lychee gel — it sets firmer and cleaner, produces a more precise cut edge, and is suitable for vegetarian and vegan guests.

Edible jasmine flowers: Source food-grade, unsprayed. Rinse gently and dry on kitchen paper before plating. Crystallised in egg white and caster sugar, they hold their shape for up to 48 hours.

Ingredients

Jasmine Tea Ganache

  • 200ml heavy cream (35% fat)
  • 12g loose-leaf jasmine pearl tea
  • 220g Valrhona Opalys 33% white chocolate, finely chopped
  • 30g unsalted butter, softened
  • Pinch of fine sea salt

Lychee Gel

  • 300g fresh lychee purée (approximately 20 lychees, peeled, stoned, blended and strained)
  • 30g caster sugar
  • 2g agar agar powder
  • 1 tsp fresh lime juice

Coconut Dacquoise

  • 3 egg whites, room temperature
  • 80g caster sugar
  • 60g desiccated coconut, finely ground
  • 40g ground almonds
  • 20g icing sugar
  • Pinch of fine sea salt

Jasmine Cream

  • 200ml heavy cream, cold
  • 8g loose-leaf jasmine pearl tea
  • 20g icing sugar
  • 2g gelatin sheets, bloomed

Crystallised Jasmine Flowers

  • 12–16 food-grade jasmine flowers, rinsed and dried
  • 1 egg white, lightly beaten
  • 60g caster sugar

Method

Day 1 — Crystallised Flowers

Brush each jasmine flower gently with egg white using a fine pastry brush — coat both sides evenly. Dust lightly with caster sugar and place on a wire rack. Leave at room temperature for 24 hours until stiff and glittering. Store in an airtight container.

Day 1 — Jasmine Tea Ganache

Heat cream to 80°C — do not boil. Add jasmine tea, stir briefly, cover and steep for exactly 8 minutes. Strain through a fine sieve, pressing gently on the leaves. Weigh the infused cream and top back up to 200ml with fresh cream if needed. Pour over the chopped white chocolate in three additions, stirring from the centre out with each addition. Add softened butter and sea salt. Blitz briefly with a hand blender for a glossy emulsion. Pour into individual silicone dome moulds or a lined 15cm square tin to a depth of 2cm. Refrigerate overnight.

Day 1 — Lychee Gel

Combine lychee purée, caster sugar, and agar agar in a small saucepan. Bring to a full boil, stirring constantly, and boil for 90 seconds. Remove from heat, add lime juice, and pour into a flat container to a depth of 5mm. Refrigerate until fully set — approximately 1 hour. Once set, cut into precise 3cm rounds or squares using a sharp cutter. Reserve on a tray lined with cling film.

Day 2 — Coconut Dacquoise

Preheat oven to 170°C (fan). Combine ground coconut, ground almonds, and icing sugar in a bowl. Whisk egg whites with salt to soft peaks, then add caster sugar gradually, whisking to a stiff, glossy meringue. Fold the dry ingredients through in two additions using a large spatula — work quickly and do not overwork. Spread to 5mm thickness on a lined baking tray. Bake for 14–16 minutes until lightly golden and just firm to the touch. Cool completely, then cut to match the base of your ganache portions.

Day 2 — Jasmine Cream

Heat 80ml of the cream to 80°C. Add jasmine tea, steep 8 minutes, strain. Squeeze excess water from bloomed gelatin and dissolve into the warm infused cream. Add remaining cold cream and icing sugar. Refrigerate until cold — at least 2 hours. Whip to soft peaks. Transfer to a piping bag fitted with a small round or Saint-Honoré tip.

Assembly & Plating

Unmould or cut the set ganache into clean portions. Place a dacquoise base on the plate and set the ganache on top. Position the lychee gel disc alongside — not on top — so its colour reads separately. Pipe a quenelle of jasmine cream beside the ganache. Place three crystallised jasmine flowers at considered points across the plate. Finish with a very light dusting of icing sugar if desired — keep the plate clean and uncluttered.

Serving & Storage

Serve the ganache at just below room temperature — remove from the refrigerator 15 minutes before plating. Cold ganache loses its silky mouthfeel and the jasmine aroma becomes muted. The assembled plate holds for up to 20 minutes before the dacquoise begins to absorb moisture from the gel.

Components can be made up to 2 days in advance and stored separately in the refrigerator. The crystallised flowers keep for up to 48 hours in an airtight container at room temperature.

Frequently Asked Questions

Can I use gelatin instead of agar for the lychee gel? Agar is strongly recommended here — it produces a cleaner cut edge and a slightly firmer texture that holds on the plate. Gelatin sets softer and the disc may lose its shape at room temperature. If using gelatin, use 3 sheets and do not boil.

Where can I find food-grade jasmine flowers? Specialist tea suppliers, Middle Eastern grocery stores, and online edible flower suppliers. Never use flowers from a florist or garden centre — these are treated with pesticides not suitable for consumption.

Can I substitute the white chocolate? Valrhona Opalys is ideal but any high-quality white couverture (31% cocoa butter minimum) will work. Avoid compound white chocolate — it contains vegetable fat rather than cocoa butter and will not emulsify correctly.

Can the dacquoise be made gluten-free? It already is — there is no flour in the recipe. Dacquoise is naturally gluten-free.

Chef’s Note

The 8-minute steep is precise for a reason. Under-steep and the jasmine is a whisper; over-steep and the tannins from the green tea base become bitter and angular. Set a timer. Taste the cream before it goes over the chocolate — it should smell and taste unmistakably of jasmine, clean and floral, with no bitterness at the back of the throat.

Explore more Michelin Star Series recipes on allcookings.com — including the Earl Grey & Yuzu Texture Study and the Complete Michelin Star Guide.


Part of the Michelin Star Series — restaurant-quality plated desserts for the home kitchen, by allcookings.com

Posted on

Fluffy Lemon Blueberry Muffins — Vegan & Dairy-Free

Split vegan lemon blueberry muffin showing burst blueberries inside with sugar crystals and bokeh background

Allergy-Friendly Series — Vegan · Dairy-Free · Egg-Free

Cloud-light, bakery-domed muffins bursting with fresh blueberries and finished with a sharp lemon glaze. The secret is the oat milk buttermilk — oat milk and apple cider vinegar left to curdle for five minutes — which gives the crumb an extraordinary tenderness without a single egg or drop of dairy. The lemon glaze sets into a thin, glossy shell that photographs beautifully and tastes even better.

Fluffy vegan lemon blueberry muffin with sugar falling from above on a dark plate with fresh blueberries

Why This Recipe Works

The vegan buttermilk is the engine of this recipe. When oat milk and apple cider vinegar are combined, the acid curdles the milk proteins, creating a tangy, slightly thickened liquid that reacts with the baking soda during baking — producing a rapid, dramatic rise and an open, tender crumb. No eggs are needed because the structure comes from gluten development (light mixing only) and the lift from the leavening reaction. The lemon does double work here: the juice adds brightness to the batter and the glaze, while the zest carries the floral top note that makes these muffins smell extraordinary fresh from the oven.

Ingredient Notes

Oat milk: The best plant milk for this recipe. Its neutral flavour and protein content create a more convincing buttermilk than almond or rice milk. Use unsweetened — sweetened oat milk will throw off the sugar balance.

Apple cider vinegar: The acid that curdles the milk into buttermilk and activates the baking soda. White wine vinegar works as a substitute. Do not use balsamic.

Neutral oil: Sunflower, avocado, or light rapeseed. Oil keeps muffins moist for longer than butter — these are just as good on day two as day one.

Fresh blueberries: Fresh only for the best result. Frozen blueberries can be used in a pinch — do not thaw them first, and fold them in straight from frozen to prevent the batter turning purple.

Lemon: Both zest and juice are used. Zest into the batter, juice into the glaze. Use unwaxed lemons if possible.

Ingredients

Muffin Batter

  • 2 cups (240g) all-purpose flour
  • ¾ cup (150g) cane sugar
  • 2 tsp baking powder
  • ¼ tsp baking soda
  • ½ tsp fine sea salt
  • 1 cup (240ml) unsweetened oat milk
  • 1 tbsp apple cider vinegar
  • ⅓ cup (80ml) neutral oil (sunflower or avocado)
  • 1 lemon, zested and juiced
  • 1 tsp vanilla extract
  • 1½ cups (220g) fresh blueberries

Lemon Glaze

  • 1 cup (120g) powdered sugar
  • 2 tbsp fresh lemon juice

Method

Step 1 — Prep

Preheat oven to 190°C (375°F). Line a 12-cup muffin tin with paper liners or grease well.

Step 2 — Make Vegan Buttermilk

In a small bowl or measuring cup, combine the oat milk and apple cider vinegar. Stir briefly and let sit for 5 minutes until slightly curdled — this is your vegan buttermilk.

Step 3 — Dry Ingredients

In a large bowl, whisk together the flour, cane sugar, baking powder, baking soda, and fine sea salt.

Step 4 — Wet Ingredients

Whisk the neutral oil, lemon zest and juice, and vanilla extract into the buttermilk mixture until combined.

Step 5 — Combine

Pour the wet ingredients into the dry and fold gently with a spatula until just combined — a few streaks of flour are fine. Toss the blueberries in 1 tsp of flour, then fold them in last. Do not overmix.

Step 6 — Bake

Divide batter evenly among the 12 muffin cups, filling each to just below the rim. Bake for 20–23 minutes until a toothpick inserted in the centre comes out clean and the tops are lightly golden.

Step 7 — Glaze

Let muffins cool in the tin for 5 minutes, then transfer to a wire rack. Whisk together the powdered sugar and fresh lemon juice until smooth and pourable. Once muffins are just warm (not hot), spoon the glaze over the tops and let it drip down the sides.

Serving & Storage

Best served warm or at room temperature on the day of baking, when the glaze is still slightly soft and the blueberries are at their most jammy. They make an excellent breakfast alongside oat milk flat white or a simple afternoon snack.

Store in an airtight container at room temperature for up to 3 days. To refresh them the next day, warm in an oven at 150°C for 5 minutes. They also freeze well — freeze unglazed and add fresh glaze after thawing.

Frequently Asked Questions

Can I use frozen blueberries? Yes — do not thaw them. Fold in straight from frozen to prevent the batter turning blue. The bake time may increase by 2–3 minutes.

Can I swap the oat milk? Soy milk is the next best option for vegan buttermilk as it curdles well. Almond or coconut milk will work but produce a slightly less tender crumb.

Why did my muffins come out flat? Most likely overmixing or old baking powder. Mix until just combined — lumps are fine. Check that your baking powder is less than 6 months old.

How do I get a bakery-style domed top? Fill the cups all the way to the top and start at 220°C (425°F) for 5 minutes, then reduce to 175°C (350°F) for the remaining time. The burst of initial heat forces a dramatic dome before the crust sets.

Can I make these gluten-free? Yes — use a 1:1 gluten-free flour blend. The texture will be slightly more delicate but the muffins will still rise and hold their shape.

Chef’s Note

The flour-dusted blueberry trick is not optional — it genuinely prevents sinking. And resist the urge to open the oven door in the first 15 minutes: the thermal shock will collapse the dome before it has a chance to set.

For more allergy-friendly recipes, visit our Allergy-Friendly collection, or try the Salted Caramel Tahini Blondies — another crowd-pleaser with zero dairy or eggs.


A fully vegan recipe from allcookings.com — no eggs, no dairy, no compromise.