Posted on

Vegan Tiramisu — The Michelin-Star Technique, No Eggs, Dairy, or Gelatine

Three glasses of vegan tiramisu with layered cream, ladyfingers, and cocoa

★ Michelin Vegan Desserts ★

Vegan Tiramisu

Classic coffee tiramisu, rebuilt entirely plant-based — no eggs, no dairy, no gelatine, and no compromise on structure.

⏱ Prep: 2 hours  ·  ⏲ Chill: 4 hours  ·  ☕ Serves: 6  ·  ⭐ Difficulty: Advanced

Three glasses of vegan tiramisu showing distinct layers of cream, soaked ladyfingers, cocoa dust and chocolate shavings
Clean, distinct layers — proof that a plant-based build can hold structure just as well as the classic.

The Two Ingredients Every Vegan Tiramisu Recipe Gets Wrong

Tiramisu has two structural problems for a plant-based rebuild: mascarpone, which carries the richness and set, and the raw or gently-cooked egg yolk base, which gives the cream its characteristic light, aerated structure. Most vegan tiramisu recipes solve this by using a heavy cashew cream and calling it done — the result is usually dense and one-note, missing the airiness that makes real tiramisu float rather than sit.

This version solves both properly. The mascarpone role is split between soaked cashews (for richness and body) and coconut cream (for the fat structure). The egg yolk role is replaced with a genuine pâte à bombe technique — the same hot-syrup-into-whipped-aquafaba method we use in our Tropical Mango Coconut Tiramisu, which pasteurises and aerates the aquafaba exactly the way hot syrup does egg yolks. Even the ladyfingers are rebuilt from scratch with an aquafaba-based sponge, since traditional savoiardi always contain egg.

The result holds its layers, slices cleanly, and tastes like tiramisu — not like an apology for it.

⭐ Why This Recipe

✔️ 100% plant-based
✔️ Real pâte à bombe technique
✔️ Homemade aquafaba ladyfingers
✔️ Coconut-cashew mascarpone cream
✔️ No gelatine, no eggs
✔️ Genuine light, aerated texture
✔️ Make-ahead friendly
✔️ Classic coffee & cocoa finish


Ingredients (serves 6)

Aquafaba Ladyfingers

120g aquafaba (chickpea brine)
1/4 tsp cream of tartar
80g caster sugar
90g plain flour
1 tsp vanilla extract
Icing sugar, for dusting

Coconut-Cashew Cream

200g raw cashews, soaked 4 hours/overnight
200g full-fat coconut cream (chilled, solids only)
60g icing sugar
1 tsp vanilla bean paste
Pinch of fine sea salt

Pâte à Bombe (Aquafaba)

90g caster sugar
35g water
90g aquafaba (separate batch, whipped)

Coffee Soak

250ml strong espresso, cooled
2 tbsp caster sugar
1 tbsp coffee liqueur (optional)

To Finish

Unsweetened cocoa powder, for dusting
Dark chocolate shavings (dairy-free)

The Method

Aquafaba Ladyfingers (make first)

Step 1. Preheat oven to 170°C. Whip aquafaba with cream of tartar to soft peaks. Gradually add sugar, whipping to stiff, glossy peaks — this takes longer than egg whites, be patient.

Step 2. Fold in vanilla, then sift the flour over in two additions, folding gently to keep as much air as possible.

Step 3. Pipe into 8cm fingers on a lined tray, spaced apart. Dust generously with icing sugar. Bake 12–15 minutes until pale gold and just firm. Cool completely — they’ll crisp further as they cool.

The Cream

Step 4. Drain the soaked cashews and blend with the coconut cream solids, icing sugar, vanilla and salt until completely smooth — this takes a full 2–3 minutes in a high-speed blender. Any graininess here will carry through the whole dessert.

Step 5 — The Pâte à Bombe. Combine sugar and water in a small pan, cook to 121°C (firm-ball stage — see our sugar stages guide for the full technique). Meanwhile whip the second batch of aquafaba to soft peaks. Pour the hot syrup in a thin stream down the side of the bowl while whipping continuously, then keep whipping on high speed until cooled and thick, about 8–10 minutes.

Step 6. Fold the pâte à bombe into the cashew-coconut base in two additions, keeping as much volume as possible. This is what gives the cream its lightness rather than a dense, cheesecake-like set.

Assembly

Step 7. Combine cooled espresso, sugar and liqueur (if using). Dip each ladyfinger briefly — a one-second pass per side, not a soak, since the eggless sponge is more delicate than traditional savoiardi.

Step 8. Layer soaked ladyfingers in a dish or individual glasses, top with a layer of cream, dust lightly with cocoa. Repeat for a second layer of ladyfingers and cream. Smooth the top layer of cream and refrigerate uncovered for a minimum of 4 hours, ideally overnight.

Overhead view of cocoa-dusted tiramisu topped with chocolate curls in a glass
A generous, even dusting of cocoa is the finishing touch — sift it on just before serving so it stays dry and defined.

Step 9 — Finish. Dust generously with cocoa powder just before serving. Finish with dark chocolate shavings.

Chef’s Secrets

01 — Aquafaba Needs Patience

Aquafaba takes noticeably longer to whip to stiff peaks than egg whites — often double the time. Don’t rush it or stop early; an under-whipped batch won’t hold the pâte à bombe’s structure.

02 — Blend the Cashews Fully

This is the step people rush most. Two full minutes in a high-speed blender is the difference between silky cream and a gritty one — there is no fixing graininess after it’s folded together.

03 — Dip, Don’t Soak

The eggless ladyfingers are more fragile than traditional savoiardi and absorb liquid faster. A one-second dip per side is enough — they’ll continue softening overnight in the fridge.

Part of Michelin Vegan Desserts — plant-based fine dining built on the same technique as our classic recipes. See the same pâte à bombe method applied in our Vegan Chocolate Délice and Tropical Mango Coconut Tiramisu.

FREE GUIDE ✦ INSTANT DOWNLOAD

Want to plate like a Michelin-star chef?

Get the free PDF guide — 5 plating secrets from a professional pastry kitchen, sent directly to your inbox.

Posted on

Pistachio Basque Cheesecake — Burnt Cheesecake, Pistachio Ice Cream & Caramelized Pistachios

★ Michelin Star Series ★

Pistachio Basque Cheesecake

A deeply burnt, custard-based pistachio cheesecake served with pistachio ice cream over caramelized pistachios and fresh petals.

⏱ Prep: 1 hour  ·  ⏲ Bake: 13 mins + chill  ·  🥧 Makes: ~1.6kg cake (≈14 slices, 110g each)  ·  ⭐ Difficulty: Advanced

Not the Whisk-and-Bake Version

Most home versions of Basque cheesecake are whisked cold and poured straight into the tin. This is the professional variation: the custard base is cooked on a bain-marie first, tempered carefully into egg yolks, thickened to 75°C before it ever meets the cream cheese, then baked at a fierce 263°C for a short, precise 13 minutes. The result is a firmer, more stable set beneath that signature blistered, near-black top — one that holds a clean slice rather than collapsing into a puddle.

Pistachio paste is folded through the batter itself, so the interior comes out a genuine vivid green — not a green swirl, the whole cake. It’s served with a quenelle of pistachio ice cream sitting directly on a bed of caramelized pistachios, so every spoonful of ice cream picks up shattered pieces of praline. Fresh petals finish the plate.

This recipe is written for the base 1.6kg batch. In the professional kitchen it’s scaled 4x for service — the technique and ratios stay identical either way.

⭐ Why This Recipe

✔️ Cooked custard base, not raw-whisked
✔️ Vivid pistachio interior
✔️ Deep burnt Basque top
✔️ Pistachio ice cream included
✔️ Caramelized pistachio praline
✔️ Restaurant plating guide
✔️ Precise 263°C / 13-minute bake
✔️ Professional batch ratios


Ingredients

Pistachio Cheesecake Batter

200g cream cheese, room temperature
50g whipping cream
45g egg yolk
50g sugar
5g plain flour
5g cornflour
40g pistachio paste

Pistachio Ice Cream

250g pistachio paste
625g whole milk
50g milk powder
143g dextrose powder
25g glucose powder
6g stabiliser (Stab 2000)
16g sugar

Caramelized Pistachios

500g whole pistachio nuts
250g caster sugar
70g water
10g butter

To Finish

Fresh edible petals

The Method

Caramelized Pistachios (make first — needs time to cool)

Step 1. Roast the pistachio nuts at 150°C for 12 minutes. Keep warm.

Step 2. Combine sugar and water in a heavy pan. Cook to 118°C.

Step 3. Add the warm roasted nuts and stir continuously. The sugar will crystallise and turn sandy before it melts again and caramelises around the nuts — keep stirring through this stage until every nut is evenly coated and glossy.

Step 4. Stir in the butter. Pour out onto a large flat surface lined with parchment, spreading the nuts apart so they cool separately rather than fusing into a slab. Once cool, roughly chop.

Pistachio Ice Cream

Step 5. Combine pistachio paste and milk, bring to a boil, whisking to fully disperse the paste.

Step 6. Whisk in milk powder. Add dextrose powder, glucose powder, stabiliser and sugar. Bring the base to 70°C, whisking constantly to fully dissolve and hydrate the stabiliser.

Step 7. Cool the base rapidly over an ice bath, then refrigerate a minimum of 4 hours (ideally overnight) before churning in an ice cream machine according to the manufacturer’s instructions. Freeze until service.

Pistachio Cheesecake

Step 8. Warm the whipping cream over a bain-marie until hot.

Step 9. Remove the cream from the bain-marie. Pour a small amount over the egg yolks to temper, whisking constantly, then return the combined mixture to the bain-marie.

Step 10. Whisk the sugar into the egg yolks and pour slowly into the warm cream, whisking continuously.

Step 11. Add the flour and cornflour in three additions, mixing thoroughly after each to avoid lumps.

Step 12. Keep over the bain-marie, whisking, until the mixture reaches 75°C and thickens noticeably — it should coat the back of a spoon.

Step 13. Remove from the bain-marie. Pour into the room-temperature cream cheese in three additions, mixing thoroughly after each until fully diluted and smooth. Add the pistachio paste and mix until the batter is uniformly green.

Step 14. Line a loaf tin generously with baking parchment, pushing it into the corners with excess overhanging the sides — this is what creates the signature burnt, wrinkled crust. Pour in the batter.

Step 15 — Bake. Bake at 263°C (fan) for exactly 13 minutes. The top should be deeply blistered and near-black, while the centre remains soft and custardy. Remove from the oven immediately — do not leave it in residual heat. Cool to room temperature, then refrigerate at least 4 hours before slicing.

Whole burnt Basque cheesecake loaf on a dark slate board, glossy near-black wrinkled top
Straight out of the oven — deeply blistered and near-black on top, this is exactly what a correctly baked loaf should look like before slicing.

Step 16 — Plating. Slice with a hot knife, wiped clean between cuts, targeting roughly 110g per slice. Scatter a bed of chopped caramelized pistachios on the plate. Place a quenelle of pistachio ice cream directly on top of the pistachios, so it picks up shards as it’s plated. Finish with a scatter of fresh edible petals.

Chef’s Secrets

01 — Cook the Custard First

Most Basque cheesecakes skip this step entirely. Cooking the base to 75°C before it meets the cream cheese is what gives this version its firmer, more stable set beneath the burnt top.

02 — Out of the Oven, No Exceptions

At 263°C, residual heat keeps cooking the cake even after the timer ends. Pull it the moment 13 minutes is up — a minute of carryover heat is the difference between a soft custard centre and an overbaked one.

03 — Pistachios Under, Not Beside

Placing the ice cream directly on the caramelized pistachios, rather than scattering them beside it, means every spoonful naturally picks up crunch and caramel — no extra step needed from the person eating it.

Part of the Michelin Star Series on allcookings.com — restaurant-quality pastry techniques broken down for the serious home baker.

FREE GUIDE ✦ INSTANT DOWNLOAD

Want to plate like a Michelin-star chef?

Get the free PDF guide — 5 plating secrets from a professional pastry kitchen, sent directly to your inbox.
Posted on

Tropical Mango Coconut Tiramisu — A Michelin-Star Twist on the Italian Classic

★ Michelin Star Series ★

Tropical Mango Coconut Tiramisu

The Italian classic reimagined — coconut-laced mascarpone cream, soaked ladyfingers, and a bright mango-passionfruit coulis, built and finished in the glass.

⏱ Prep: 1.5 hours  ·  ⏲ Chill: 4 hours  ·  🥭 Serves: 6 (200g each)  ·  ⭐ Difficulty: Advanced

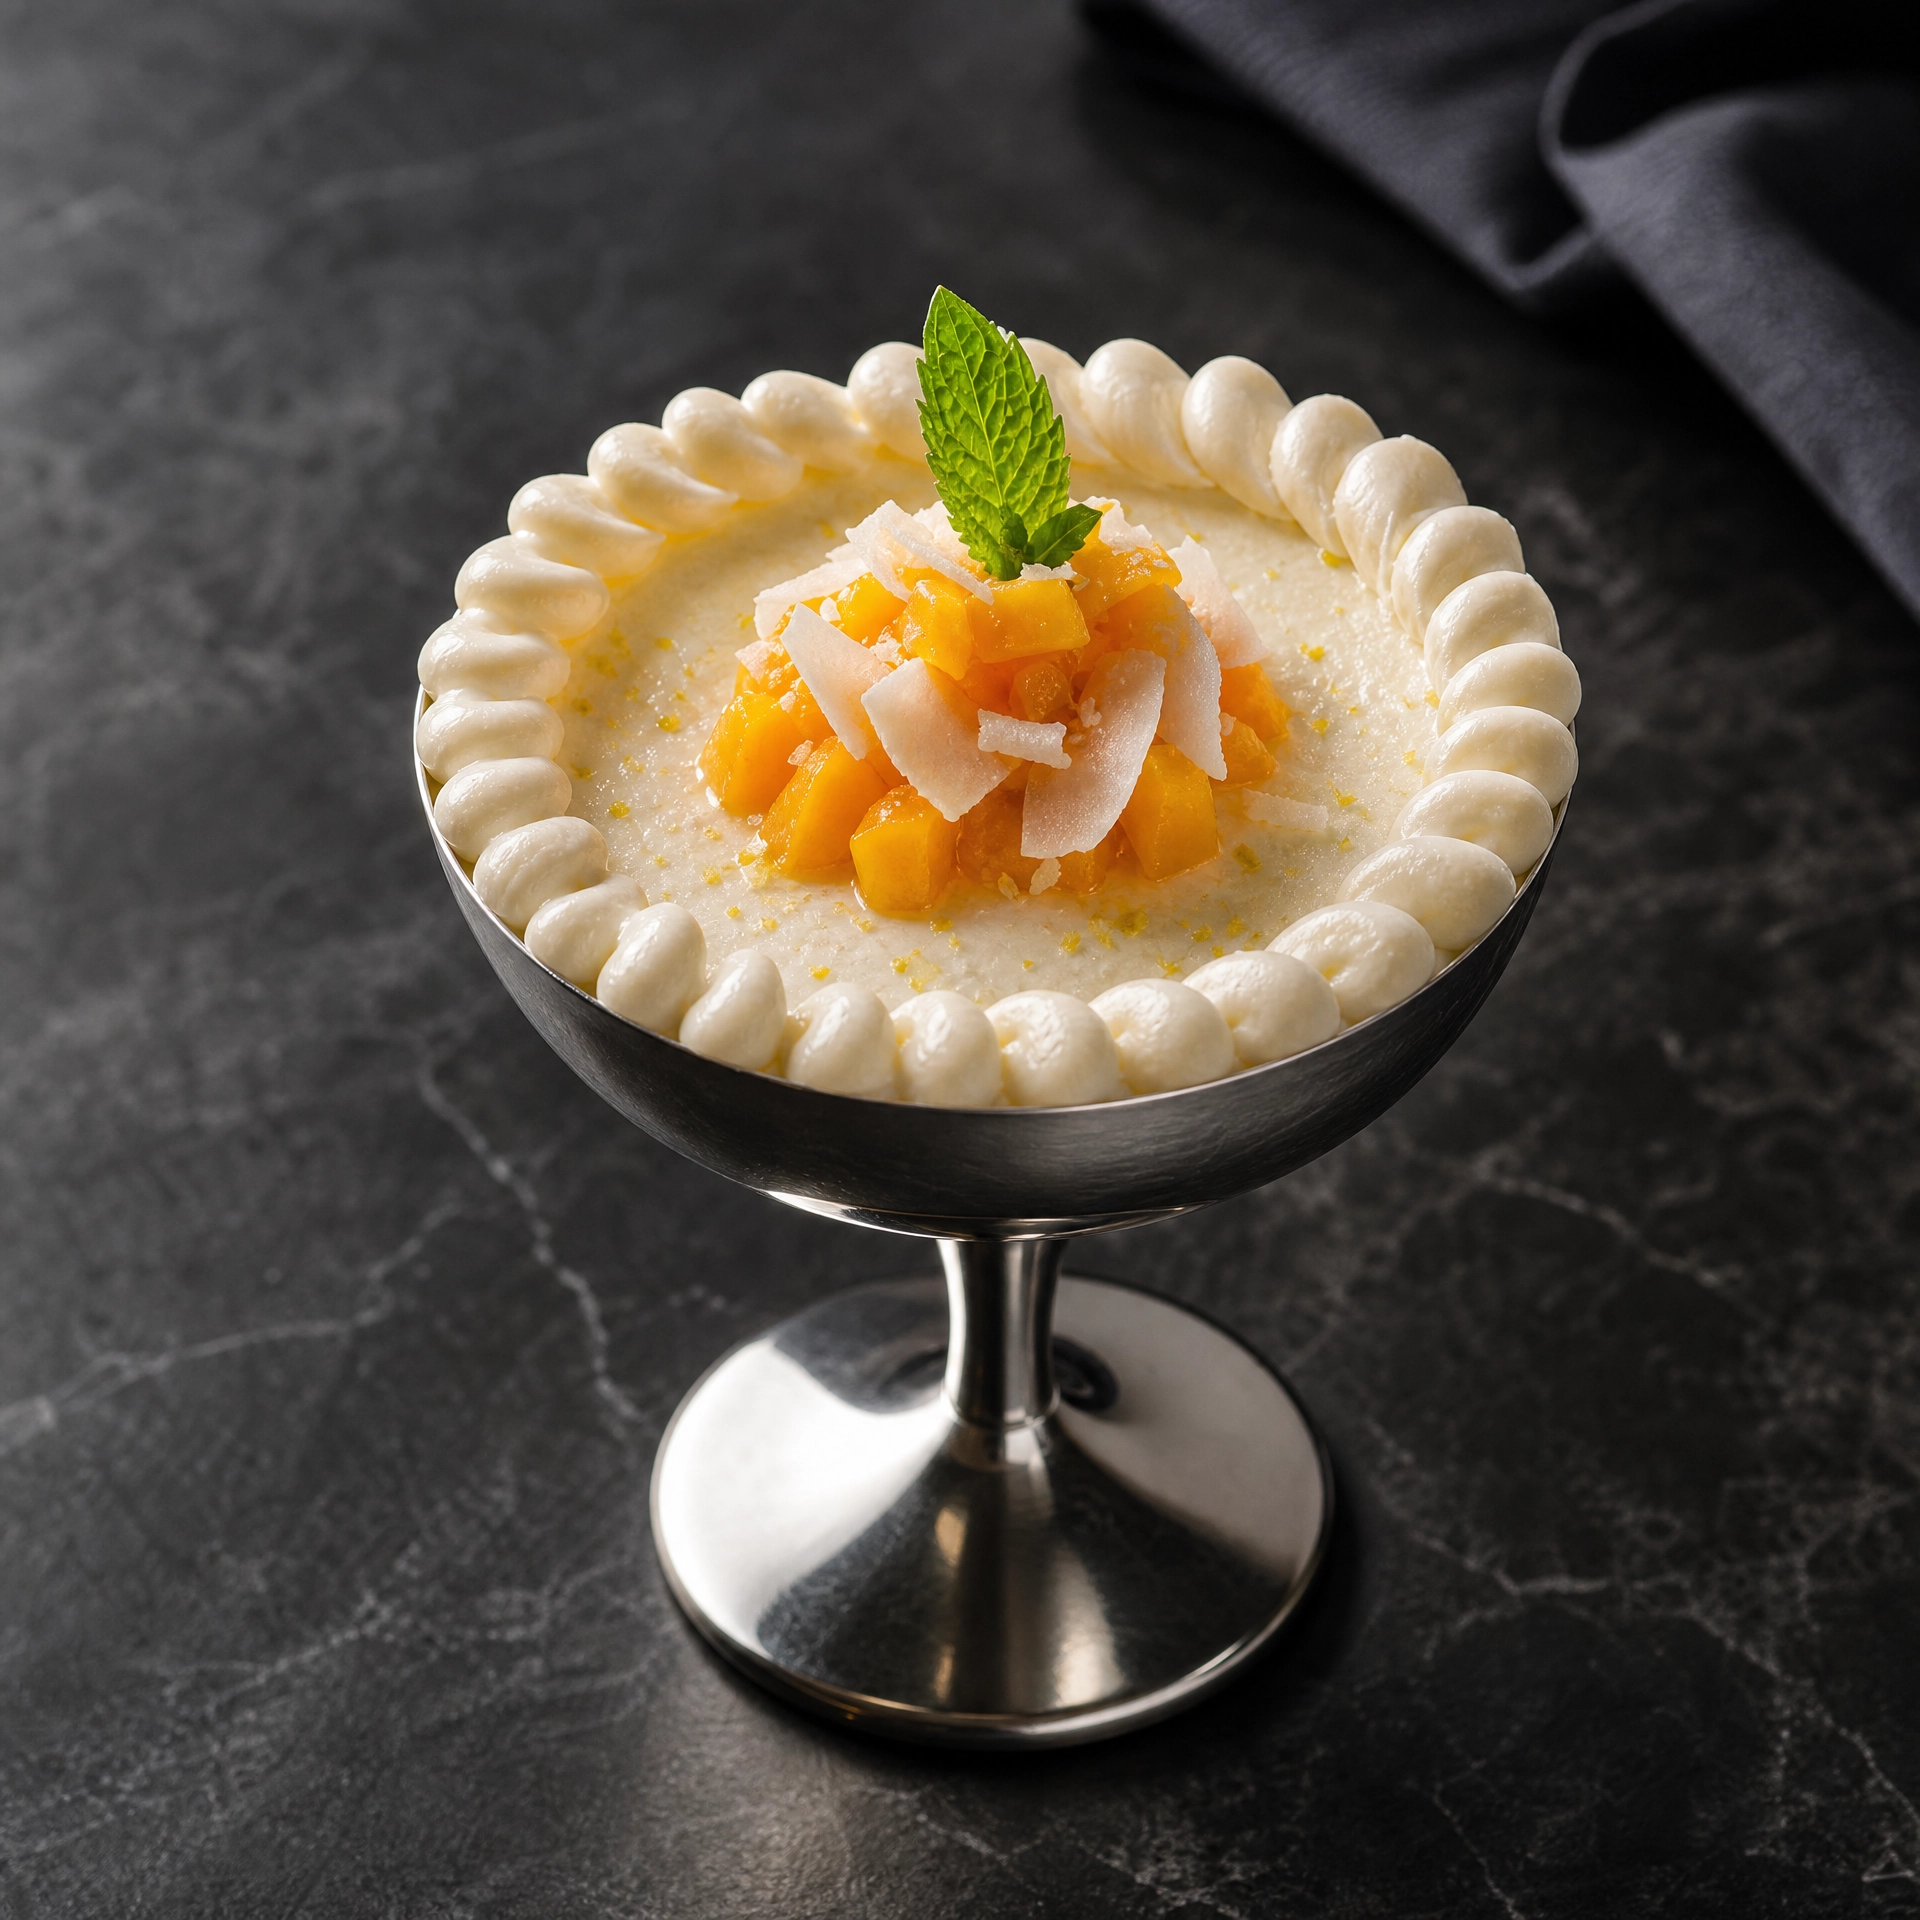
Tropical mango coconut tiramisu in a metal coupe glass, piped cream border, diced mango and coconut garnish with mint
Built in the glass, finished tableside — the diced mango and toasted coconut go on last, right before service.

Tiramisu, Rebuilt Around the Tropics

Classic tiramisu is built on three fixed points: a pâte à bombe base for the mascarpone cream, coffee-soaked ladyfingers, and cocoa to finish. This version keeps the structure — the technique that actually makes tiramisu work — and swaps every flavour element for something brighter. Coconut cream folds into the mascarpone base alongside the traditional cream. Vanilla sugar syrup and coconut milk replace the espresso for soaking the ladyfingers. And in place of cocoa, a sharp mango-passionfruit coulis, set with agar-agar, sits between the cream layers and again on top, finished with fresh mango, shredded coconut, mint and lemon zest.

The pâte à bombe technique is what separates this from a simple whipped-cream tiramisu. Sugar and water are cooked to a syrup and poured over whipping egg yolks, cooking them gently and safely while building volume — the same base technique behind Italian buttercream. It’s what gives the mascarpone cream its structure and its light, aerated set, rather than a heavy, dense texture.

Built in individual glasses and finished with the garnish right before service, this is designed to be assembled ahead and finished tableside — exactly how it would be handled in a professional pastry section.

⭐ Why This Recipe

✔️ Classic pâte à bombe technique
✔️ Coconut-mascarpone cream
✔️ Agar-set mango-passionfruit coulis
✔️ No coffee, no cocoa
✔️ Built and finished in the glass
✔️ Make-ahead friendly
✔️ Bright, warm-weather alternative
✔️ Restaurant plating guide


Ingredients (makes 6 servings, ~200g each)

Pâte à Bombe Syrup

96g caster sugar
40g water
64g egg yolk (about 3 large yolks)

Coconut-Mascarpone Cream

104g coconut cream
104g double cream
20g icing sugar
600g mascarpone, room temperature
8g gelatine (bloomed)

Ladyfinger Soak

150g coconut milk
40g vanilla sugar syrup
18–24 ladyfingers (savoiardi)

Mango-Passionfruit Coulis

100g mango purée
100g passionfruit purée
20g sugar
2g agar-agar powder

To Finish

1 fresh mango, diced small
2–3 tbsp reserved coulis (for mixing through mango)
Shredded/shaved fresh coconut
Fresh mint leaves
Lemon zest, finely grated

The Method

Step 1 — The Coulis (make first, needs time to set). Combine mango purée, passionfruit purée and sugar in a saucepan. Whisk in agar-agar powder while cold to avoid lumps. Bring to a full boil for 90 seconds, whisking constantly. Pour into a shallow container and refrigerate until fully set, about 1 hour. Once set, blend until smooth and spoonable — this becomes your layering and garnish coulis.

Step 2 — The Pâte à Bombe. Combine sugar and water in a small saucepan and cook to 121°C (soft-ball stage). Meanwhile, begin whisking egg yolks in a stand mixer on medium speed. Once the syrup reaches temperature, pour it in a thin, steady stream down the side of the bowl while whisking continuously — never directly onto the whisk. Continue whisking on high speed until the mixture is pale, thick, and cooled to room temperature, roughly 8–10 minutes.

Step 3 — The Cream. Bloom the gelatine in cold water. Whip coconut cream, double cream and icing sugar together to soft peaks. In a separate bowl, beat the mascarpone until smooth and loose — do not overwhip, or it will split. Gently melt the bloomed gelatine and stir a small amount of the mascarpone into it to temper, then fold this back into the rest of the mascarpone. Fold the pâte à bombe into the mascarpone in two additions, then fold in the whipped coconut cream mixture until fully combined and airy.

Step 4 — Soak the Ladyfingers. Combine coconut milk and vanilla sugar syrup in a shallow dish. Dip each ladyfinger briefly — a quick pass, not a soak — so they stay structured rather than turning to mush.

Step 5 — Build the Glass. Break soaked ladyfingers to fit the base of each glass. Pipe a layer of the coconut-mascarpone cream over the top. Add a thin layer of mango-passionfruit coulis. Repeat with a second layer of ladyfingers, then a final generous layer of cream, piped in the decorative border shown in the photo, leaving the centre slightly lower to hold the garnish. Refrigerate at least 4 hours, ideally overnight.

Step 6 — Finish Tableside. Just before serving, toss the diced mango with 2–3 tablespoons of the reserved coulis. Spoon into the centre of each glass. Top with shredded coconut, a sprig of fresh mint, and a fine grating of lemon zest.

Chef’s Secrets

01 — Pour the Syrup Slowly

Pouring hot syrup too fast, or directly onto the moving whisk, splashes hot sugar onto the bowl walls where it hardens instead of incorporating. A thin, steady stream down the side is what builds proper volume.

02 — A Quick Dip, Not a Soak

Ladyfingers left in liquid too long turn to paste and collapse the layers. A one-to-two second dip per side is enough — they’ll continue softening in the fridge overnight.

03 — Garnish Only at Service

The diced mango and coulis mixture will weep liquid onto the cream if added too early. Keep it separate and finish each glass in the last minutes before serving, exactly as done tableside.

Part of the Michelin Star Series on allcookings.com — restaurant-quality pastry techniques broken down for the serious home baker.

FREE GUIDE ✦ INSTANT DOWNLOAD

Want to plate like a Michelin-star chef?

Get the free PDF guide — 5 plating secrets from a professional pastry kitchen, sent directly to your inbox.

Posted on

Vegan Chocolate Délice — The Michelin-Star Technique, No Eggs or Dairy

★ Michelin Vegan Desserts ★

Vegan Chocolate Délice

The same silky, set ganache technique as our original Délice — rebuilt entirely plant-based, with no compromise on texture.

⏱ Prep: 45 mins  ·  ⏲ Chill: 4 hours  ·  🍫 Serves: 8  ·  ⭐ Difficulty: Intermediate

Slice of vegan chocolate délice with gold leaf, sea salt, and raspberry coulis on a dark plate
Same glossy set, same clean slice — no eggs or dairy anywhere in this one.

Why This Isn’t a Compromise Recipe

Most “vegan versions” of classic desserts read like apologies — thinner, less glossy, missing the thing that made the original worth making. This one isn’t that. It’s a direct rebuild of our original Valrhona Chocolate Délice, using the exact same set-ganache technique, with full-fat coconut cream standing in for dairy cream and whipped aquafaba replacing the egg that gives the ganache its structure.

More fine-dining kitchens are building genuine plant-based tasting menus now, and the pastry course is usually where the whole menu either holds together or falls apart. Chocolate, done properly, is one of the easiest places to make that transition invisible — cocoa solids don’t know whether the fat around them came from a cow or a coconut.

Same silky set. Same clean slice. Same gold leaf finish. Just no eggs, no dairy.

⭐ Why This Recipe

✔️ 100% plant-based
✔️ Same technique as our #1 recipe
✔️ Valrhona 70% dark chocolate
✔️ Coconut cream ganache
✔️ Aquafaba structure, no eggs
✔️ Silky, clean-slice texture
✔️ Restaurant plating guide
✔️ Gold leaf finish


Ingredients

Dark chocolate discs, organic coconut cream, and fresh raspberries laid out as vegan délice ingredients
The whole swap in one shot — coconut cream in place of dairy, no eggs anywhere on the counter.

Vegan Pastry Base

200g plain flour
90g cold vegan butter block, cubed
70g icing sugar, sifted
1 tbsp aquafaba
1 tsp vanilla extract
Pinch of fine sea salt
2–3 tbsp ice cold water

Vegan Ganache

280g Valrhona 70% dark chocolate (dairy-free)
250ml full-fat coconut cream (chilled overnight)
30g vegan butter
3 tbsp aquafaba, whipped to soft peaks
Pinch of fine sea salt

To Finish

Fresh raspberries
Raspberry coulis
Edible gold leaf
Flaky sea salt

The Method

Step 1 — Pastry. Pulse flour, icing sugar and salt in a food processor. Add cold vegan butter, pulse to fine crumbs. Add aquafaba and vanilla, pulse until the dough just comes together, adding ice water a teaspoon at a time if needed. Wrap and chill 1 hour.

Step 2. Preheat oven to 180°C. Roll pastry to 3mm, line a 23cm tart tin, blind bake with baking beans for 15 minutes, then bake 8 more minutes uncovered until golden. Cool completely.

Step 3 — The Coconut Cream. Scoop only the thick, solidified cream from the top of a chilled can of coconut cream, leaving the watery liquid behind — you need the fat, not the water, or the ganache will split. Heat this cream gently until just below a simmer.

Step 4 — The Ganache. Pour the hot coconut cream over chopped chocolate in three additions, stirring from the centre outward each time until glossy and fully emulsified. Stir in vegan butter and salt.

Step 5 — Whip the Aquafaba. Whip the chickpea brine to soft, glossy peaks — this replaces the structural role eggs play in the classic version. Fold it gently into the cooled (but still pourable) ganache in two additions, keeping as much air in as possible.

Step 6. Pour the ganache into the cooled tart shell. Tap gently to level and release any air bubbles. Refrigerate uncovered for a minimum of 4 hours, ideally overnight.

Step 7 — Michelin Plating. Slice with a hot knife, wiping clean between cuts. Plate off-centre with a small pool of raspberry coulis and three fresh raspberries. Finish with a single piece of gold leaf and a pinch of flaky sea salt.

Chef’s Secrets

01 — Cream Only, No Water

The single biggest failure point in vegan ganache is using the watery liquid from the coconut can instead of just the solid cream. Chill the can overnight and scoop only the firm top layer.

02 — Fold, Don’t Stir, the Aquafaba

Whipped aquafaba is doing the structural job eggs normally do. Stirring it in knocks the air out and the set will be dense instead of silky. Fold gently, like you would into a mousse.

03 — Check the Chocolate Label

Not all dark chocolate is dairy-free by default — some contain milk fat or are processed on shared lines. Valrhona’s 70% Guanaja and Caraïbe lines are dairy-free; always check the specific bar.

Part of Michelin Vegan Desserts — plant-based fine dining built on the same technique as our classic recipes. Read the original Valrhona Chocolate Délice to see where this technique started, or try our Vegan Tiramisu for another plant-based rebuild using the same pâte à bombe method.

FREE GUIDE ✦ INSTANT DOWNLOAD

Want to plate like a Michelin-star chef?

Get the free PDF guide — 5 plating secrets from a professional pastry kitchen, sent directly to your inbox.

Posted on

Salted Caramel Chocolate Délice — The Michelin Star Companion to Our Original Recipe

★ Michelin Star Series ★

Salted Caramel Chocolate Délice

A deep amber caramel layer beneath silky Valrhona ganache — the companion to our original Chocolate Délice recipe.

⏱ Prep: 1 hour  ·  ⏲ Chill: 4 hours  ·  🍫 Serves: 8  ·  ⭐ Difficulty: Advanced

Slice of salted caramel chocolate délice showing the distinct caramel layer beneath the ganache, finished with gold leaf and sea salt
Two distinct layers, one continuous flavour arc — bitter caramel, rich chocolate, and a clean mineral finish.

The Companion to Our Most-Loved Recipe

When we published our original Valrhona Chocolate Délice, it became the recipe readers kept coming back to. This is its natural evolution: the same silky, set ganache technique, but with a thin layer of deep amber caramel poured beneath it — cooked to exactly the point discussed in our piece on how sugar actually works — and finished with a generous scatter of Maldon salt.

The salt is not a garnish here. As we cover in our piece on salt in Michelin-star pastry, a correctly seasoned caramel tastes rounder and more complete, not saltier — it suppresses the slight bitterness of a deep caramel and lets the full flavour of the Valrhona chocolate come through undiminished.

Two layers, two textures, one continuous flavour arc from bitter caramel to rich chocolate to the clean mineral snap of salt at the very end.

⭐ Why This Recipe

✔️ Companion to our #1 recipe
✔️ Valrhona 70% chocolate
✔️ Deep amber caramel layer
✔️ Precise sugar-stage technique
✔️ Make-ahead friendly
✔️ Restaurant plating guide
✔️ Maldon salt finish
✔️ Gold leaf finishing touch


Ingredients

Pâte Sucrée

200g plain flour
100g unsalted butter, cold & cubed
80g icing sugar, sifted
2 large egg yolks
1 tsp vanilla extract
Pinch of fine sea salt
2–3 tbsp ice cold water

Salted Caramel Layer

150g caster sugar
40ml water
120ml double cream, warmed
30g unsalted butter
1 tsp fine sea salt

Chocolate Ganache

280g Valrhona 70% dark chocolate
280ml double cream
50ml whole milk
2 large eggs, room temperature
40g unsalted butter, softened
Edible gold leaf & Maldon sea salt flakes, to finish

The Method

Step 1 — Pastry. Pulse flour, icing sugar and salt in a food processor. Add cold butter, pulse to fine crumbs. Add yolks and vanilla, pulse until just combined. Wrap and chill 1 hour.

Step 2. Preheat oven to 180°C. Roll pastry to 3mm, line a 23cm tart tin, blind bake with baking beans for 15 minutes, then egg wash and bake 8 more minutes until golden. Cool completely.

Step 3 — The Caramel. Combine sugar and water in a heavy pan. Cook on medium-high without stirring until it reaches a deep amber, roughly 175°C. Remove from heat and carefully whisk in the warm cream — it will bubble vigorously. Whisk in butter and salt until glossy. Pour a thin, even layer into the cooled tart shell and refrigerate 20 minutes until just set.

Chef pouring hot caramel from a copper pan into a baked tart shell
Pour while the caramel is still fluid — it firms quickly once it hits the cooler pastry shell.

Step 4 — The Ganache. Heat cream and milk to just below a simmer. Pour over chopped chocolate in three additions, stirring from the centre outward each time until silky.

Glossy dark chocolate ganache being stirred smooth with a wooden spoon
Stir from the centre outward — this builds the emulsion gradually instead of shocking it.

Step 5. Cool ganache to 35°C. Whisk in eggs and softened butter until completely smooth.

Step 6. Reduce oven to 110°C. Pour the ganache gently over the set caramel layer. Bake 20–25 minutes — the outer 4cm should be set, the centre should still wobble.

Step 7. Cool 30 minutes, then refrigerate uncovered for a minimum of 4 hours, ideally overnight.

Step 8 — Michelin Plating. Slice with a hot knife, wiped clean between cuts, so both layers show distinctly. Place off-centre on a warm plate. Finish with gold leaf placed by tweezers and a scatter of Maldon salt crystals across the exposed caramel edge.

Chef’s Secrets

01 — The Caramel Colour

Stop too early and the caramel tastes flat and one-note. Push it to a proper deep amber and the bitterness balances the sweetness of the ganache above it.

02 — Let the Caramel Set First

Pouring warm ganache over unset caramel causes the two layers to merge into a muddy single layer. Twenty minutes in the fridge is the difference between two distinct textures and one.

03 — Salt at the End, Not Before

Fine salt goes into the caramel itself. Save the Maldon sea salt crystals for the final plate — their texture is the point, and they dissolve into nothing if added too early.

Part of the Michelin Star Series. This post shares its base technique with our original Valrhona Chocolate Délice — start there if this is your first délice.

As an Amazon Associate, All Cookings earns from qualifying purchases.

FREE GUIDE ✦ INSTANT DOWNLOAD

Want to plate like a Michelin-star chef?

Get the free PDF guide — 5 plating secrets from a professional pastry kitchen, sent directly to your inbox.

Posted on

The Three-Spoon Quenelle: A Michelin Pastry Chef’s Guide to the Perfect Shape

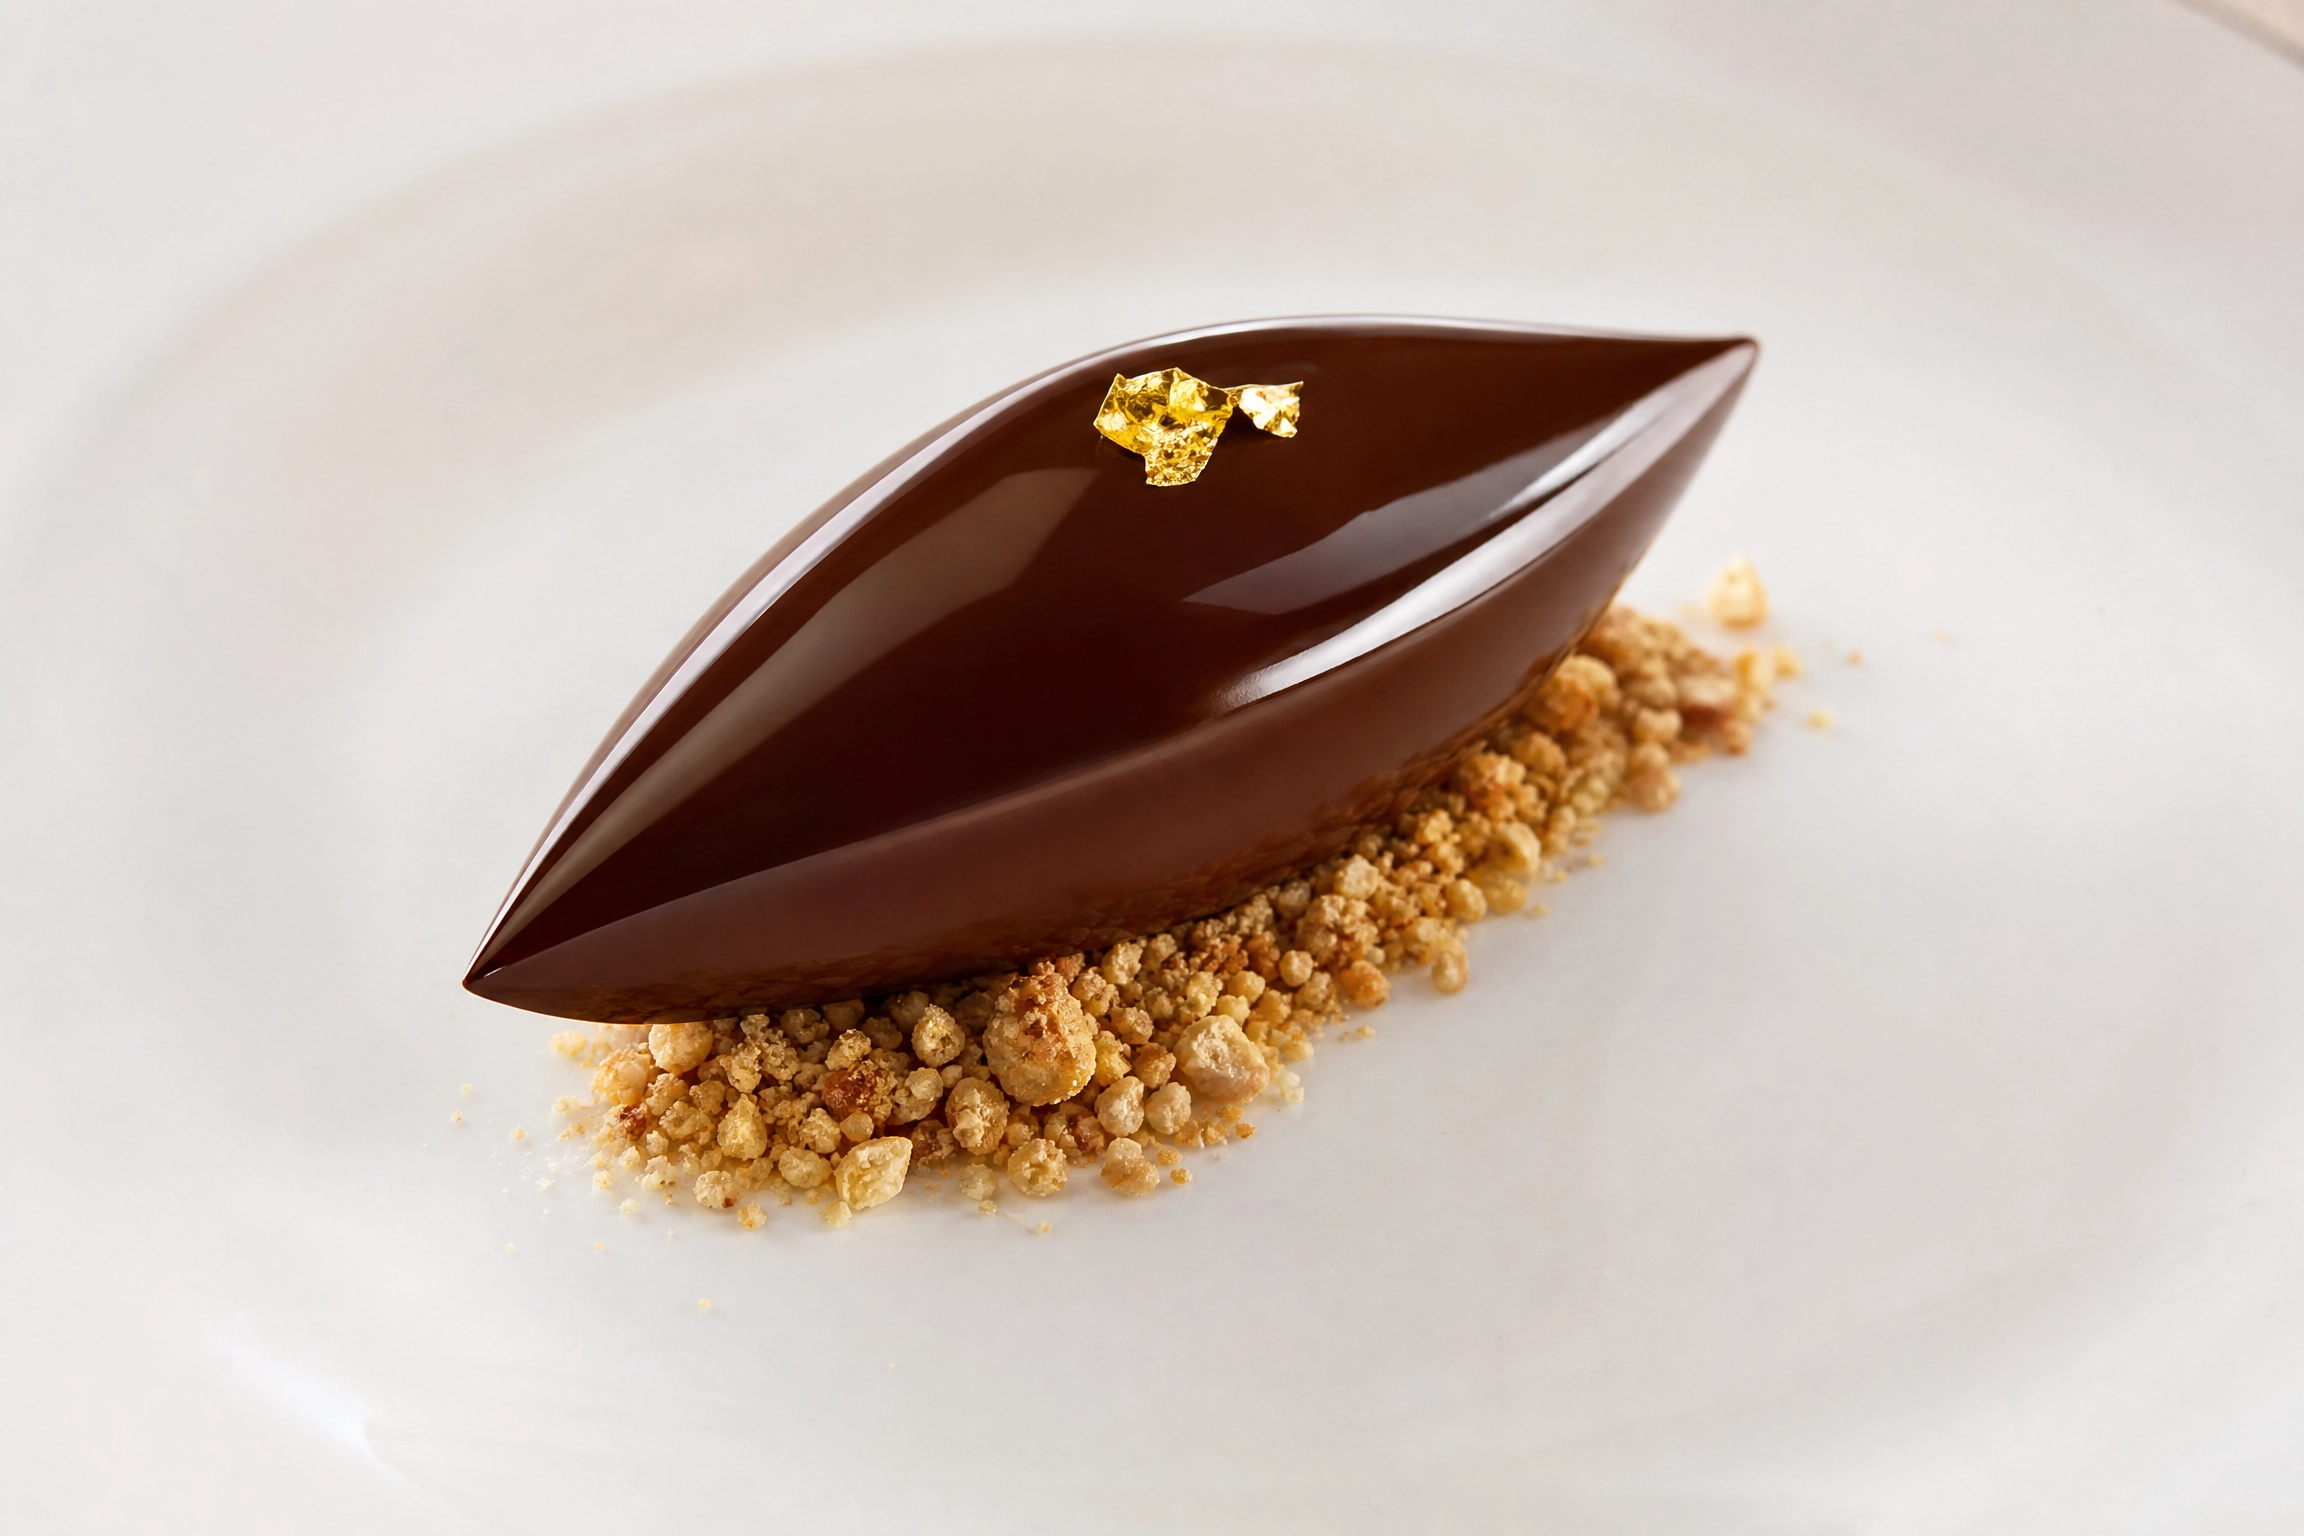
Glossy dark chocolate quenelle with gold leaf accent on a hazelnut praline crumble base

MICHELIN STAR SERIES · TECHNIQUE

Why the quenelle separates home cooks from professionals

Nothing signals a professional pastry bench faster than a clean quenelle. That elegant, three-sided oval of ice cream, mousse, or ganache sitting on a plate looks like a small miracle of shaping — but it’s not sculpting, and it’s not luck. It’s a controlled, repeatable motion, and once your hands learn it, you’ll never go back to an ice cream scoop for plating again.

The two spoons (or three, if you’re precise)

You need two identical dessert spoons, ideally oval-bowled rather than round. Warm both spoons slightly under hot water and dry them — a cold spoon drags and tears rather than gliding. Some chefs use a third spoon purely to release the quenelle onto the plate without fingerprints on the surface; it’s a nice-to-have, not a requirement when you’re starting out.

Two matching oval dessert spoons on marble beside a bowl of glossy chocolate ganache
Two identical oval-bowled spoons, warmed and dried — the only tools you need.

The motion, broken into three passes

  1. First pass: Drag the spoon across the surface of the mixture at roughly a 30° angle, scooping a shallow curl. Don’t press down — let the spoon’s edge do the work.
  2. Second pass: Transfer the curl to the second spoon, reshaping it with a single smooth motion rather than repeated scraping. Each extra pass makes the surface rougher, not smoother.
  3. Third pass: Pass it back once more to tighten the oval and sharpen the three edges. Stop here — over-handling melts the surface and kills the sheen.
Chef shaping a chocolate quenelle between two spoons, showing the transfer motion
The transfer between spoons — one smooth motion, not repeated scraping.

Temperature is doing more work than your hands are

Most failed quenelles aren’t a technique problem — they’re a temperature problem. Ice cream and frozen mousse need to sit out for a few minutes until they’re just pliable, not hard and not soupy. Ganache or cream-based quenelles need to be cool enough to hold shape but not so cold that they crack at the edges. If your mixture is tearing instead of curling, it’s almost always too cold; if it’s collapsing flat, it’s too warm.

Plating it

Place the quenelle with its pointed ends running diagonally across the plate rather than straight across — it reads as more dynamic and intentional. Set it down in one motion; don’t nudge it into position afterward, which flattens the sharp edges you just built. Pair it against a contrasting texture nearby — a tuile, a crumble, a swoosh of sauce — so the smooth curve of the quenelle has something to play against.

Vanilla bean quenelle plated diagonally on a dark plate with crumble and a mint leaf
The finished quenelle set diagonally, with crumble providing textural contrast against the smooth curve.

This technique is one of the five covered in full, with step-by-step photos, in our free Michelin-Star Plating Guide — grab it here.

Posted on

From Scratch to Elite: How to Build a Michelin-Level Restaurant

A Michelin star is never awarded to a menu. It’s awarded to a system — a restaurant where every detail, from the sourcing of a single herb to the timing of a server’s approach, operates at a level of consistency most operations never attempt. Building toward that level from nothing is a multi-year undertaking that spans concept, capital, kitchen discipline, and hospitality culture. Here’s how it’s done.

1. The Concept: Before Anything Else

Every elite restaurant starts with a singular point of view, not a broad menu. Michelin inspectors and top diners alike are evaluating whether a restaurant has a clear culinary identity — a chef’s voice, a defined technique, a story that explains why this restaurant exists and not another one like it.

Requirements at this stage:

  • A defined cuisine philosophy (regional, technique-driven, ingredient-led, or narrative-based)
  • A signature style that can be articulated in one sentence
  • A target guest profile — who this is for, and who it is deliberately not for
  • A location strategy that matches the concept’s price point and expected covers per night

Skipping this stage is the single most common reason ambitious restaurants stall at “very good” instead of reaching “exceptional.”

2. Capital and Business Structure

Fine dining economics are brutal before they are glamorous. Elite restaurants typically run on thin margins (often 3–9% net) sustained by high average checks, disciplined food cost control, and strong covers management.

What’s required:

  • Capital for buildout, which in fine dining runs significantly higher per square foot than casual dining due to kitchen equipment, design, and front-of-house finishes
  • 6–12 months of operating reserve, since reputation-building and star consideration take time
  • A realistic P&L built around food cost (typically 28–35%), labor cost (often 35–40% at this tier due to brigade depth), and rent
  • Legal structure, licensing, and — depending on jurisdiction — liquor licensing, which can itself take months

3. Location and Design

Location must match ambition. Elite dining rooms are usually 30–60 covers — small enough to maintain obsessive quality control, large enough to be financially viable. Design should communicate the concept nonverbally: lighting, spacing between tables, acoustics, and materials all signal fine dining before a single dish arrives.

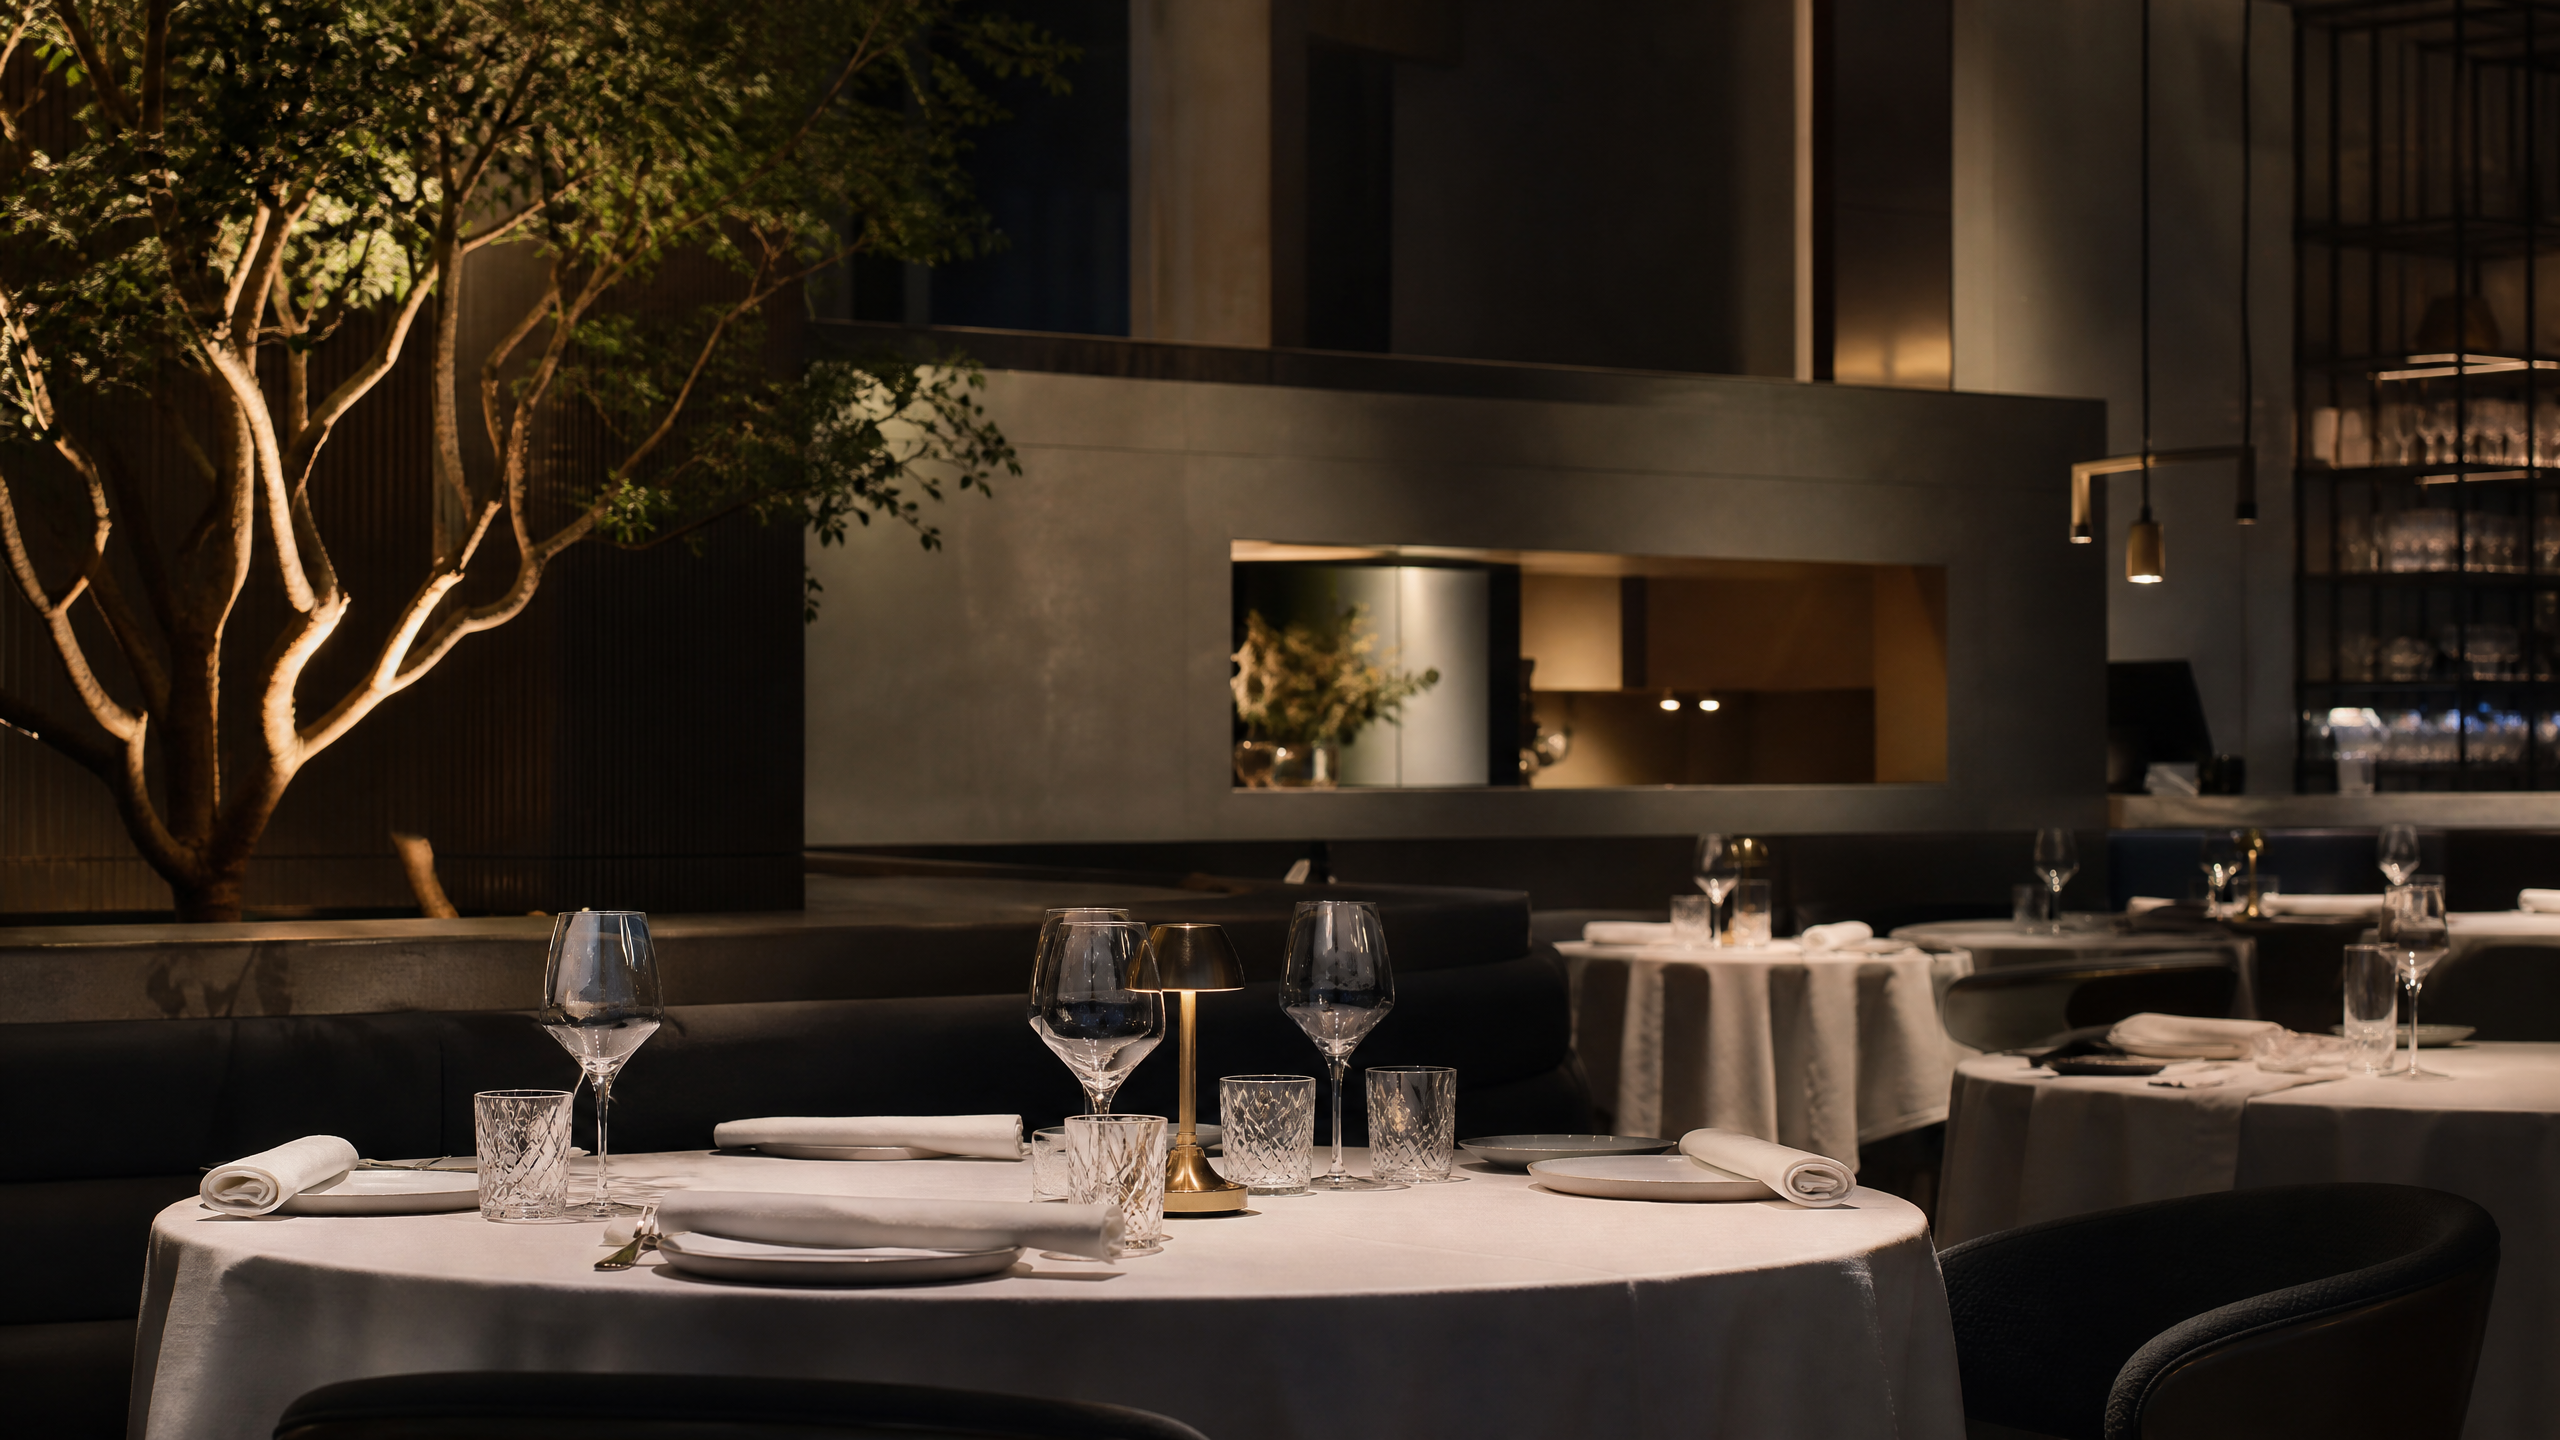
Elegant fine dining room set with white linens, crystal glassware, and warm ambient lighting beside a lit tree
Lighting, spacing, and materials signal fine dining before a single dish arrives.

4. Building the Kitchen Brigade

This is where most Michelin-track restaurants live or die. The classic brigade structure exists because elite service requires specialized, uncompromising execution at every station, night after night.

Core roles to build toward:

  • Executive Chef / Head Chef — sets vision, standards, and menu direction
  • Sous Chef — runs the pass, enforces consistency
  • Chef de Partie (by station: saucier, poissonnier, pâtissier, etc.)
  • Demi-Chef and Commis roles — the pipeline that trains future chefs de partie
  • Stagiaires (interns) — common at ambitious restaurants building a reputation

Non-negotiables:

  • Documented recipes (mise en place standards down to the gram)
  • A culture of tasting and correction before every service
  • Strict hygiene, HACCP, or equivalent food safety certification
  • Cross-training so no single absence breaks a station

5. Sourcing and Supply Chain

Michelin-level cooking depends on ingredient integrity as much as technique. This means:

Heirloom tomatoes, black winter truffles, and fresh herbs on a wooden board with a supplier tag reading Umbria, Italy
Direct relationships with specialist growers and foragers are what separate consistent kitchens from exceptional ones.
  • Direct relationships with specialist farmers, foragers, fishmongers, and purveyors — not just wholesale ordering
  • Seasonal menu structures that can flex with ingredient availability
  • Traceability for every core ingredient, since top restaurants are increasingly expected to speak to provenance
  • Backup suppliers for critical items, since running out of a hero ingredient mid-service is reputationally costly

6. Front of House and Service Standards

Michelin inspectors evaluate hospitality as rigorously as food. Service must be technically flawless — correct cutlery timing, wine service, plating explanation — and warm without being scripted; guests should feel genuine care, not choreography. Consistency matters most, since inspectors visit anonymously and expect the same standard regardless of who is dining.

Sommelier in formal attire pouring red wine tableside at a fine dining restaurant
Service must be technically flawless and warm at once — the standard inspectors expect on every visit, not just opening night.

Requirements:

  • A trained sommelier or wine director for pairing-driven menus
  • A reservations and guest-history system (tracking allergies, preferences, and past visits)
  • Staff trained specifically in luxury hospitality, not just service basics

7. Financial and Operational Management

Running the elite tier requires tighter management than any other restaurant category:

  • Daily food cost tracking, not monthly
  • Waste logs tied directly back to menu engineering
  • POS and inventory systems built for high-SKU, high-turnover ingredients
  • A staffing model that can absorb the labor cost of a deep brigade without collapsing margins

8. The Long Runway to Recognition

Michelin stars are not applied for — they’re the result of sustained, inspected excellence, often over 2–5 years of consistent operation. During that runway, the priority is building relationships with respected food critics and industry press, maintaining unwavering consistency even during slow periods, and reinvesting in training, sourcing, and refinement rather than expanding covers or opening a second location too early.

The Real Requirement

Above every checklist, what separates restaurants that reach elite status from those that plateau is obsessive, sustained attention to detail — sourced ingredients, technique, hospitality, and consistency — repeated at the same standard on a random Tuesday as on opening night. That discipline, more than capital or concept, is what Michelin recognition actually measures.

Posted on

How Sugar Actually Works: The Michelin Pastry Chef’s Guide to Sugar Stages

Every pastry student learns about sugar. Sweetness, caramelisation, syrup stages — these are foundational. What is rarely taught is that in professional kitchens, sugar is not used primarily for sweetness. It is used for texture, for colour, for moisture control, and for structural architecture. Sweetness is almost secondary.

Understanding how sugar behaves at different stages of cooking, and why Michelin pastry chefs use it the way they do, will change how you approach every dessert you make. Not because you will necessarily change your recipes, but because you will understand what you are doing rather than simply following instructions.

The Sugar Stages and What Each One Actually Does

Sugar dissolved in water and heated passes through identifiable physical stages, each with specific applications in pastry. The temperature references below assume you are working at sea level. Dubai and other high-altitude cities require small adjustments (subtract approximately 1°C per 300m of elevation).

Thread Stage: 106–113°C

Hot sugar syrup being poured into a stand mixer whipping egg whites into stiff peaks
Thread and soft-ball stage syrup poured into whipping egg whites — the base of Italian meringue.

At this temperature, sugar syrup dropped into cold water forms thin threads. In professional kitchens this stage is used for moistening baba, dipping fruits, and making spun sugar. It is also the stage used for Italian meringue preparation — the syrup is poured into whipping egg whites at exactly 121°C to pasteurise the eggs and create a stable, shiny meringue that holds structure without collapsing or weeping. Temperature precision at this stage is critical. Under 118°C and the meringue will weep. Over 124°C and the syrup will seize on contact with the whites.

Soft Ball: 113–118°C

Used for fudge, fondant and buttercream. The sugar retains moisture and produces a pliable, yielding texture when set. Fondant — the smooth, white confection used to glaze éclairs and mille-feuille — is made by cooking syrup to 116°C, cooling it to around 40°C, then agitating it vigorously until it crystallises into an opaque, smooth paste. The agitation is essential: it produces millions of microscopic crystals that give fondant its smooth melt on the palate. Large crystals produce a grainy texture — the sign of poor fondant technique.

Firm Ball: 118–121°C

The range for Italian meringue and most French buttercreams. At this temperature, the sugar solution is concentrated enough to pasteurise egg whites on contact, but fluid enough to incorporate smoothly without seizing. This is the stage professional pastry chefs return to most frequently — the same principle carries over to pâte à bombe, where hot syrup is poured into whipping egg yolks instead of whites, cooking them safely while building the aerated structure behind desserts like our Tropical Mango Coconut Tiramisu, and its plant-based counterpart, our Vegan Tiramisu, which uses the same technique with whipped aquafaba in place of egg yolks.

Hard Crack: 149–154°C

Pulled sugar at hard-crack stage stretched into fine golden threads by hand
Hard-crack sugar stretched into pulled sugar threads — the window to shape it is roughly 90 seconds.

Used for pulled sugar, blown sugar, nougatine and praline. At this temperature most of the water has evaporated and the sugar is almost entirely sucrose. It sets rigid and glassy on cooling. Nougatine — the caramelised almond brittle that forms the base of many plated desserts — is made at hard crack, combined with toasted nuts, then rolled thin and cut before it sets. The window between workable and brittle is roughly 90 seconds, which is why professional kitchens keep it under heat lamps during shaping.

Caramel: 160–180°C

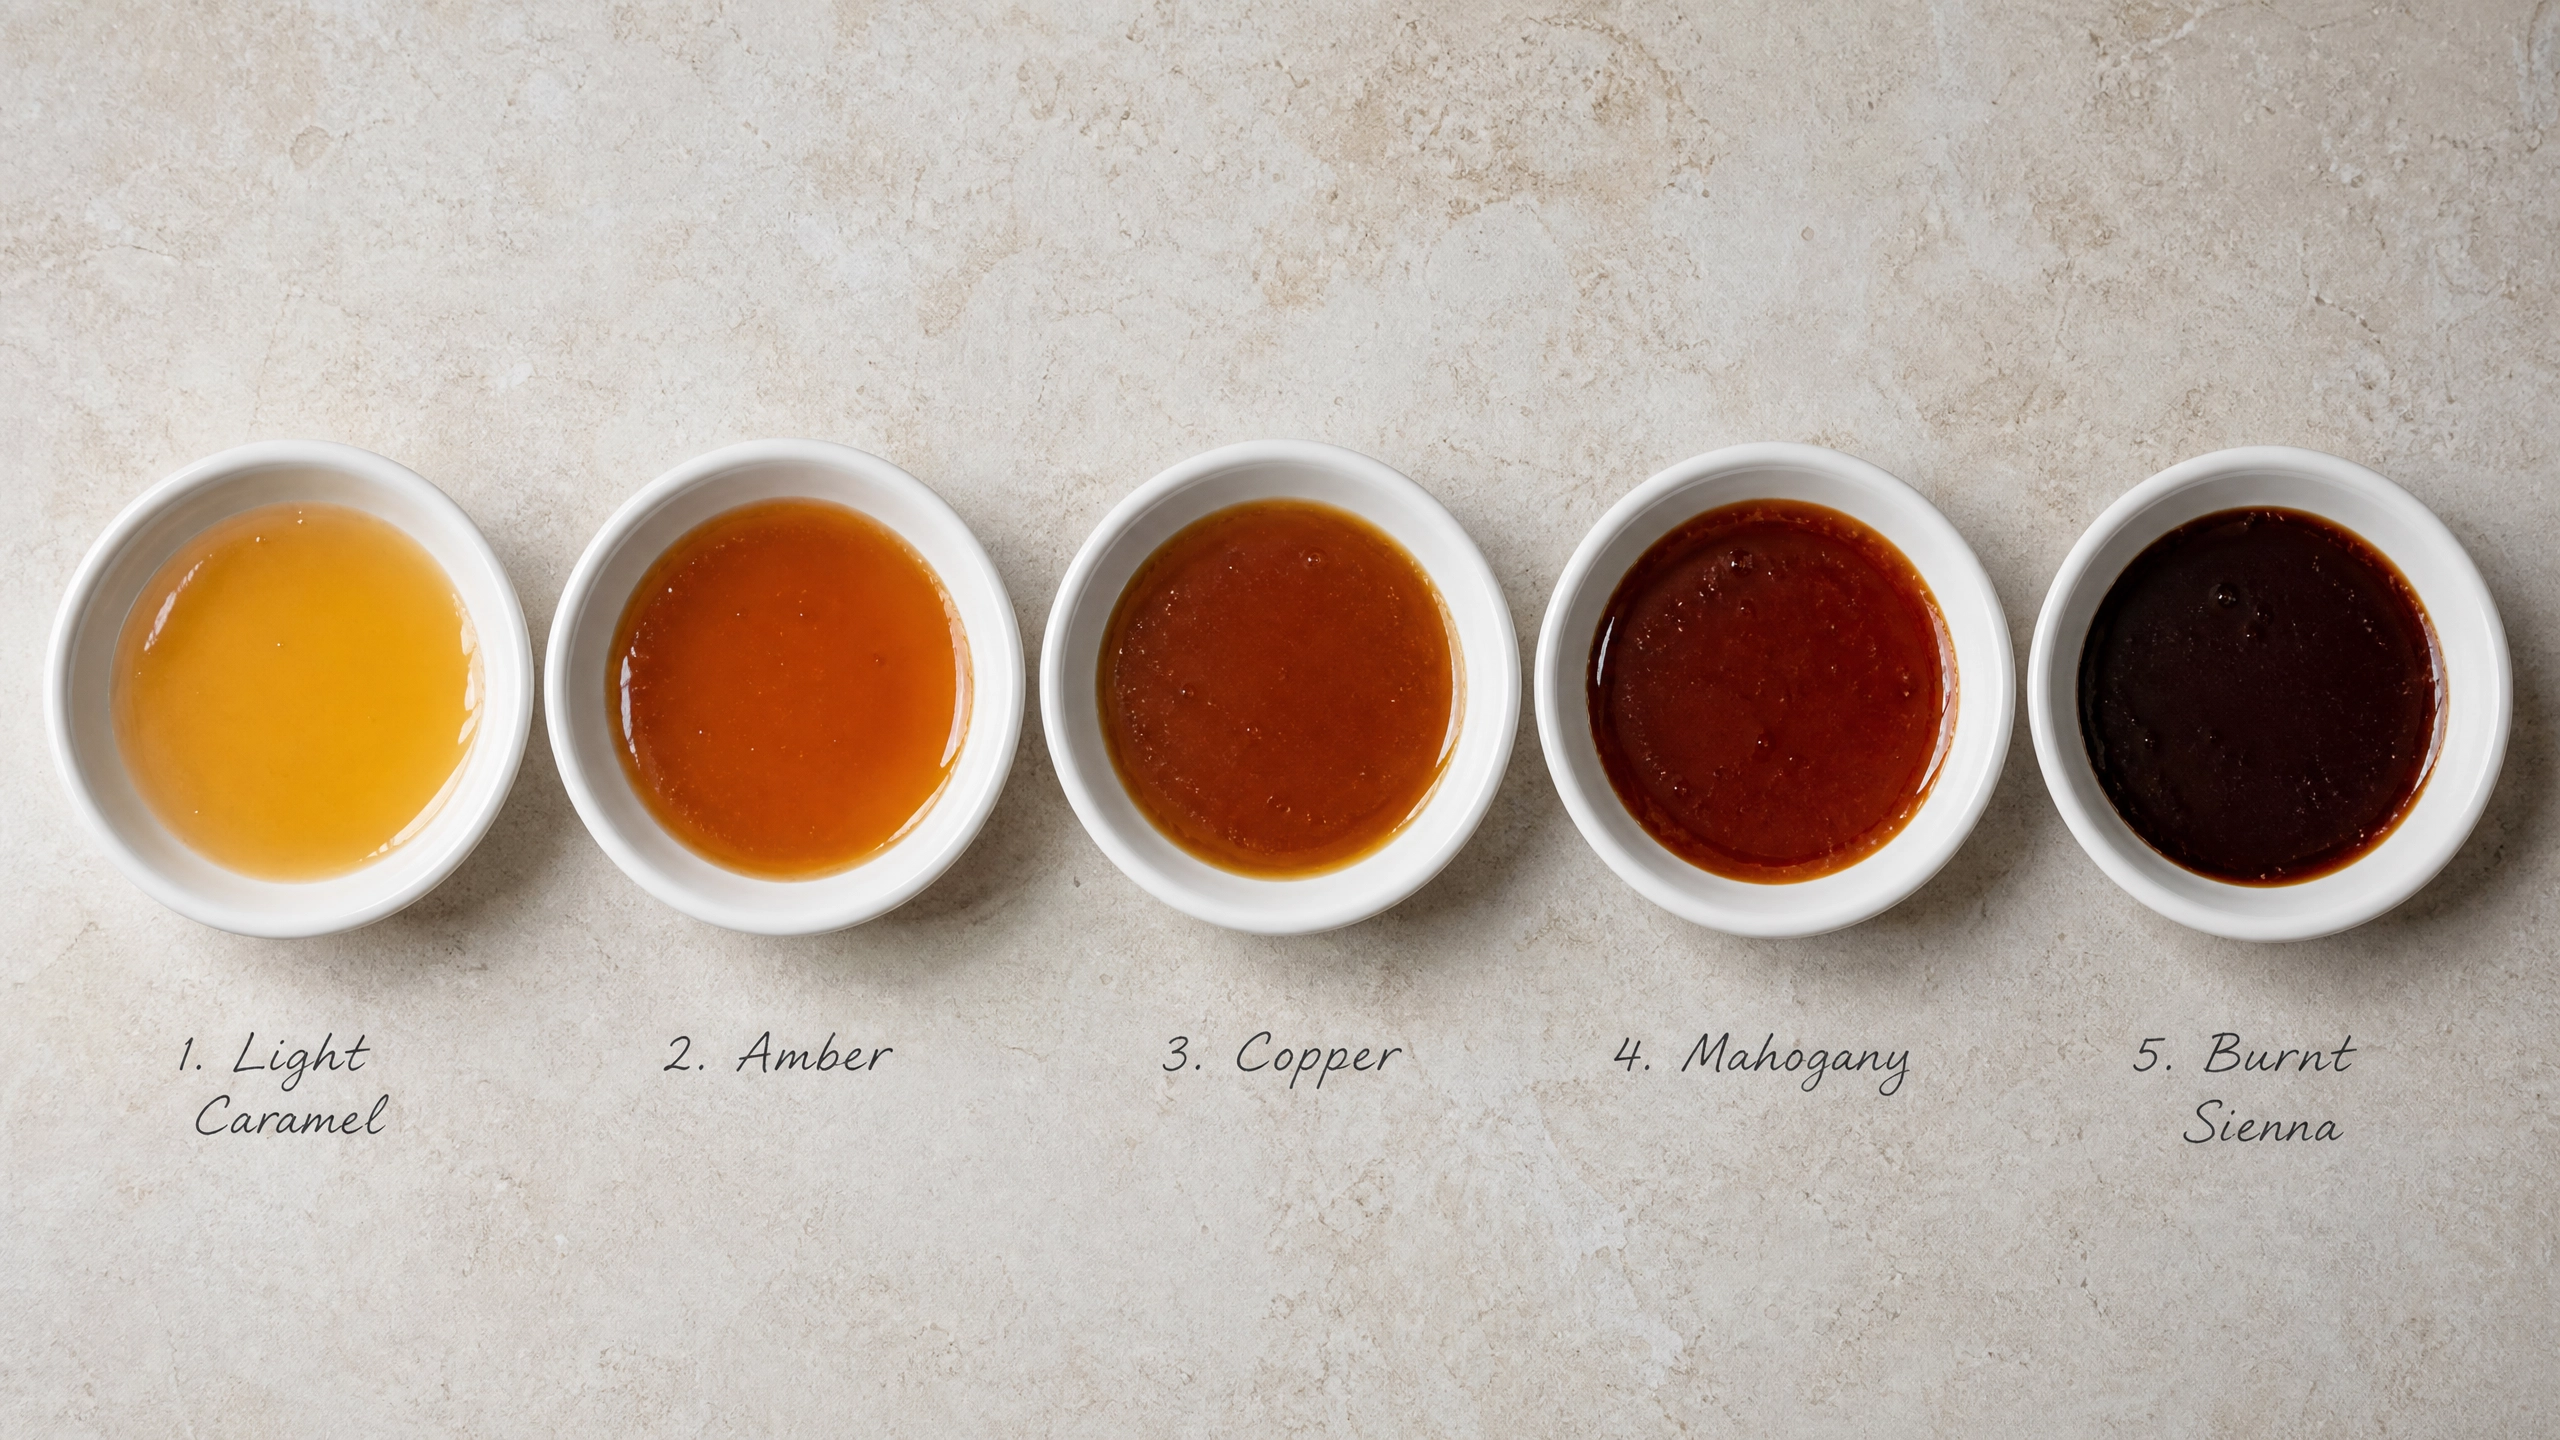
This is where sucrose breaks down entirely and the Maillard reaction and pyrolysis produce hundreds of new flavour compounds. The colour shifts from amber to deep copper to mahogany. The flavour shifts from butterscotch to bitter toffee to burnt. Professional pastry chefs typically use caramel at 170–175°C for sauces and glazes — complex, slightly bitter, with depth. Lighter caramel (160°C) is sweet and one-dimensional. Dark caramel (above 180°C) is acrid and irreversible. The difference between them is often less than 10 seconds on the heat — see our Salted Caramel Chocolate Délice for this exact stage in practice.

Five bowls of caramel at increasing stages of colour, labeled Light Caramel, Amber, Copper, Mahogany, and Burnt Sienna
The colour shift from light caramel to burnt sienna happens fast — often less than 10 seconds apart on the heat.

How Professional Pastry Chefs Actually Use These Stages

Sugar as Moisture Control

Sugar is hygroscopic — it attracts and retains moisture from its environment. This is why a cake or biscuit with higher sugar content stays moist longer than a lower-sugar one. Inverted sugar (glucose + fructose, made by hydrolysing sucrose) is even more hygroscopic than caster sugar, which is why professional ganaches and ice cream bases use trimoline or glucose syrup — it keeps textures soft and prevents crystallisation in frozen products.

Sugar as Structure

In a baked cake, sugar delays gluten network formation and protein coagulation by competing with them for water. This is why high-sugar cakes are tenderer than low-sugar ones — less gluten develops during mixing. The same principle explains why adding sugar to a meringue stabilises it: sugar raises the temperature at which the egg white proteins coagulate, giving you more time to build the foam before it sets. Remove sugar from a meringue and it collapses almost immediately when heated.

Sugar as Colour

Reducing sugars (glucose, fructose, lactose) participate in the Maillard reaction when heated with amino acids from proteins. This is what produces the golden colour on a baked croissant, the dark crust on a brioche, the caramelised surface of a crème brûlée. Professional egg washes include milk (lactose) precisely because the additional reducing sugar accelerates browning. A pure egg wash browns more slowly and less deeply than one extended with milk or cream.

The Professional Discipline: Temperature, Not Guesswork

Digital probe thermometer reading 121°C in a copper pan of boiling sugar syrup
Firm-ball stage at 121°C — the range for Italian meringue, confirmed by thermometer, not guesswork.

In a professional kitchen, sugar work is never done by eye alone. A probe thermometer is essential equipment, not optional. Home baking guides often suggest the “cold water test” as a substitute for a thermometer — dropping syrup into cold water and feeling the texture. It works in principle but introduces variables: the temperature of the water, the speed of your hands, the air temperature. A thermometer removes all of those variables.

If you bake seriously, a digital probe thermometer is the single piece of equipment that will improve your results more than any other purchase. Not a stand mixer. Not a silicone mat. A probe. Temperature is information. Without it, you are guessing.


Part of the Michelin Star Series on allcookings.com — the science and technique behind professional pastry, broken down for the serious home baker.

Posted on

Kouign-Amann: The Laminated Breton Pastry That Croissants Wish They Were

Kouign-Amann was invented in 1860 in Douarnenez, Brittany, by a baker named Yves-René Scordia who, by most accounts, simply ran out of brioche dough and improvised with bread dough, butter, and sugar. The result was an accident that became arguably the greatest laminated pastry France ever produced.

It is rarely made outside of Brittany, rarely taught, and consistently underestimated by pastry students who assume croissant dough is the pinnacle of lamination. It is not. Kouign-Amann is harder, more unforgiving, and produces a more extraordinary result when done correctly: a caramelised, lacquered crust surrounding a layered interior of buttery, chewy, salted pastry. Nothing else in the French canon tastes quite like it.

What Makes Kouign-Amann Different from Croissant

In croissant and pain au chocolat, the lamination is dry — you fold cold butter into cold dough, creating distinct, separate layers that puff and separate during baking. The result is airy, flaky, and crisp.

In Kouign-Amann, you laminate with sugar as well as butter. The sugar is folded into the final turns, which means it dissolves slightly into the fat during resting and then caramelises during baking. The layers do not separate cleanly — they fuse at the edges while remaining distinct in the centre, creating a hybrid of flaky lamination and caramelised toffee. The crust becomes a hard, brittle caramel shell. The interior is chewy and layered. The salt — always fleur de sel in Breton baking — cuts through the sweetness precisely.

This is not a delicate pastry. It is aggressive, loud, and completely addictive.

The Two Technical Challenges

1. The Dough Is Not Enriched

Croissant dough contains eggs, milk, and sugar that make the gluten easier to work with. Kouign-Amann uses a lean bread dough — flour, water, yeast, salt. That means higher gluten tension and a dough that tears more easily under the rolling pin. You must rest it aggressively between turns, minimum 20 minutes in the refrigerator. Do not rush the rests. Torn layers mean butter leaking out of the dough rather than staying within it, and the caramelisation will be uneven.

2. The Sugar Burns Before the Pastry Cooks

Sugar caramelises at around 160–180°C. A laminated pastry needs 200–210°C to bake properly. The solution is to bake in a cake tin with high sides, which contains the caramel and prevents it from burning on the base before the interior is cooked. The tin should be buttered generously and dusted with sugar — this creates the lacquered bottom crust that is the defining feature of the pastry. Bake on a low shelf so the base caramelises without the top burning. Expect smoke. It is normal.

Full Recipe: Classic Breton Kouign-Amann

Ingredients

Butter, flour, sugar, and fleur de sel laid out on a wooden table beside a Kouign-Amann chalkboard sign
Four ingredients, no shortcuts — the Breton butter is non-negotiable.

For the dough:

  • 300g strong white bread flour
  • 7g instant yeast
  • 6g fine salt
  • 180ml cold water

For lamination:

  • 200g cold unsalted butter (84% fat or higher — use Breton butter if available)
  • 150g caster sugar
  • 4g fleur de sel (plus extra to finish)

Method

Day 1 — Make the dough: Combine flour, yeast and salt. Add cold water and mix to a rough dough. Knead 8 minutes until smooth. The dough will be tight and slightly stiff — this is correct. Do not add water. Wrap and refrigerate overnight.

Day 2 — Prepare the butter block: Place cold butter between two sheets of parchment. Beat with a rolling pin into a 15 x 15cm square of even thickness. Refrigerate until firm but pliable (around 12°C — it should flex without cracking).

Laminate: Roll the dough into a 30 x 30cm square. Place the butter block in the centre at 45 degrees. Fold the four dough corners over the butter like an envelope, sealing the edges tightly. Roll out to 45 x 20cm. Fold into thirds (letter fold). Wrap and rest 20 minutes in the refrigerator. Repeat the roll and letter fold twice more, resting 20 minutes between each turn. After three letter folds, rest 30 minutes.

Hands folding dough over a block of cold butter, locking it in for lamination
Sealing the butter block in completely — any gaps mean uneven lamination later.

Add the sugar: Roll the dough to 40 x 30cm. Scatter the caster sugar and fleur de sel evenly over the surface. Fold into thirds, pressing lightly to embed the sugar. Roll gently to a round shape roughly the size of your tin. Rest 15 minutes refrigerated.

Tin and proof: Butter a 24cm round cake tin generously. Dust with caster sugar. Place the dough in the tin, pressing to the edges. Cover loosely and proof at room temperature for 45 minutes to 1 hour until slightly puffed and the dough fills the tin.

Bake: Preheat oven to 200°C. Scatter additional fleur de sel over the surface. Bake on the lowest shelf for 30–35 minutes until deep golden brown and caramel is actively bubbling around the edges. The top should be lacquered and hard. Remove from oven and turn out onto a wire rack immediately — if you wait, the caramel will set and fuse to the tin permanently.

Serve warm. Do not refrigerate — the caramel will soften and the texture will be lost.

How to Read a Correctly Made Kouign-Amann

Cross-section of a baked kouign-amann showing the caramelized crust and thin laminated layers
A correct cross-section: paper-thin layers throughout, with a hard caramel shell at the edge, not a soft crumb.

The base should be almost black in patches — that is correct caramelisation, not burning. The interior should tear into visible layers, chewy and slightly sticky from the integrated caramel. The fleur de sel should be audible in the first bite before it dissolves against the sweetness. If your Kouign-Amann is pale, sweet without bitterness, or soft throughout, it was underbaked. Take it further next time. This pastry is not afraid of heat.


Part of the Laminated Luxury Series on allcookings.com — a deep-dive into the most technical and rewarding laminated pastries in the French and European tradition.

Posted on

How Michelin Star Chefs Make Crème Caramel (And What You’re Probably Getting Wrong)

Crème caramel is one of those desserts that exposes you. No chocolate to hide behind. No decoration to distract from a flawed texture. Just egg, cream, sugar and heat — and the results will tell you exactly where your technique stands.

At Fouquet’s and in Michelin-starred kitchens across the world, pastry chefs have refined this dessert to a science. The gaps between a good crème caramel and a flawless one are not secrets — they are simply precision, ratio, and temperature control applied consistently.

The Three Mistakes That Ruin Most Crème Caramels

1. Wrong Egg Ratio

Most home recipes lean too heavily on whole eggs. Whole eggs are high in protein and set firm — which gives you a rubbery, bouncy custard instead of a trembling, silky one. Professional recipes use a blend of whole eggs and yolks only. The yolks add richness and emulsification without over-setting the structure. A reliable ratio for restaurant-quality crème caramel is 2 whole eggs + 4 yolks per 500ml of liquid. Adjust from there based on your mould depth and desired texture.

2. Boiling the Custard Base

Chef whisking hot infused cream into egg yolks for crème caramel custard base
Tempering hot cream into the egg yolks slowly prevents scrambling and keeps the custard silky.

When you heat your cream or milk to infuse it with vanilla, it should reach 80°C — never a rolling boil. Boiling destroys the protein structure of the cream and introduces air, both of which produce surface bubbles and uneven setting. Bring the liquid to just below simmering, infuse your vanilla for 10 minutes off heat, then temper slowly into the eggs. The word is temper, not pour — ladle the hot liquid in gradually while whisking constantly so the eggs never scramble.

3. Baking Too Hot or Without a Proper Bain-Marie

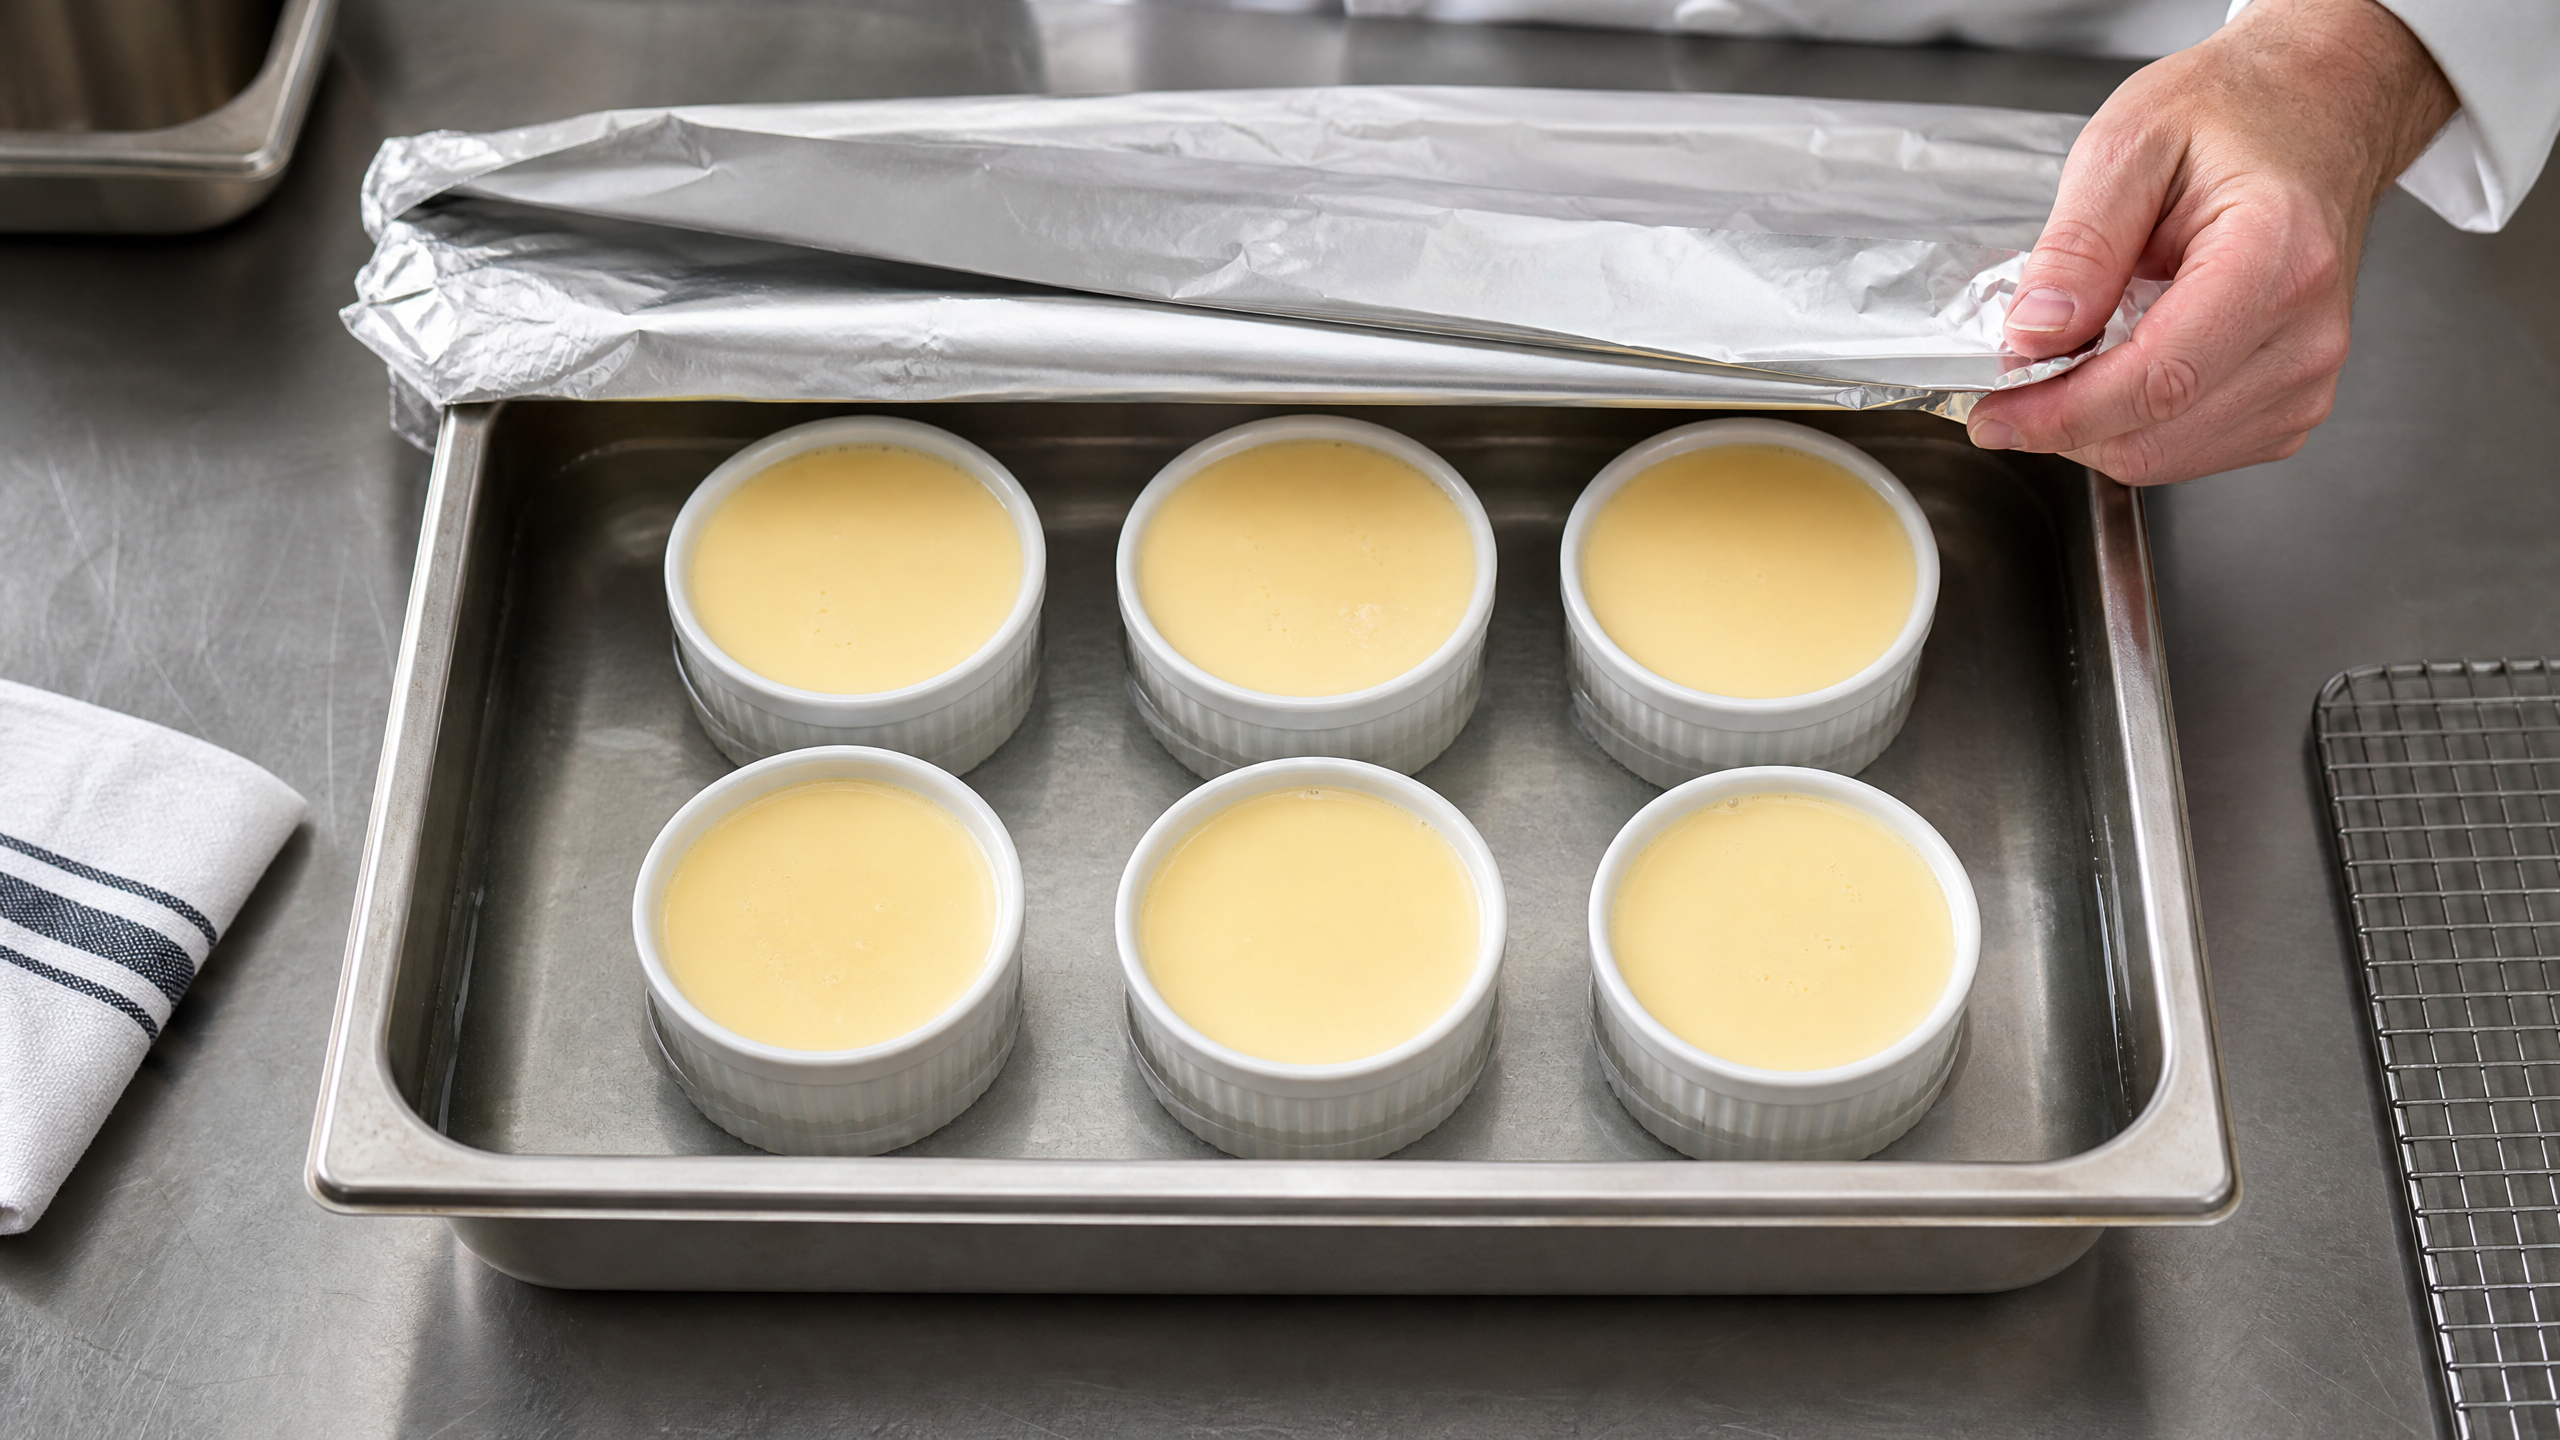
Custard should never exceed 85°C internally during baking. Above that temperature the proteins over-coagulate, releasing water — which is the source of that weeping, watery pool underneath your unmoulded custard. Professional kitchens bake crème caramel at 150°C in a deep bain-marie with water that comes at least two-thirds up the side of the moulds. The water moderates heat transfer and prevents hot spots. Cover the tray loosely with foil to stop a skin forming on the surface.

The Caramel: Where Most People Rush and Always Regret It

The caramel base defines the flavour profile of the entire dessert. Cook it too light and you get bland sweetness. Cook it too dark and bitterness takes over. The professional target is a deep amber, around 175–180°C — at this temperature the sugar has caramelised fully, developing the bitter, complex top notes that balance the richness of the custard. Do not stir once the sugar begins colouring. Swirl the pan gently to even out hot spots, then remove from heat the moment it hits that deep copper colour. It will continue cooking for several seconds after leaving the heat.

Digital thermometer reading 175 degrees Celsius in bubbling amber caramel
175°C, deep amber — the target most home recipes miss because they go by colour alone rather than a thermometer.

Pour the caramel into your moulds immediately and tilt to coat the base evenly. Work fast — caramel sets in seconds. If it seizes before you coat the mould, do not attempt to reheat in the mould. Start the caramel again.

The Michelin Kitchen Method: Full Walkthrough

Ingredients (serves 6)

  • 500ml whole milk
  • 200ml double cream
  • 2 whole eggs
  • 4 egg yolks
  • 130g caster sugar (for custard)
  • 1 vanilla pod, split and scraped
  • For the caramel: 150g caster sugar + 40ml water

Method

Caramel: Combine sugar and water in a heavy pan. Cook on medium-high without stirring until the caramel reaches deep amber (175–180°C). Pour immediately into 6 lightly greased ramekins. Leave to set.

Custard: Combine milk, cream and vanilla pod in a saucepan. Heat to 80°C. Remove from heat and infuse 10 minutes. Meanwhile, whisk eggs, yolks and sugar until pale — do not over-aerate. Slowly ladle the warm cream mixture into the egg mixture, whisking continuously. Strain through a fine sieve. Skim any surface bubbles with a spoon or blowtorch pass.

Bake: Preheat oven to 150°C. Pour custard into prepared ramekins. Place in a deep baking tray. Fill with hot water to two-thirds the height of the ramekins. Cover loosely with foil. Bake 35–45 minutes — the custard should be set at the edges with a gentle wobble in the centre. Remove from the bain-marie and cool to room temperature. Refrigerate a minimum of 4 hours, preferably overnight.

Ramekins of crème caramel custard in a water bath, covered with foil, ready to bake
A proper bain-marie — water two-thirds up the ramekins, foil loosely covering — keeps the custard from ever overheating.

To unmould: Run a thin knife around the inside edge of the ramekin. Place a plate over the top, invert sharply and hold for 3 seconds before lifting the ramekin. The caramel will cascade over the custard.

What the Texture Should Tell You

A correctly made crème caramel trembles like set jelly when you shake the plate. It should slice cleanly, hold its shape for a few seconds, then slowly yield. The surface should be smooth and mirror-like with no bubbles or pitting. Bubbles mean the custard was baked too hot or the base was over-aerated. Pitting means the bain-marie water was boiling actively — it should never exceed 90°C.

Spoon cutting cleanly into an unmoulded crème caramel, revealing the smooth custard interior
A clean cut with no weeping liquid — the sign of a bain-marie that never boiled and a custard that never overheated.

This is the gap between home baking and professional patisserie: not the recipe, but the discipline around temperature at every stage. Master the temperature, and crème caramel becomes one of the most reliable, impressive desserts in your repertoire.


This is part of the Michelin Star Series on allcookings.com — restaurant-quality pastry techniques broken down for the serious home baker. Explore more recipes in the series.