★ Michelin Star Series ★
Valrhona Chocolate Délice with Raspberry Coulis & Gold Leaf
The silkiest, most intensely chocolatey dessert in fine dining — perfected for the home kitchen.
⏱ Prep: 45 mins · ⏲ Chill: 4 hours · 🍫 Serves: 8 · ⭐ Difficulty: Advanced

What is a Chocolate Délice?
A chocolate délice is the jewel of the fine dining dessert trolley. The word délice means delight in French — and this dessert earns that name in every possible way. It is a set chocolate ganache tart of extraordinary silkiness, made with the finest dark chocolate, double cream and a whisper of sea salt, poured into a buttery sweet pastry shell and chilled until it trembles.
You will find this dessert on the menus of Michelin-starred restaurants across Paris, London and New York — plated with mathematical precision, finished with edible gold leaf, and accompanied by a vivid raspberry coulis that cuts through the richness with electric acidity.
Today I am going to show you how to make it at home — with the exact technique, the exact ratios, and the exact finishing touches that separate a délice from every other chocolate dessert.
⭐ Why This Recipe
✔️ Michelin star technique
✔️ Valrhona 70% chocolate
✔️ Perfect for dinner parties
✔️ Make-ahead friendly
✔️ Restaurant plating guide
✔️ Raspberry coulis included
✔️ Gold leaf finishing touch
✔️ Gluten-free option included
Ingredients
Pâte Sucrée
200g plain flour
100g unsalted butter, cold & cubed
80g icing sugar, sifted
2 large egg yolks
1 tsp vanilla extract
Pinch of fine sea salt
2–3 tbsp ice cold water
Chocolate Délice Filling
300g Valrhona 70% dark chocolate
300ml double cream
50ml whole milk
3 large eggs, room temperature
50g unsalted butter, softened
1 tsp flaky sea salt (Maldon)
1 tsp vanilla bean paste
Raspberry Coulis & Finish
250g fresh raspberries
50g caster sugar
1 tbsp lemon juice
Edible gold leaf sheets
Fresh raspberries
Micro herbs
Flaky sea salt crystals

The Method
Step 1. In a food processor, pulse the flour, icing sugar and salt together. Add the cold cubed butter and pulse until the mixture resembles fine breadcrumbs.
Step 2. Add the egg yolks and vanilla. Pulse until just coming together. Wrap in cling film and refrigerate for 1 hour minimum.
Step 3. Preheat oven to 180°C. Roll pastry to 3mm thickness. Line a 23cm tart tin and blind bake with baking beans for 15 minutes. Egg wash, then bake 8 more minutes until golden. Cool completely.
Step 4. Heat cream and milk to just below a simmer. Pour over chopped Valrhona chocolate in three additions, stirring from the centre outward each time.
Step 5. Cool ganache to exactly 35°C. Add whisked eggs, softened butter, vanilla paste and sea salt. Stir until completely silky and smooth.
Step 6. Reduce oven to 110°C. Pour filling into the cooled tart shell. Bake 20–25 minutes — the outer 4cm should be set but the centre must still wobble like barely-ripe jelly.
Step 7. Cool 30 minutes then refrigerate uncovered for a minimum of 4 hours. Overnight gives the best texture.
Step 8. For coulis: cook raspberries, sugar and lemon juice for 5–7 minutes. Pass through a fine sieve. Cool and refrigerate.
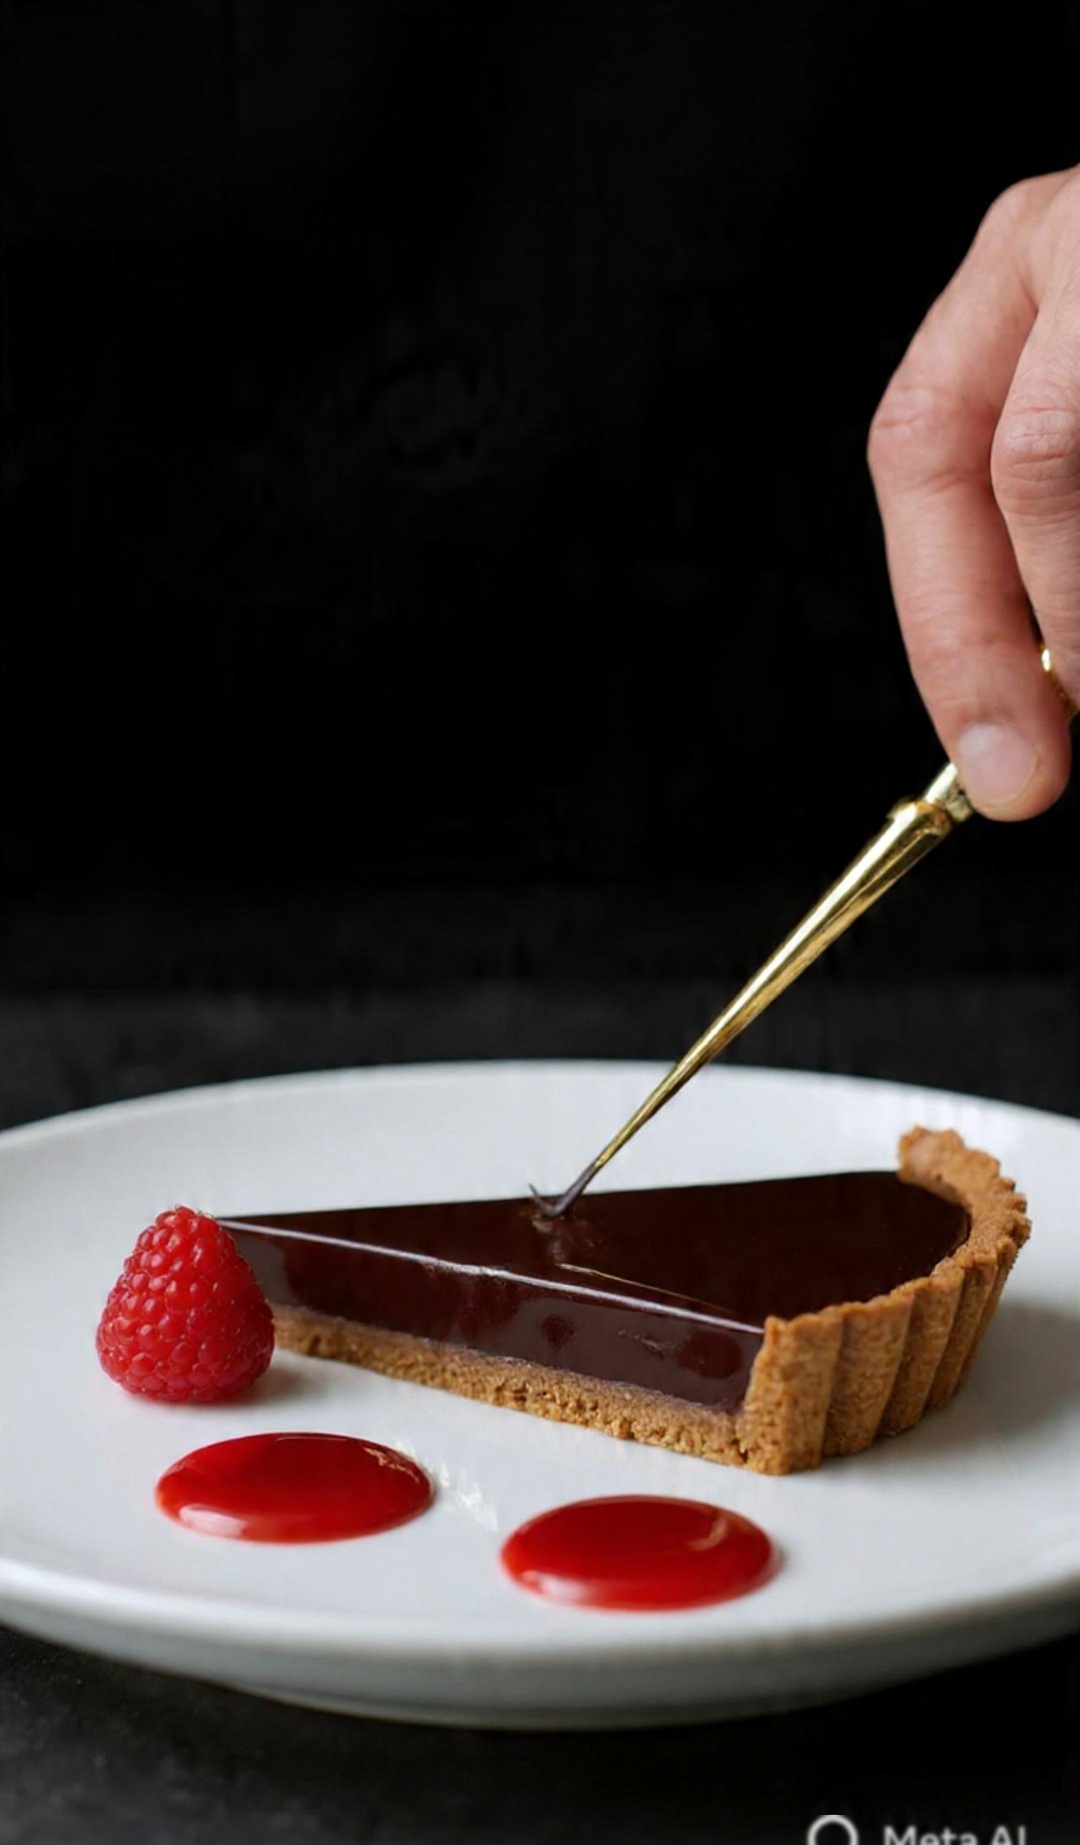
Step 9. Slice with a hot knife wiped clean between every cut. Place the slice off-centre on a warm white plate.
Step 10 — Michelin Plating. Create three descending pools of coulis alongside the slice. Place gold leaf with tweezers. Finish with three Maldon crystals and one micro herb.
Chef’s Secrets
01 — Temperature
The filling must be poured at exactly 35°C. Too hot and it cooks the eggs. Too cold and it sets before levelling. Use a digital thermometer — it is non-negotiable.
02 — The Wobble
Ready when the outer 4cm is set and the centre wobbles like barely-ripe jelly. If it ripples all the way to the edge it needs more time.
03 — The Plating
Gold leaf placed with tweezers. Three pools of coulis descending in size. Slice placed off-centre. Three Maldon crystals. One micro herb.
The Professional Kitchen Toolkit
🍫 Valrhona 70% Chocolate
View on Amazon →
🥧 Loose-Bottomed Tart Tin
View on Amazon →
🌡️ Digital Thermometer
View on Amazon →
🥊 Fine Mesh Sieve
View on Amazon →
✨ Edible Gold Leaf Sheets
View on Amazon →
🧰 Plating Tweezers
View on Amazon →
Disclosure: This post contains affiliate links. All Cookings earns a small commission at no extra cost to you.
FREE GUIDE ✦ INSTANT DOWNLOAD
Want to plate like a Michelin-star chef?
Get the free PDF guide — 5 plating secrets from a professional pastry kitchen, sent directly to your inbox.