Posted on

Fluffy Lemon Blueberry Muffins — Vegan & Dairy-Free

Split vegan lemon blueberry muffin showing burst blueberries inside with sugar crystals and bokeh background

Allergy-Friendly Series — Vegan · Dairy-Free · Egg-Free

Cloud-light, bakery-domed muffins bursting with fresh blueberries and finished with a sharp lemon glaze. The secret is the oat milk buttermilk — oat milk and apple cider vinegar left to curdle for five minutes — which gives the crumb an extraordinary tenderness without a single egg or drop of dairy. The lemon glaze sets into a thin, glossy shell that photographs beautifully and tastes even better.

Fluffy vegan lemon blueberry muffin with sugar falling from above on a dark plate with fresh blueberries

Why This Recipe Works

The vegan buttermilk is the engine of this recipe. When oat milk and apple cider vinegar are combined, the acid curdles the milk proteins, creating a tangy, slightly thickened liquid that reacts with the baking soda during baking — producing a rapid, dramatic rise and an open, tender crumb. No eggs are needed because the structure comes from gluten development (light mixing only) and the lift from the leavening reaction. The lemon does double work here: the juice adds brightness to the batter and the glaze, while the zest carries the floral top note that makes these muffins smell extraordinary fresh from the oven.

Ingredient Notes

Oat milk: The best plant milk for this recipe. Its neutral flavour and protein content create a more convincing buttermilk than almond or rice milk. Use unsweetened — sweetened oat milk will throw off the sugar balance.

Apple cider vinegar: The acid that curdles the milk into buttermilk and activates the baking soda. White wine vinegar works as a substitute. Do not use balsamic.

Neutral oil: Sunflower, avocado, or light rapeseed. Oil keeps muffins moist for longer than butter — these are just as good on day two as day one.

Fresh blueberries: Fresh only for the best result. Frozen blueberries can be used in a pinch — do not thaw them first, and fold them in straight from frozen to prevent the batter turning purple.

Lemon: Both zest and juice are used. Zest into the batter, juice into the glaze. Use unwaxed lemons if possible.

Ingredients

Muffin Batter

  • 2 cups (240g) all-purpose flour
  • ¾ cup (150g) cane sugar
  • 2 tsp baking powder
  • ¼ tsp baking soda
  • ½ tsp fine sea salt
  • 1 cup (240ml) unsweetened oat milk
  • 1 tbsp apple cider vinegar
  • ⅓ cup (80ml) neutral oil (sunflower or avocado)
  • 1 lemon, zested and juiced
  • 1 tsp vanilla extract
  • 1½ cups (220g) fresh blueberries

Lemon Glaze

  • 1 cup (120g) powdered sugar
  • 2 tbsp fresh lemon juice

Method

Step 1 — Prep

Preheat oven to 190°C (375°F). Line a 12-cup muffin tin with paper liners or grease well.

Step 2 — Make Vegan Buttermilk

In a small bowl or measuring cup, combine the oat milk and apple cider vinegar. Stir briefly and let sit for 5 minutes until slightly curdled — this is your vegan buttermilk.

Step 3 — Dry Ingredients

In a large bowl, whisk together the flour, cane sugar, baking powder, baking soda, and fine sea salt.

Step 4 — Wet Ingredients

Whisk the neutral oil, lemon zest and juice, and vanilla extract into the buttermilk mixture until combined.

Step 5 — Combine

Pour the wet ingredients into the dry and fold gently with a spatula until just combined — a few streaks of flour are fine. Toss the blueberries in 1 tsp of flour, then fold them in last. Do not overmix.

Step 6 — Bake

Divide batter evenly among the 12 muffin cups, filling each to just below the rim. Bake for 20–23 minutes until a toothpick inserted in the centre comes out clean and the tops are lightly golden.

Step 7 — Glaze

Let muffins cool in the tin for 5 minutes, then transfer to a wire rack. Whisk together the powdered sugar and fresh lemon juice until smooth and pourable. Once muffins are just warm (not hot), spoon the glaze over the tops and let it drip down the sides.

Serving & Storage

Best served warm or at room temperature on the day of baking, when the glaze is still slightly soft and the blueberries are at their most jammy. They make an excellent breakfast alongside oat milk flat white or a simple afternoon snack.

Store in an airtight container at room temperature for up to 3 days. To refresh them the next day, warm in an oven at 150°C for 5 minutes. They also freeze well — freeze unglazed and add fresh glaze after thawing.

Frequently Asked Questions

Can I use frozen blueberries? Yes — do not thaw them. Fold in straight from frozen to prevent the batter turning blue. The bake time may increase by 2–3 minutes.

Can I swap the oat milk? Soy milk is the next best option for vegan buttermilk as it curdles well. Almond or coconut milk will work but produce a slightly less tender crumb.

Why did my muffins come out flat? Most likely overmixing or old baking powder. Mix until just combined — lumps are fine. Check that your baking powder is less than 6 months old.

How do I get a bakery-style domed top? Fill the cups all the way to the top and start at 220°C (425°F) for 5 minutes, then reduce to 175°C (350°F) for the remaining time. The burst of initial heat forces a dramatic dome before the crust sets.

Can I make these gluten-free? Yes — use a 1:1 gluten-free flour blend. The texture will be slightly more delicate but the muffins will still rise and hold their shape.

Chef’s Note

The flour-dusted blueberry trick is not optional — it genuinely prevents sinking. And resist the urge to open the oven door in the first 15 minutes: the thermal shock will collapse the dome before it has a chance to set.

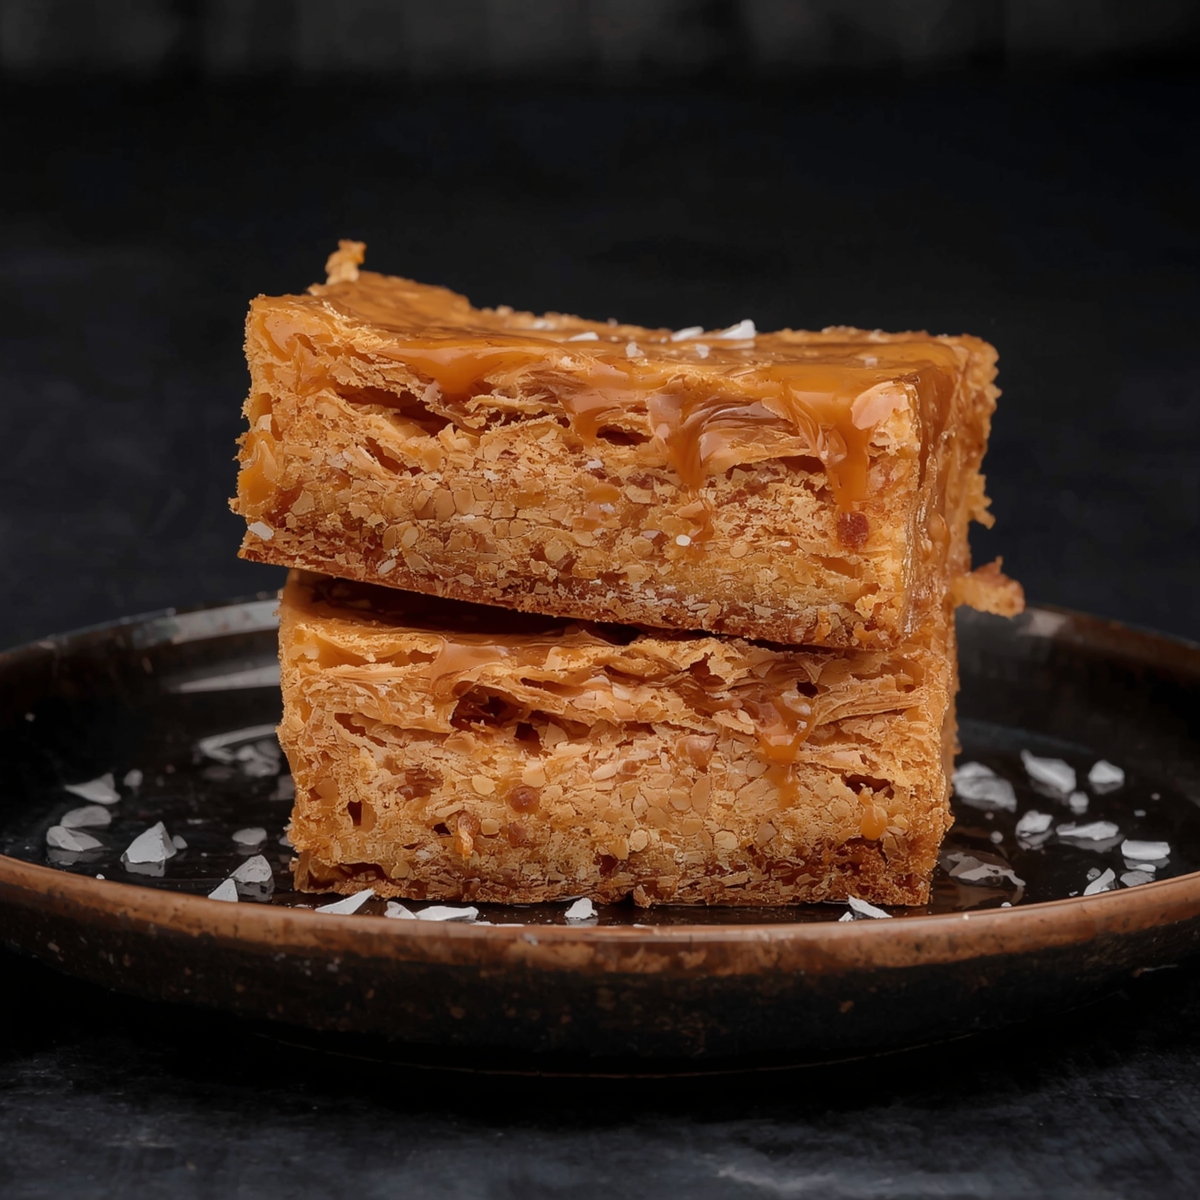
For more allergy-friendly recipes, visit our Allergy-Friendly collection, or try the Salted Caramel Tahini Blondies — another crowd-pleaser with zero dairy or eggs.


A fully vegan recipe from allcookings.com — no eggs, no dairy, no compromise.

Posted on

Salted Caramel Tahini Blondies — Vegan & Fudgy

Salted caramel tahini blondies stacked on a dark plate with caramel drizzle and flaky sea salt

Allergy-Friendly Series — Vegan · Dairy-Free · Egg-Free

These blondies prove that vegan baking doesn’t require compromise. Tahini takes the place of butter — adding a deep, nutty richness that browns slightly in the oven. The coconut caramel swirl on top creates a sticky, lacquered finish that is impossible to resist. Fudgy in the centre, set at the edges, and finished with flaky sea salt: this is the bar that converts sceptics.

Why This Recipe Works

Most vegan bakes sacrifice texture for ethics. This one does not. The combination of tahini and coconut oil mimics the fat content of butter almost exactly — tahini brings emulsification and depth, coconut oil brings structure and a clean melt. The flax egg binds the batter without adding any detectable flavour, and the brown sugar caramelises beautifully in the oven, giving the blondie its signature chew and golden colour. The coconut caramel swirl is made separately and folded in at the last moment, which means it stays intact as a distinct ribbon rather than disappearing into the batter.

Ingredient Notes

Tahini: Use a runny, well-stirred tahini — not one that has separated and gone solid at the top. Light tahini (hulled sesame) is milder and works better here than dark (unhulled), which can make the blondie slightly bitter.

Coconut oil: Melted and cooled. Refined coconut oil has no detectable coconut flavour; unrefined will add a faint tropical note — either works.

Flax egg: 1 tbsp ground flaxseed + 3 tbsp water, rested for 5 minutes until gel-like. This is the binder. Do not skip the resting time or the batter will be too loose.

Coconut cream: Full-fat only. Light coconut cream will not reduce to a proper caramel — it stays too liquid and will make the top of the blondie wet rather than lacquered.

Coconut sugar: Gives the caramel its deep, slightly smoky flavour. Brown sugar works as a substitute if needed.

Ingredients

Blondie Batter

  • 1½ cups (190g) all-purpose flour
  • 1 cup (200g) brown sugar, packed
  • ½ cup (125ml) tahini, well-stirred
  • ⅓ cup (80ml) coconut oil, melted and cooled
  • 1 flax egg (1 tbsp ground flaxseed + 3 tbsp water, rested 5 min)
  • 1 tsp vanilla extract
  • 1 tsp baking powder
  • ½ tsp fine sea salt

Vegan Salted Caramel

  • ½ cup (125ml) full-fat coconut cream
  • ¼ cup (50g) coconut sugar
  • ½ tsp flaky sea salt, for topping

Method

Step 1 — Prep

Preheat oven to 175°C (350°F). Line an 8×8-inch baking pan with parchment paper, leaving an overhang on two sides for easy removal.

Step 2 — Make the Caramel

In a small saucepan over medium heat, combine the coconut cream and coconut sugar. Stir constantly until thickened and golden, about 5–6 minutes. Remove from heat and set aside to cool slightly — it will thicken further as it cools.

Step 3 — Make the Batter

In a large bowl, whisk together the tahini, melted coconut oil, flax egg, and vanilla extract until smooth and glossy. Add the brown sugar and whisk again until fully incorporated.

Step 4 — Combine

Add the flour, baking powder, and fine sea salt to the wet mixture. Stir until just combined — don’t overmix. The batter will be thick.

Step 5 — Swirl

Spread the batter evenly into the prepared pan. Drizzle the caramel over the top and use a butter knife or skewer to swirl it gently through the batter in long, sweeping motions.

Step 6 — Bake

Bake for 22–25 minutes, until the edges are set and a toothpick inserted in the centre comes out with just a few moist crumbs. Sprinkle with flaky sea salt as soon as they come out of the oven.

Step 7 — Cool & Slice

Let cool completely in the pan before lifting out and slicing into 16 squares. The texture improves significantly after 1 hour at room temperature as the caramel sets.

Serving & Storage

Serve at room temperature for the best texture — straight from the fridge they are denser and the caramel loses some of its chew. These blondies are excellent alongside a strong coffee or a scoop of coconut ice cream for a more indulgent dessert.

Store in an airtight container at room temperature for up to 4 days. They freeze well for up to 1 month — wrap individual squares in cling film before freezing and defrost at room temperature for 30 minutes.

Frequently Asked Questions

Can I substitute the tahini? Almond butter or cashew butter both work well as a 1:1 swap. The flavour will be slightly different — nuttier and less sesame-forward — but the texture will be the same.

Can I use a different oil? Yes — melted vegan butter or a neutral oil like sunflower also works. Avoid olive oil, which adds too strong a flavour.

My caramel is too thin — what went wrong? It likely needed another 2–3 minutes on the heat. Coconut cream reduces slowly — keep stirring until it visibly coats the back of a spoon before removing from heat.

Can I make these gluten-free? Yes — substitute a 1:1 gluten-free flour blend. The texture will be slightly more crumbly but still fudgy and delicious.

How do I know when they’re done? The edges should be set and pulling slightly away from the pan. The centre will look just underdone — this is correct. They firm up as they cool.

Chef’s Note

For extra fudgy blondies, pull them from the oven 2 minutes early — they firm up significantly as they cool. The flaky sea salt on top is not optional: it cuts through the sweetness and makes every bite more complex. Don’t skip it.

If you enjoy allergy-friendly baking, try our Low-Carb Cheesecake or explore the full Allergy-Friendly collection on allcookings.com.


A fully vegan recipe from allcookings.com — no eggs, no dairy, no compromise.

Posted on

Low-Carb Cheesecake Recipe — 7 Secrets for the Perfect Guilt-Free Dessert

Cheesecake is the answer, no matter what the question is.

There is nothing quite like the creamy, velvety texture of a classic cheesecake, but many of us shy away from it because of the sugar and carb count. Today, we are diving into a recipe that delivers all the decadence of a high-end bakery without the guilt. Whether you are looking for a low-carb alternative or just want a lighter way to enjoy your favorite dessert, these “7 Secrets” will ensure your cheesecake is perfect every single time.
Why This Recipe Works
Unlike many low-carb desserts that feel like a compromise, this recipe uses a combination of high-fat cream cheese and a specific sugar alternative blend to mimic the exact mouthfeel of a traditional New York-style cheesecake.

Ingredients
For the Crust:

  • Almond Flour: 1 ½ cups(144g) (finely ground)
  • Butter: ¼ cup (56g) melted
  • Sweetener Monk Fruit: 2 tbsp (24g)
  • Vanilla Extract: 1 tsp (5ml)
    For the Filling:
  • Cream Cheese: 24 oz (680g), softened to room temperature
  • Powdered Sweetener: ¾ cup(120g)
  • Large Eggs: 3 (room temperature)
  • Lemon Juice: 1 tbsp
  • Vanilla Extract: 1 tsp
  • Sour Cream: ¼ cup (60g) for that signature tang
    Step-by-Step Instructions
  • Prep the Base: Preheat your oven to 325°F (160°C). Mix the almond flour, melted butter, and sweetener until it feels like wet sand. Press it firmly into the bottom of a 9-inch springform pan. Bake for 8–10 minutes until slightly golden, then let it cool.
  • Cream the Cheese: In a large bowl, beat the softened cream cheese and sweetener until completely smooth. Secret Tip: Ensure there are no lumps now, as you can’t overbeat it once the eggs are in!
  • Add the Flavor: Mix in the sour cream, lemon juice, and vanilla extract.
  • Incorporate Eggs: Add the eggs one at a time on low speed. Mix just until combined to avoid adding too much air into the batter (which causes cracks).
  • The Water Bath: Wrap the outside of your pan in foil and place it in a larger roasting pan filled with an inch of hot water. This ensures even cooking.
  • Bake: Bake for 45–55 minutes. The edges should be set, but the center should still have a slight “jiggle.”
  • The Slow Cool: Turn off the oven and crack the door open. Let the cheesecake sit inside for 1 hour before moving it to the fridge. Chill for at least 6 hours (ideally overnight).
    Pro-Tips for Success
  • Room Temp is Key: Always use room temperature ingredients to prevent a lumpy batter.
  • Avoid the Crack: Never skip the water bath; the steam keeps the surface moist and prevents it from splitting.
  • Toppings: Serve with a simple sugar-free raspberry coulis or fresh blueberries for a burst of freshness.

About the Author “Welcome to my kitchen! I’m passionate about proving that you don’t need sugar or flour to create world-class desserts. My mission is to simplify the science of baking—one gram at a time—so you can enjoy your favorite treats without the compromise. If you made this recipe, I’d love to see it! Tag me in your photos or leave a comment below.

Posted on

French Apple Tart Recipe — Classic & Allergy-Friendly Version

Looking for a delicious apple tart that fits every diet? This easy recipe has a gluten free, nut free, and dairy free version.

This classic French style apple tart features thin, tender apple slices arranged over a buttery, flaky pastry, finished with a glossy apricot glaze.

It requires roughly 25 minutes of prep and 40 minutes of baking, serving 8 people. The key to elegant dessert, is layering apple slices to create a beautiful, caramelized, rustic look.

RECIPE

Pastry

  • 275g plain flour
  • 175g cold butter, cubed
  • 1 tbsp caster sugar
  • 50ml cold water (approx.)

Filling and glaze

  • 5-6 large cooking apples
  • 100g caster sugar
  • 1 egg (for wash)
  • 2 tbsp apricot jam (for glaze)

Instructions

  1. Prepare Dough: Combine flour and sugar, then rub in cold butter until it looks like breadcrumbs. Mix in cold water until a dough forms. Chill for 30 minutes.
  2. Prepare Apples: Peel, core, and slice the apples thinly (about 1/8 to 1/2 inch).
  3. Assemble: Preheat oven to 200°C (390°F). Roll out the pastry and place it into a tart tin. Arrange apples in concentric circles or overlapping rows.
  4. Bake: Sprinkle with sugar. Bake for 40 minutes until golden brown.
  5. Glaze: Melt apricot jam with a little water, then brush over the warm apples for a shiny finish.

Tip

Use a mix of sweet and sour apples to balance the flavor, and bake at 400°F (200°C) initially to set the crust before lowering to 350°F (175°C) for calamelization.

Key Dairy – free Substitutes (Vegan apple tart)

For pastry: use a firm vegan butter block in a 1:1 ratio for the diary butter. Cold coconut oil(solid state) also works well for a very crisp, short texture.

For the Egg: Brush the pastry edges with a mixture of non-dairy milk like almond or soy, and a splash of maple syrup or agave to achieve a golden, shiny finish without eggs.

For the Glaze: most apricot jamsare naturally dairy-free, but ensure yours doesn’t contain hidden dairy-derived thickeners.

Tips

  • Temperature is critical: plant based butters often melt faster than dairy butter. Freeze the vegan butter for 10-15minutes before rubbing it into the flour to ensure a flaky crust.
  • Pastry handling: if the dough feels too dry when using coconut oil or vegan butter, add 1 tablespoon of ice cold water at a time until it just comes together.
  • Serving: serve the tart with a scoop of coconut milk-based vanilla ice cream or a dollop of cashew whipped cream for a fully vegan dessert experience.

Gluten – Free apple dessert recipe

Allergy friendly holiday desserts

Yields: 1 9-inch tart (8 servings)
Prep time: 30 minutes (plus 1 hour chilling)
Bake time: 45–55 minutes

  1. Ingredients
  • For the Crust:
  • 2 cups Gluten-Free All-Purpose Flour (Ensure it contains xanthan gum; if not, add ½ tsp)
  • 1 tbsp Sugar (Granulated or coconut sugar)
  • ½ tsp Salt
  • ¾ cup (12 tbsp) Cold Vegan Butter Block, cubed
  • 1 Egg (Acts as a critical binder for GF dough; use a “flax egg” for a fully vegan option, though it may be more crumbly)
  • 2–4 tbsp Ice Water (Use only as much as needed)
    For the Filling & Glaze:
  • 4–5 Large Apples (Mix Granny Smith for tartness and Gala or Honeycrisp for sweetness)
  • ¼ cup Sugar (For sprinkling)
  • 2 tbsp Apricot Jam or Jelly
  • 1 tbsp Lemon Juice (To prevent browning)
    2. Step-by-Step Instructions
  • Make the Dough: In a large bowl, whisk the flour, sugar, and salt. Cut in the cold vegan butter using a pastry cutter or fork until it resembles coarse crumbs.
  • Bind and Chill: Stir in the beaten egg. Add ice water, one tablespoon at a time, until the dough just holds together when pressed. Shape into a disc, wrap in plastic, and refrigerate for at least 1 hour to allow the GF flour to hydrate.
  • Prep the Apples: Peel, core, and slice apples into thin wedges (about ⅛ inch). Toss with lemon juice.
  • Roll the Crust: Roll the chilled dough between two sheets of parchment paper to about 12 inches in diameter. Peel off the top sheet, flip the dough into a 9-inch tart pan, and gently press it into the edges. Trim any excess.
  • Assemble: Arrange apple slices in tight, overlapping concentric circles starting from the outside. Sprinkle with sugar.
  • Bake: Bake at 375°F (190°C) for 45–55 minutes until the crust is golden and apples are tender.
  • Glaze: Melt the apricot jam with a splash of water and brush over the warm tart for a professional, glossy finish.

Troubleshooting

Continue reading French Apple Tart Recipe — Classic & Allergy-Friendly Version